Category: Workshop

Written by: Mo Al-Kaf | Posted on: | Category:

In this sessions the group members changes, there for roles has to be swapped around, to accomodate new students who where not there in the 1st week.

The idea for the script change and the ground finally decided to focus on a thriller themed scene. One of the characters is a Killer and the other unaware asking unassuming mundian questions, however the killer begins to feel interogated.

With the use of flashback, to show that the newspaper was intended to be used in one of his murders.

At this current stage the ground was not sure if the flashback, should go to the past to show. a previous killer or to the future to show what the killer intends to do with the character asking the questions.

The Group was motivated in working together and listening to each person perspective and opinion. A whats-app group chat was created with everyone in the group to ease communicating.

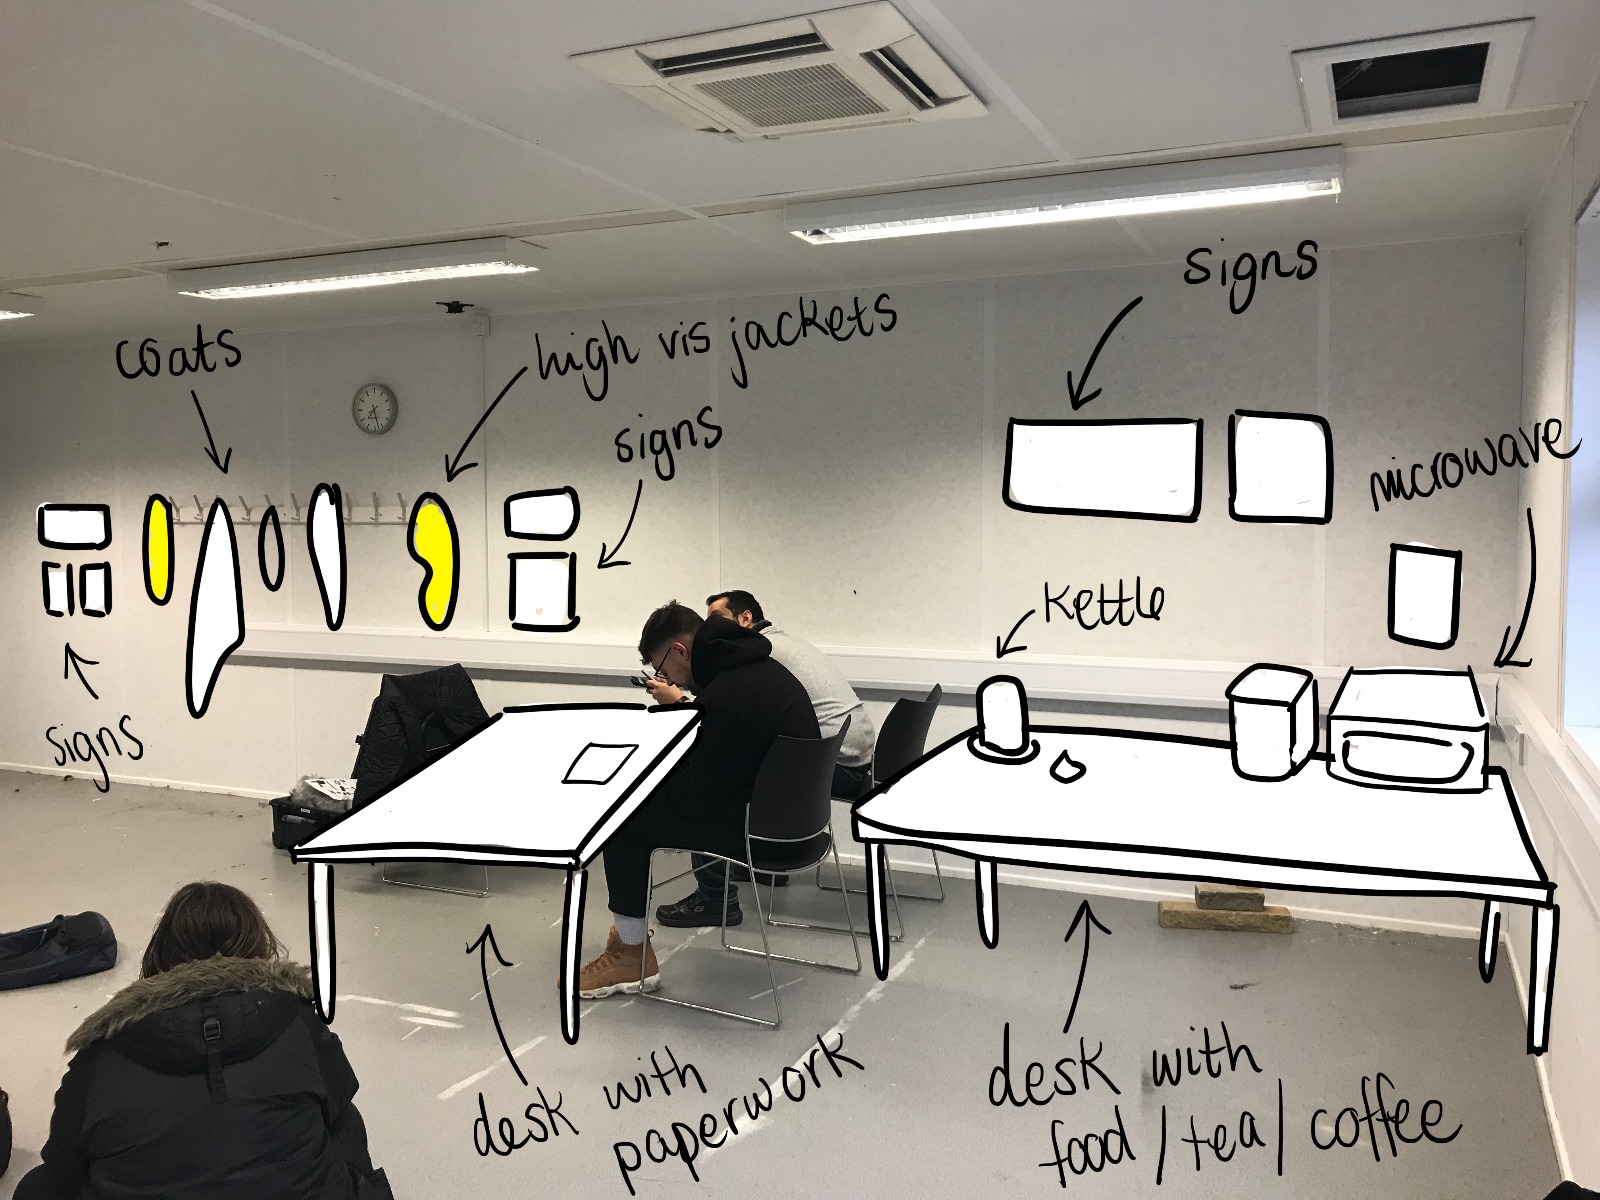
The Production designer decided to film the majority of the scene in the PortaKabin and not in the Blue Shed. This added extra logistics of getting the key to the Kabin on the needed dates and to make sure there are not classes with other courses if they are using it.

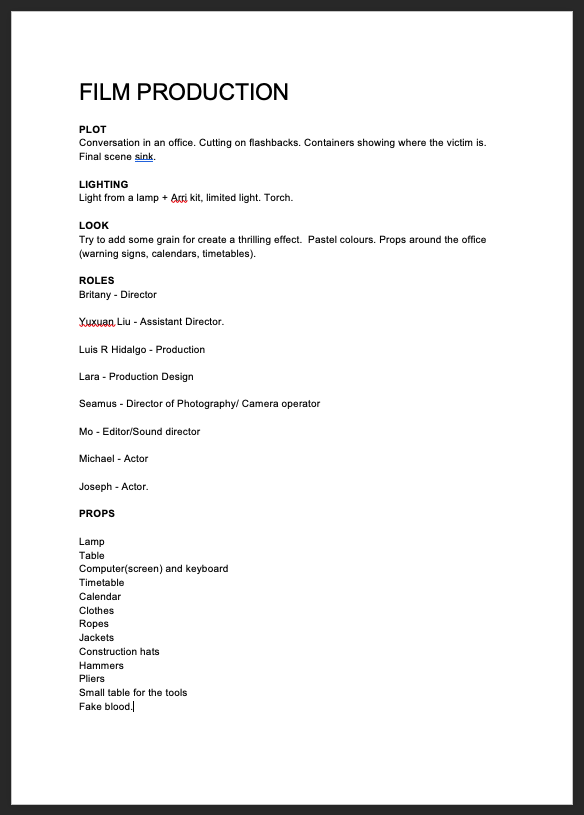
Below is A document created by the group.

Screenshot 2019-04-15 at 12.13.53.png

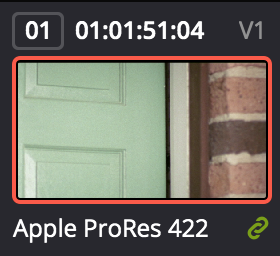
The Production designer had start placing an idea of how thing will look like with in the PortaKabin. They created an image below: Idea for Set Production by Lara.jpeg

Written by: Mo Al-Kaf | Posted on: | Category:

DaVinci Resolve Software

Introduction to Davinci Resolve, not only it is a colour software, it is able to be used as a fully fledge editing software. Able to ingest media and manipulate video, with many video and audio tracks.

  • Can edit in any software after edit is complete and after has the ability Transfer/import project files into DaVinci,
  • Colour Grading is the over all term to correcting image aesthetics
    • Done on original clips in full quality
    • Sometimes can be done before the edit start
  • Colour grading is Divide into two parts
    • 1 - Correct colour/white balance
      • Correct mistake on recording
    • 2 - Stylisation and grading
      • Warm cool, high contrast and etc.
        • To look blue/cold can be added and not done in Pre-Production.
  • We never rely on looking at the image and our eyes
    • Video looks different on many different types screen.
  • Many Screen are monitors which are optimised for text display.
  • There are other screen that are optimised for video.
  • There are Many different verity of calibrated screens - each output a different colour quality.
    • Edit suite consist of:
    • At least 1 computer Monitor
    • Small video monitor on desk
    • And large video monitor, usually on top or to the side.

It is normal to transfer media and project files into DaVinci Resolve and colour grade the media. The Interface with in DaVinci.

Screen Shot 2019-02-28 at 11.03.36.png

RGB parade

They represent the image from left to right. Button to top is luminous 0-1023 (100%) top line is white

Screen Shot 2019-02-28 at 11.16.10.png

Color Wheels

Making Adjustments

  • 4 sets of control
    • Lift - dark bits
    • Gamma - mid tones
    • Gain - Bright bits
    • Offset - the whole image

Screen Shot 2019-02-28 at 11.25.32.png

  • Always start with exposure first before changing colour settings
  • Total image has a tone range - so black setting on the line.
  • Shift - D :show before and after changes
  • High of a RGB, mean that high colour in the parade means that colour is more predominate in the image.
    • Question asked befoer starting colour balance. For items that should be white.
    • To stylise, should white things be colour neutral or to have a tint of colour to them.
  • Find colour correction
    • Search something in image that is colour natural
    • Search its repression in the Perade.

Screen Shot 2019-02-28 at 12.08.35.png

  • Multipul Clips

Screen Shot 2019-02-28 at 12.03.52.png

  • Viwing side by side

Screen Shot 2019-02-28 at 12.05.05.png

  • CMD command key and previous clip

    • And select slept screen for side by side view
  • Grey box visual on parade for video output

  • Zero saturation colour nut-role for greyscale. No colour in image.

  • Using colour wheel

    • Eyes taken away from image and can bus used confusing
      • In the industry they don’t use the mouse
        • They use a panel
          • A Grading control interfaces
  • Grading can be difficult to isolate colour tone is specific area of images

  • Option for linking grading to similar shots

    • Making colour grading so much easier
    • First option is copy and paste
    • opther option is linking the changes to to all the other linked clips

Screen Shot 2019-02-28 at 12.48.56.png

  • Using curves is same as previous.
  • Y mean luminous / brightness
    • Curves can add point to affect a narrow band (more detailed control)
    • Isolate section with curves point to bring up flesh tones or other parts of an image.

Screen Shot 2019-02-28 at 12.52.52.png

Advanced Divici Resolve grading

  • Different format and ability to colour grade
    • Less bright area usual start to get noisy
      • Compressing when shooting
  • Lower formate with compression
    • Gain compression
  • Shooting something in low light in pre-production
    • When shooting with a highly compress format, and the increasing gain. There are artifact and noise in the image that cannot be removed.
  • Easier to overexpose and then later to reduce in post production rather than underexpose and over expose in post-production
  • With compressed formate can be graded well, when well lit during recording.

* Sampling with qualifier

  • Can choose specific colours to change

Screen Shot 2019-02-28 at 14.25.40.png

Screen Shot 2019-02-28 at 14.24.14.png

  • Adding a mask - subtle spot light on the face to bring out his facial features.
    • When using people with backlight
      • Using Window (adding masks)

Screen Shot 2019-02-28 at 14.34.23.png

  • Using feather to make smooth transition
    • Adding a softness
      • Masking the transition of the mask that is being applied
    • Underexposing in postproduction is much easier and retain more detail.
      • Overlight and all with filler and making enough a different in the key light and details.
  • Linking clips together to grade multiple clips together
  • Links clip has chain symbol

Screen Shot 2019-02-28 at 14.54.29.png

  • Creating multiple groups for each similar camera takes and angles.
  • Group pre-clip is correction and not stylisation.

Screen Shot 2019-02-28 at 14.58.51.png

  • Addition adjustment to individual change setting to clip
  • Group post clip stylisation
    • Pre clip to fix
    • Post clip stylise
  • Usuful shortcuts:
    • Shift+D toggle on/off all colour correct
    • CMD+D toggle on/off only select nodes
  • Nodes are layers

Screen Shot 2019-02-28 at 15.14.15.png

  • KEYFRAMING

Screen Shot 2019-02-28 at 15.25.56.png

  • Exporting
    • Deliver tab

Screen Shot 2019-02-28 at 15.35.24.png

Screen Shot 2019-02-28 at 11.02.41_0.png

Written by: Mo Al-Kaf | Posted on: | Category:

Professional Roles and Tasks

  • Roles in Video Productions

  • Industry standard in film & TV is Avid - therefor it is good to have a basis.

  • Shooting Sage Main Roles

    • Director
      • Anything Creative
      • Set/acting/look/sound
      • Does not direct all member of crew on set.
    • Producer
      • Finish the shoot,
      • all logistics,
      • all organising,
      • Responsible for the delivery of the product in spec and in time.
      • They can over ride director as in charge of finances
  • DOP (director of photographer) / or simply Camera Operator

  • Sound Recorder

  • Slate or Clapper board is a way to keep sound and video synchronised.

  • On set there is a role called DIT (digital image Technician)

    • What is given to post production people is correct and not cause problems
      • At end go day, make arrive (Exact Copy) Making rushes. Considered archives when it exist on two different devices, kept in different location for safety.
        • Harddrive is only for archive - No other data include with the rushes.
  • POST Productions Roles:

    • Editor
      • Small production they do all, but if larger there, they do the creative decisions. They my not log the material. Such as Assistant Editor.
        • Logging
        • Sound mix
        • DIT Role
        • Grading
  • Creative Decisions - Producer has final say, but can be director cut. WHen there is a difference.

  • DIT Role of archiving,

    • how to properly copy and archive data video files.
      • By copying everything in the root location go the memory card and dragging all contents into new folder in each different location.
        • Location depend on industry - Can be used on a server
          • For CMP to use server to rushes archive - need 2 week advance to Ed - Course intern.
            • Benefit of server cant loose data and usual in a fire proof room. For high importance, this is more safer option.

Adobe Software - Premiere

  • Adobe only links to files location -
    • So when moving it losses the links. So important for location area.
  • Originally not for broadcast, mainly multimedia.
    • Doesn’t do actual management of files
      • Media encoder might open. So not the best fort workflow management,
      • Adobe Application Prelude is used to to ingest video material with more Options and easier way.
      • In Prelude easier to log and create subclass such as FCPX
Written by: Mo Al-Kaf | Posted on: | Category:

Final Cut Pro X

Preferred Method for creating a new project project. so there are not issues or loss of work and no loss of time during post-production. Create a correct folder as below on a Media Harddrive, the project should not be on the same Harddrive as the computer. The Harddrive should be fast enough for the media to play back in real time for smoother editing.

Screen Shot 2019-02-21 at 12.02.40_0.png

Create a new Project and save into the preferred location.

Screen Shot 2019-02-21 at 12.05.10.png

Change media and cache folder location from the Library properties window to the new folders set up.

Screen Shot 2019-02-21 at 12.06.48.png

This will help to reduce the size of the FCPX project folder. Keeping media and other files and data organised.

Screen Shot 2019-02-21 at 12.06.40_0.png

After evething is setup with the Project. It is time to ingest. When inserting a Camera card it is optimal to create a back up. Usuing FCPX there is an option to create a camera archive. This will create a 1 to 1 clone of the camera card that can be accessed anytime.

Screen Shot 2019-02-21 at 12.09.07_0.png

When the project is set up correctly FCPX organises the files automatically but there are easy to follow and understand where they are being placed.

Screen Shot 2019-02-21 at 12.10.14_0.png

Editing can start knowing that all the perfered procidures have been followed.

Adobe Premiere Pro

Perferred methos for setting up a project. Start by creating project and media folders on a fast harddrive.

Screen Shot 2019-02-21 at 12.12.25_0.png

Adobe has more setting for saving different types of media. If larger projects or slower hard drive media can be places in different Harddrives to speed up the programme.

Screen Shot 2019-02-21 at 12.17.14_0.png

Unlike FCPX premiere has a stand alone programe that is used to ingesting material in the correct manner. Importing directly to premiere mat cause issues later in the edit. Usuing Prelude to ingest material is the Perffered method.

Screen Shot 2019-02-21 at 12.30.57_0.png

From within prelude it can autmaticlly transcode of nesccary and place the media into the choose Premiere project folder.

Screen Shot 2019-02-21 at 12.32.02.png

With in prelude, such as FCPX import window you may start marking and choosing the media.

Screen Shot 2019-02-21 at 12.37.03.png

Image Experimentation within FCPX

Here is an example of placing 4 videos, and manipulating the size and orintation.

Screen Shot 2019-02-21 at 14.11.00.png

Properties can be changes from the inspector window,

Screen Shot 2019-02-21 at 14.15.08.png

Keyframes can be added to manipulate paramiters over times animating the video.

Screen Shot 2019-02-21 at 14.17.01.png

Changing a effect animation to be more smoother can be accessed from right-clicking the keyframe:

Screen Shot 2019-02-21 at 14.18.00.png

Changing the speed of a clip, FCPX give esear manipulation usually in real time blackback.

Screen Shot 2019-02-21 at 14.36.49.png