Evaluation - Notes
- For drama when shooting - slow down and keep gaps in the acting. Because film is slower than reality. There should be footage to add and use to create tension.
- Work on reaction shots, one actor off camera is talking to have the ability to extend time. If not enough footage of reaction if possible to slow down when they are not talking and just looking.
- When there is a decent pave, giving ability to Control the pace at will…
- There is limited to how much u can slow down, this is dependent on the filming of the actors and acting. But to speed up can be done as fast as wanted.
- Trail and error is needed when finding what is the right pace. Seeing what feels right. Its a Gut feeling
- Rhythm has an over structure such as a piece of music. Loving a song is how it played out is similar to loving a scene.
- In film with editing it can creating an extra dimension of times - what they are doing revels much more about the situation they are in.
- Audio has to travel longer if mic is not set closer to the subject. It create an unwanted effect to gain a clean audio Audio can be dubbed.
- The pace of conversation can be manipulated to achieve escalation. Helping to sustain interest to keep viewer motivation.
Production issues:
- Looking back at the video created. Considered the time frame I think was an excellent job done by the team.
- Of course there was Drawbacks.. some of the team had not put in their part in and this lead to other people taking over roles and was more complicated and was easier to miss out on aspect of the original role.
- For example in pre-production stage - the Director was not highly involved with the shoot that the DOP had to take over this role, in turn… it was harder to concentrate and keep in mind all the shots that were necessary to make.
- The director created a story board but did not make an effort in sharing it with the rest of the team. When editing I was not able to build the shots in order stated in the Story board. Because some shots where missed when editing together. There was not a wide range of shots I could use. The only shots received where shot, reverse-shot of the actors, one in medium and the other in close up.
Things that could be improved.
- Clean up the Audio, Reduce the audio outside the speech.
- Replace the noise in the background something more neutral and less high pitched.
- Slow down the pace of the edited… add more pauses to breath… to add a further tension to the conversation.
There was paper work that could have made for the Production more organised and professional. These are but not limited too:
- Copy Clearance of any Branding used.
- Release letter for actors and anyone else.
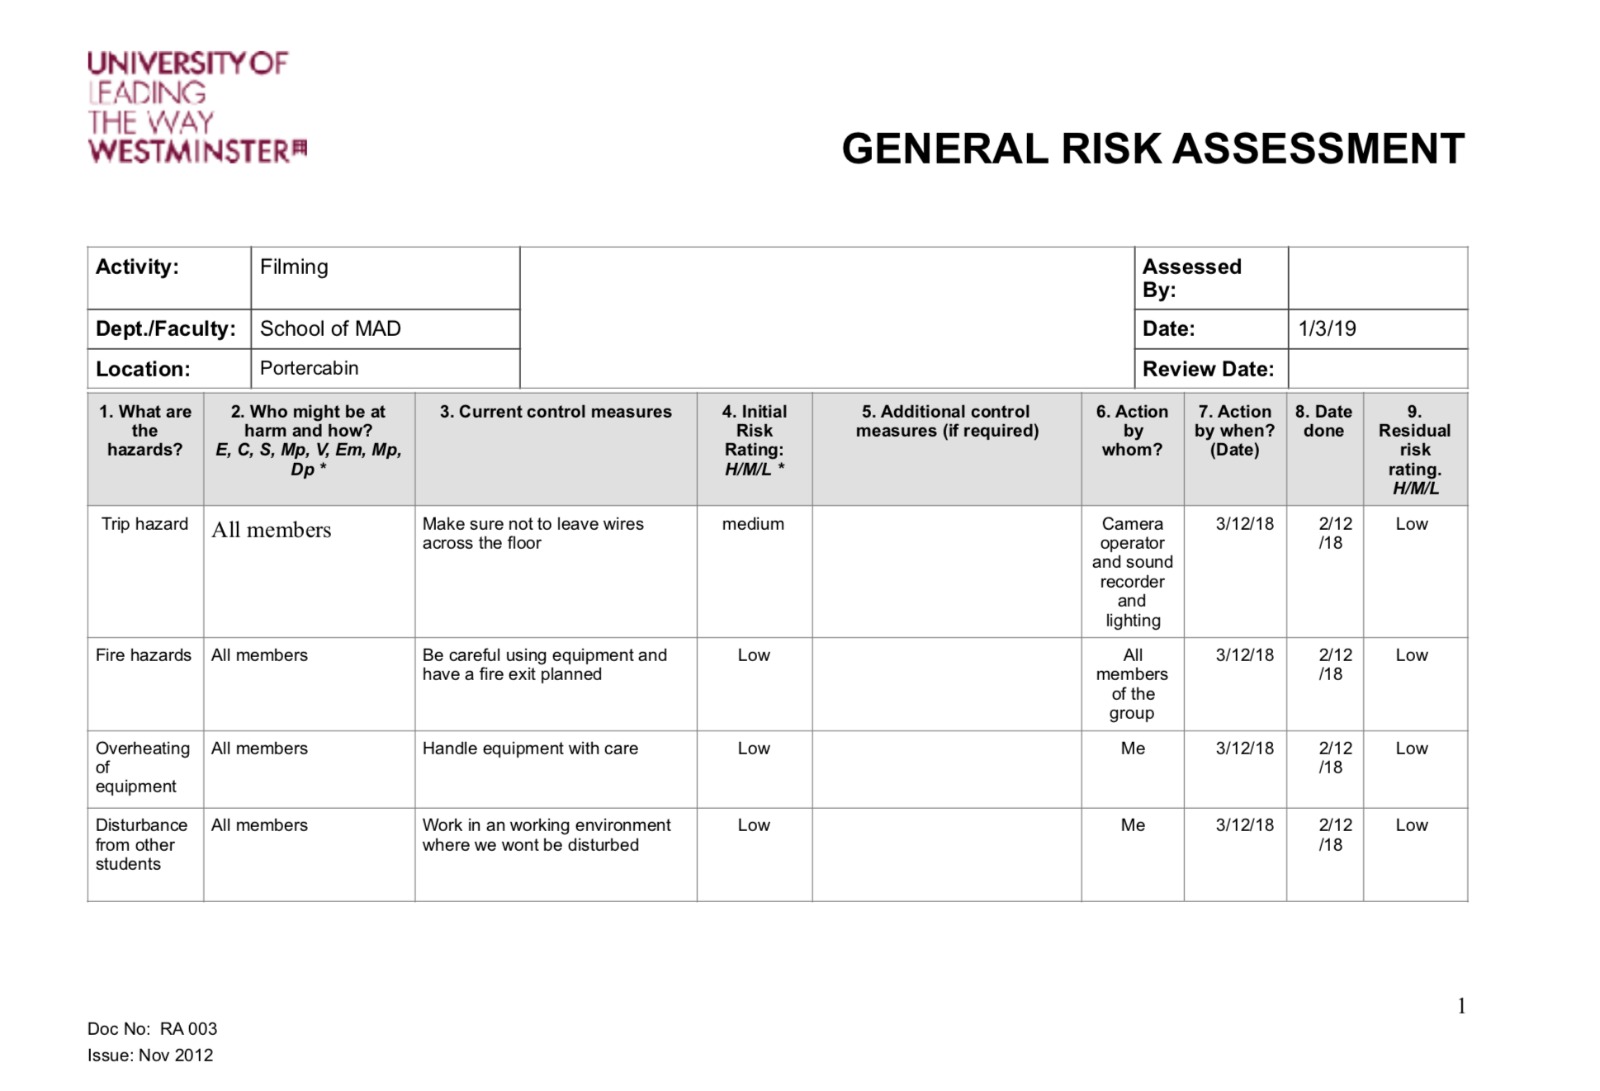
- Risk Assessment for Day of filming.
- Emergency Arrangements
- Health and Safety Checklist
- Script Breakdown (that should include blocking actor movements)
- Budget Breakdown.
Inside His Mind - Open In Youtube
Inside His Mind, Version 2 - Open In Youtube
Also the video was uploaded By Producer on Vimeo, as it his a higher bit-rate and may look better.
In editing it was important to have a direct conversation with the Director and the team. After filming I editing and create draft edit to be viewed by the time on Tuesday, unfortunately many of the time could not make it and many had valid reasons. However I had noticed after the film shoot the contact with director had reduce, and I was not able to have direct contact with director to take a edit further. I had resorted to sending export of the current edits I had to the WhatsApp group created to receive some feedback from the rest of the group. Majority had agreed with my created dictions taken for the edit.
I continued to make edits. In any stage when I was unsure of what to do, I consulted the group. I believe the group was lacking a real direction from the director, and this lead to the group taking extra roles that the director should have taken.
A clear picture of the the outcomes final product of the film was not given to us by the director.
Even with these simple issues with-in the group. My responsibility as editor was to complete an edited from the footage i was given. As group we did come up with relevant ideas. Filmed all the important scene, and completed the task as best as we could. Everyone tried to work together, and this helped us all produce an acceptable shot video at the end.
I may have not pleased with the out come of the footage i was given. as it was hard to visualise the directors intention. But it is possible this could have been because the lack of communication and motivation from some part of the group. As a i had a responsibility to the group to edit as best as i could to to have a complete video.
The choice of a blue tint through the film was a decision agreed by the whole group. However, the conversation would only have a slight tint to not take away from the "reality" of the scene. However, I had left it more pronounced in the flashback to show their intensity.
because after the shoot the director did not show any intention to meet with me. This is a vital step that was missing from our small production, it is important that the Director and editor have constant communication so the video can be realised to the Directors intention.
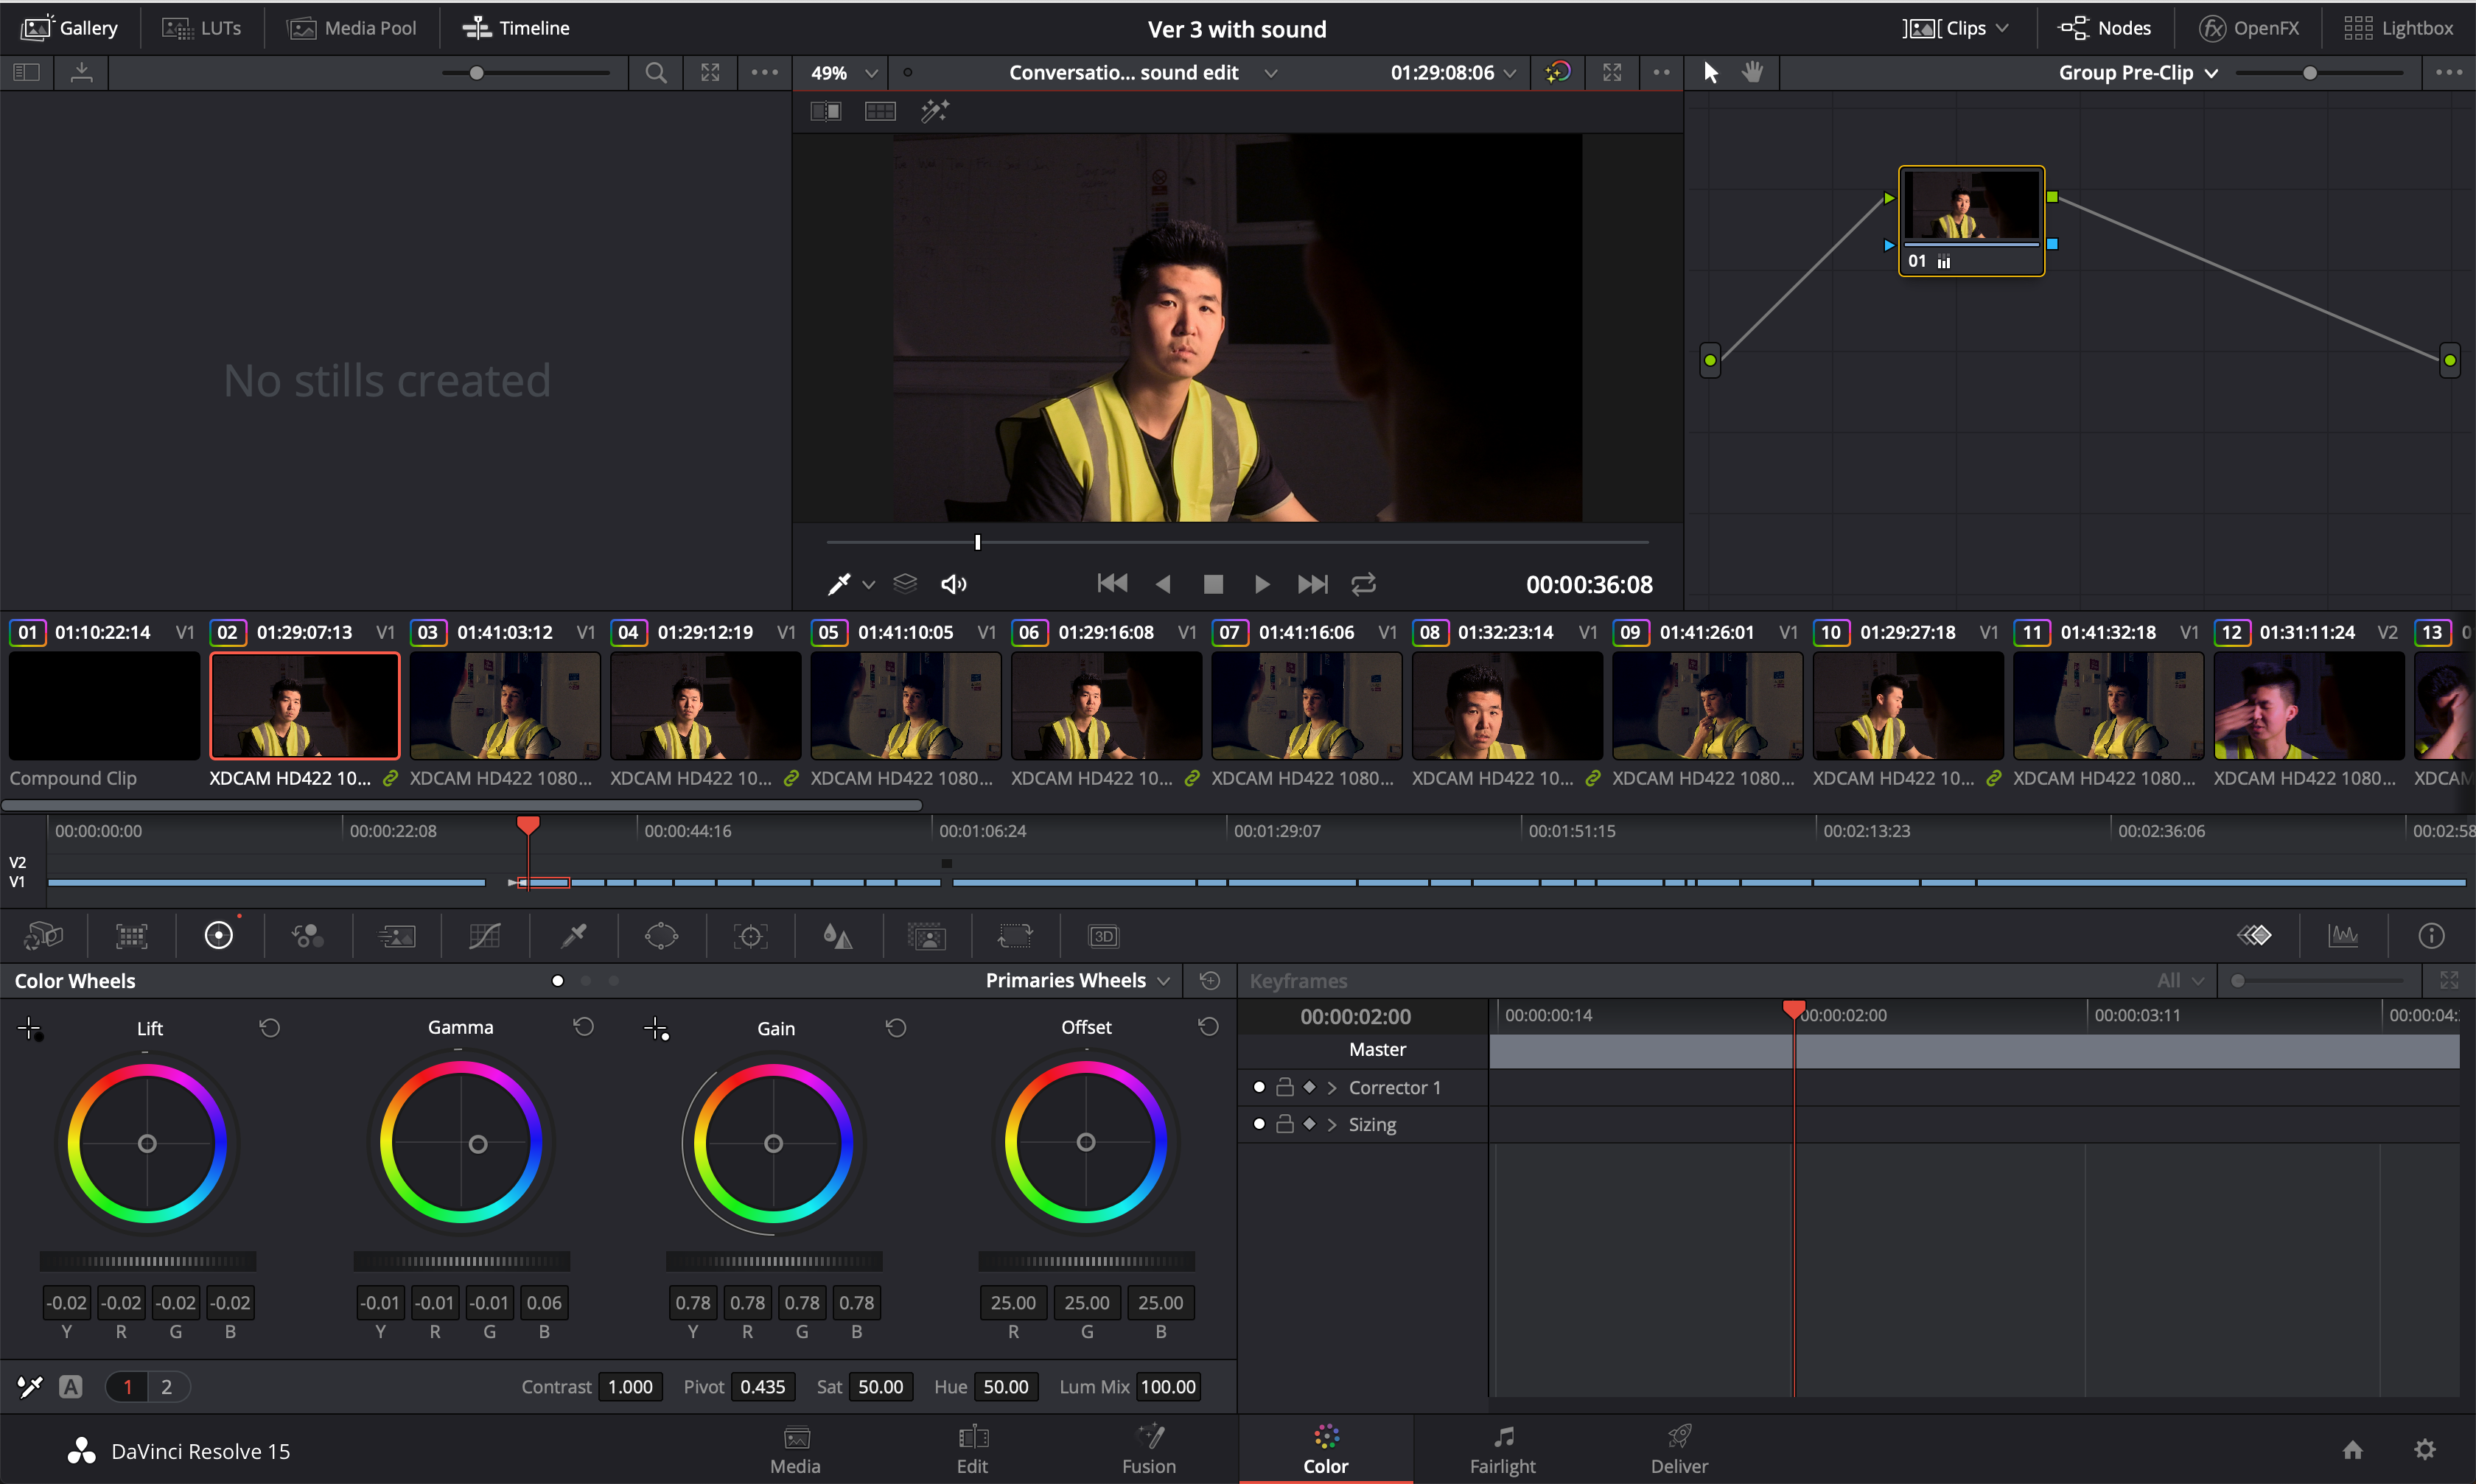
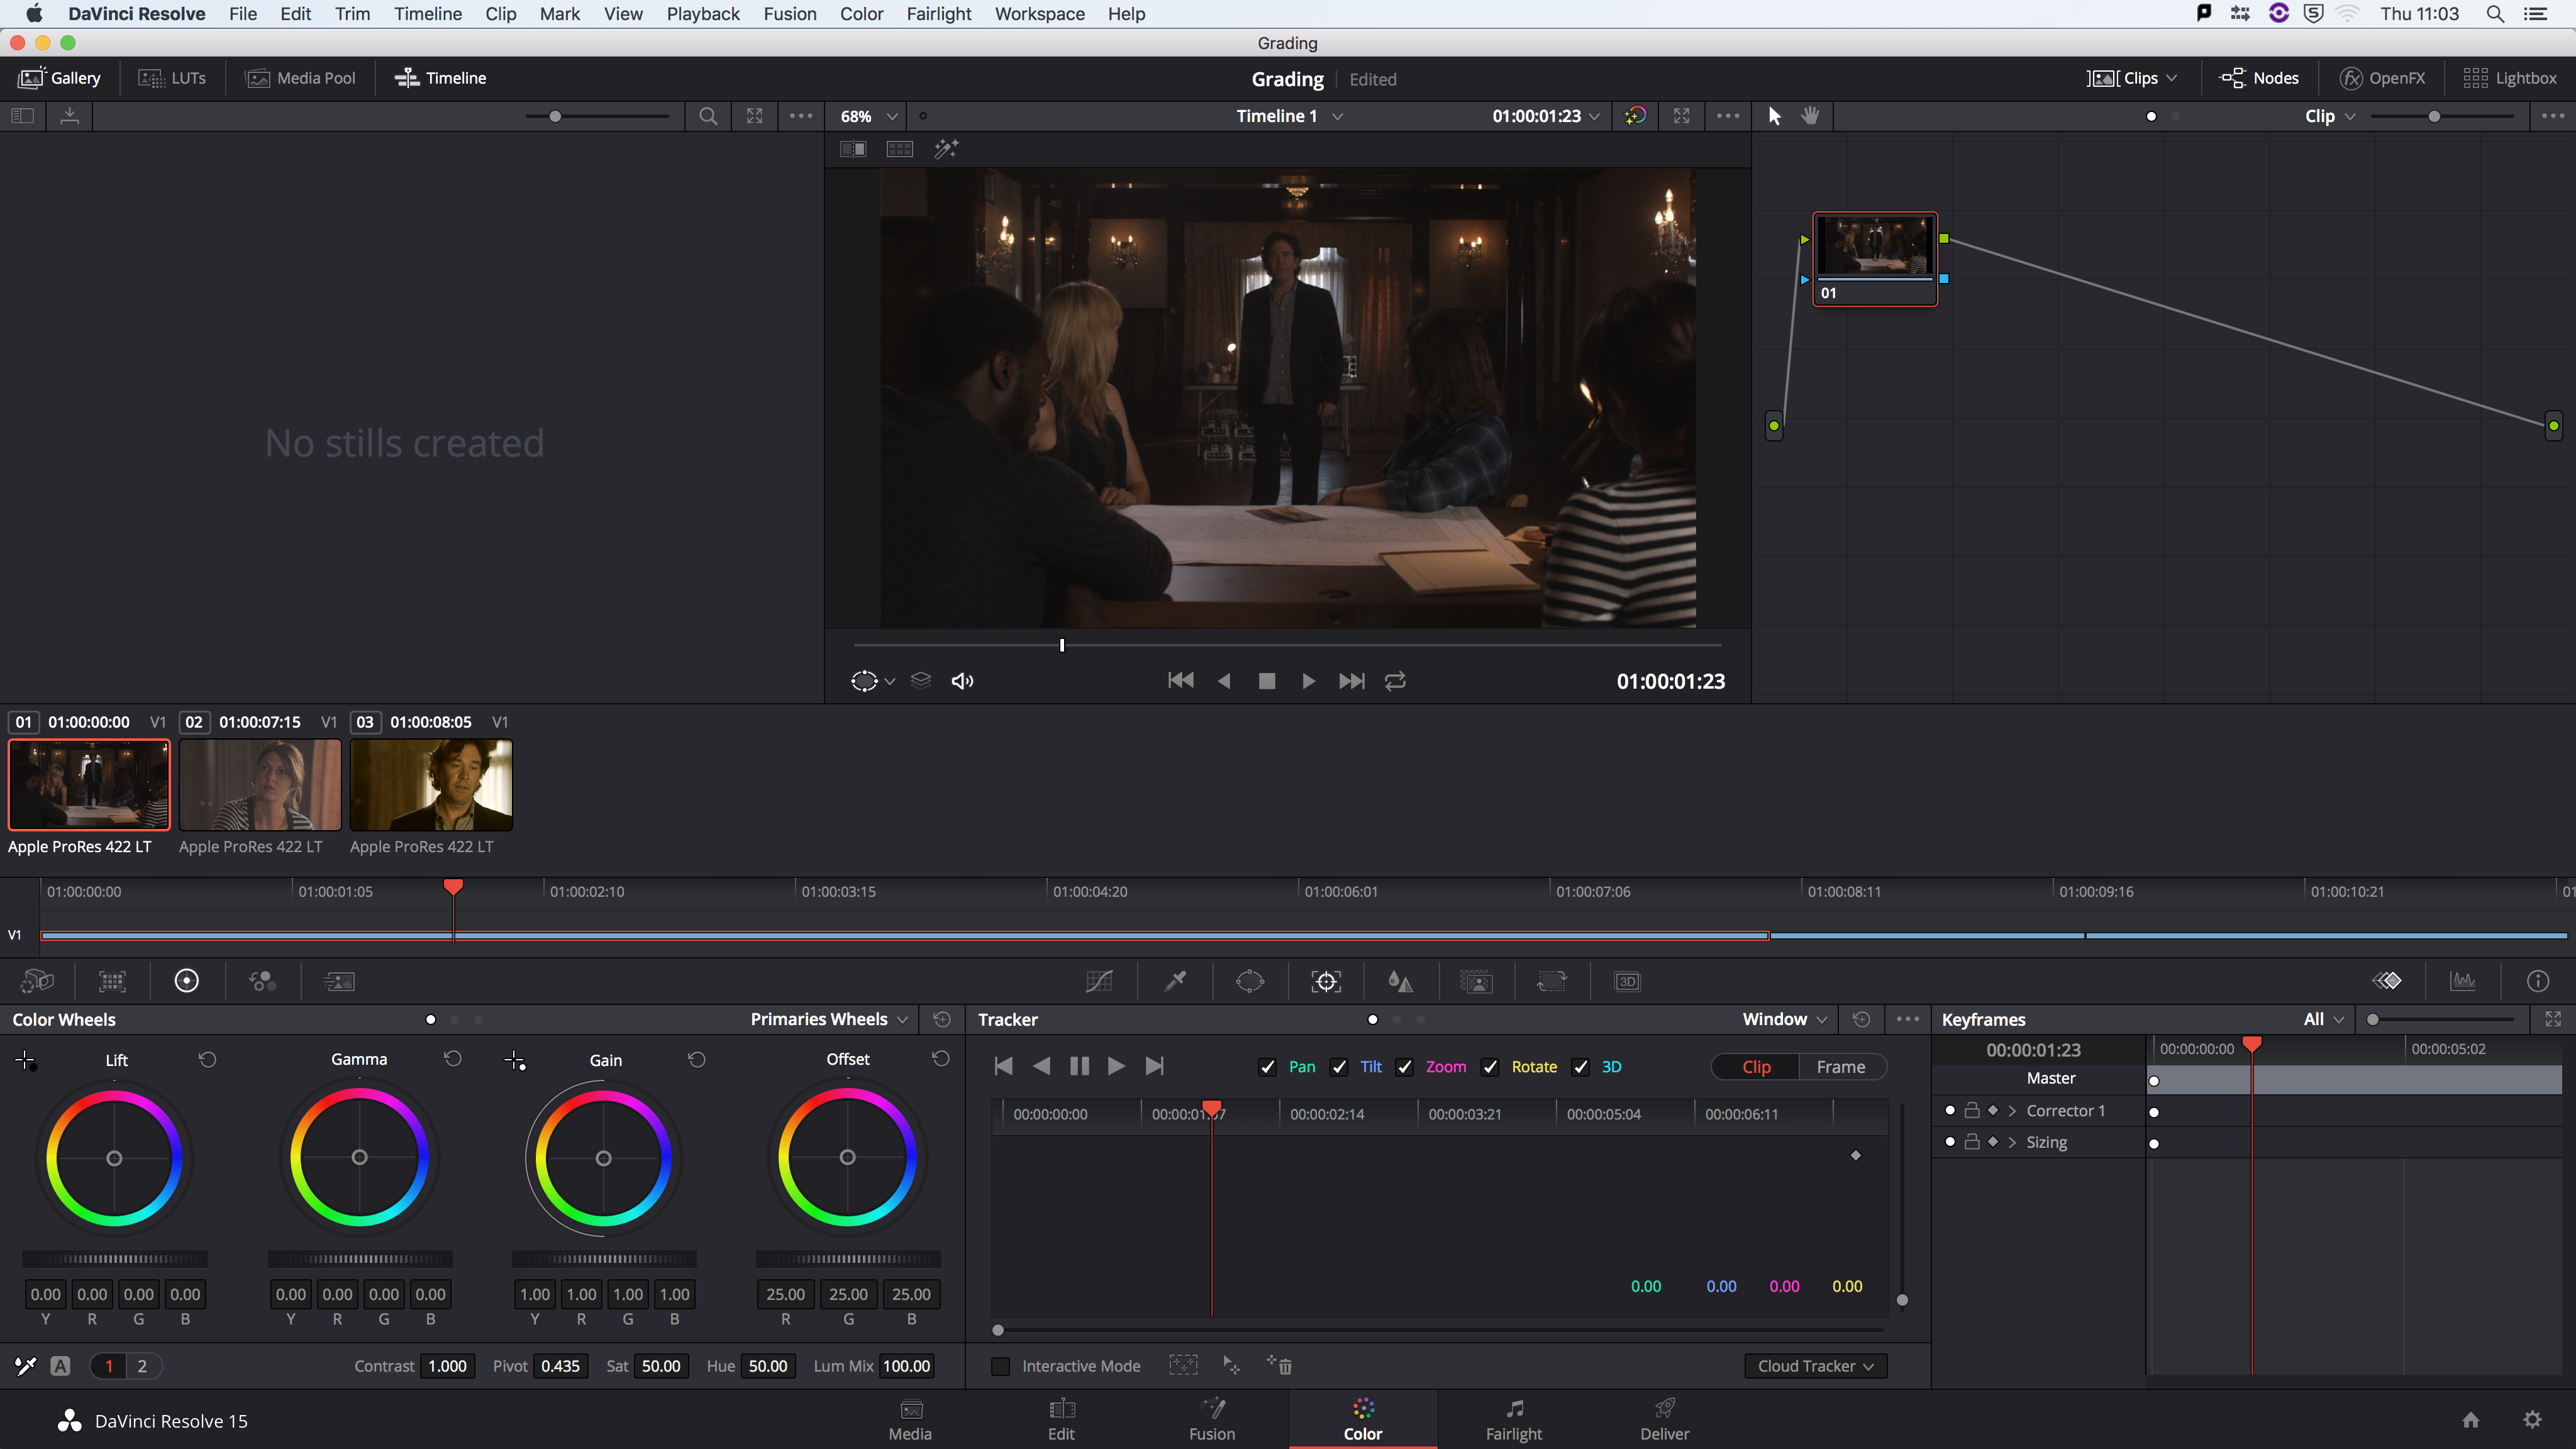
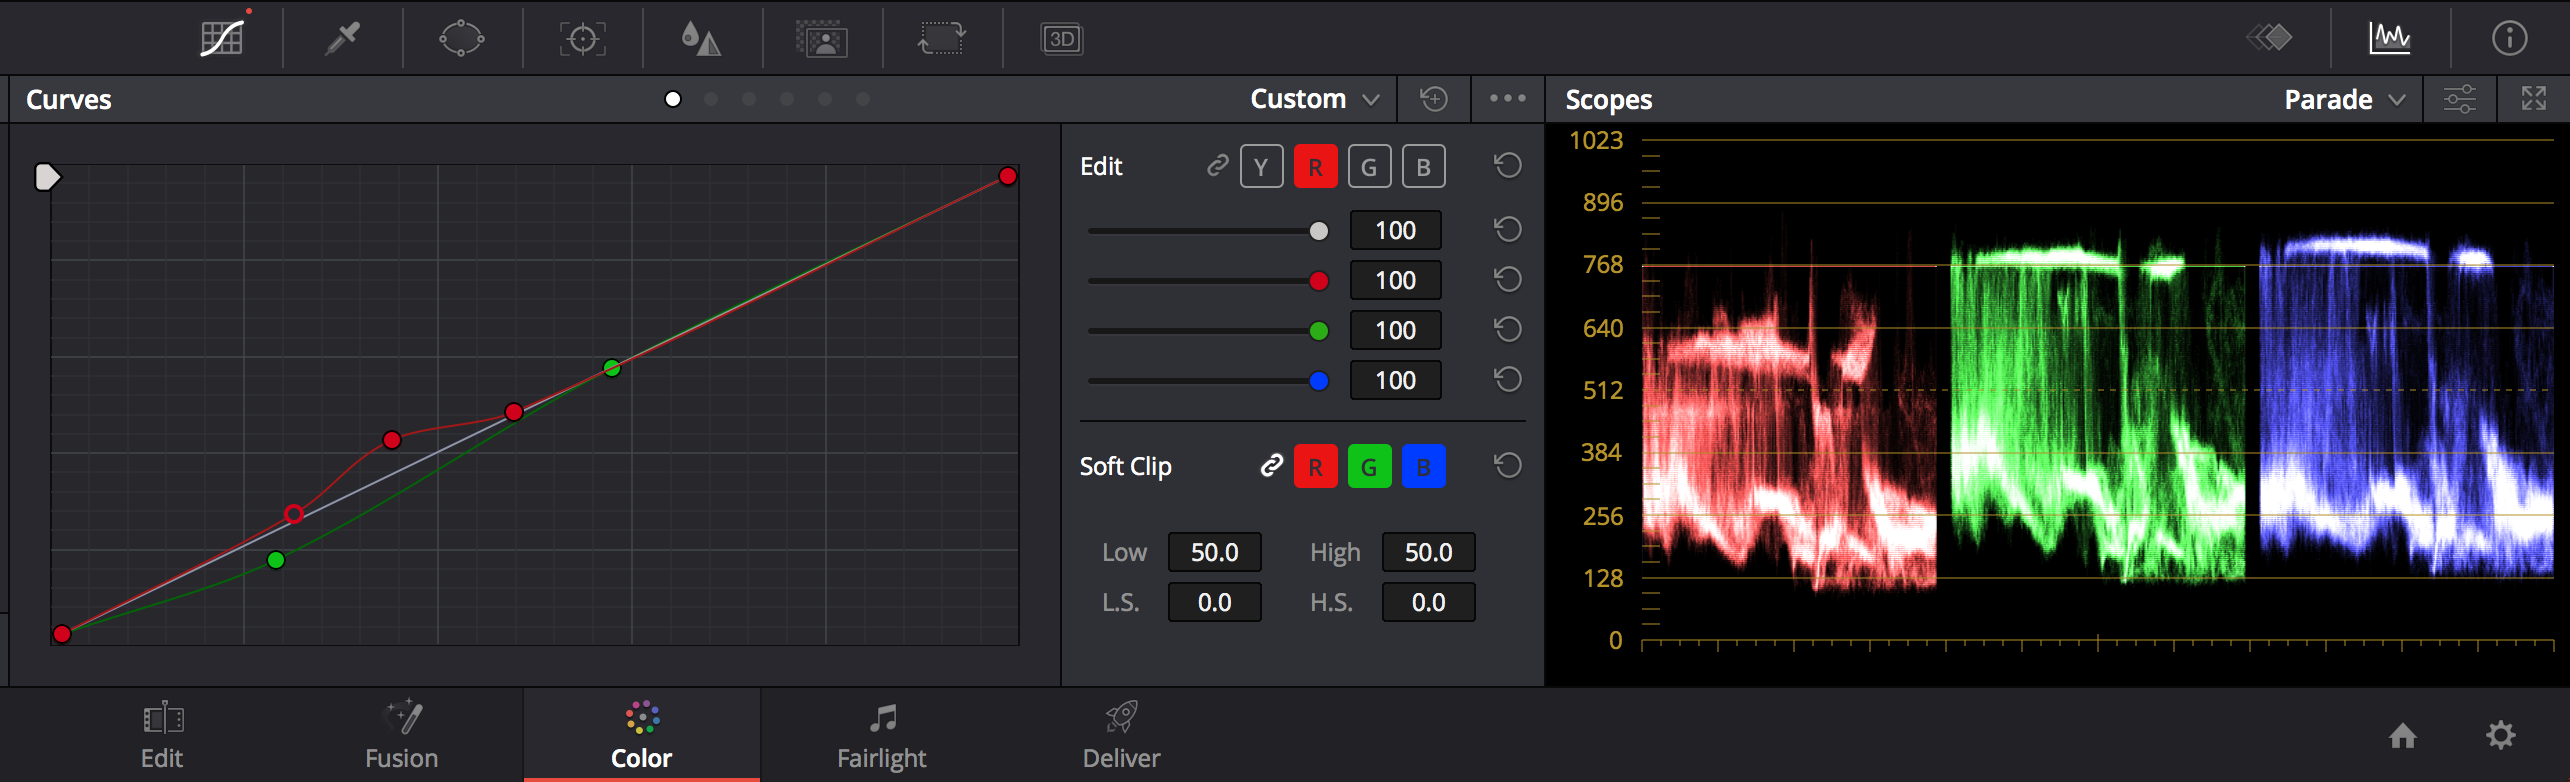
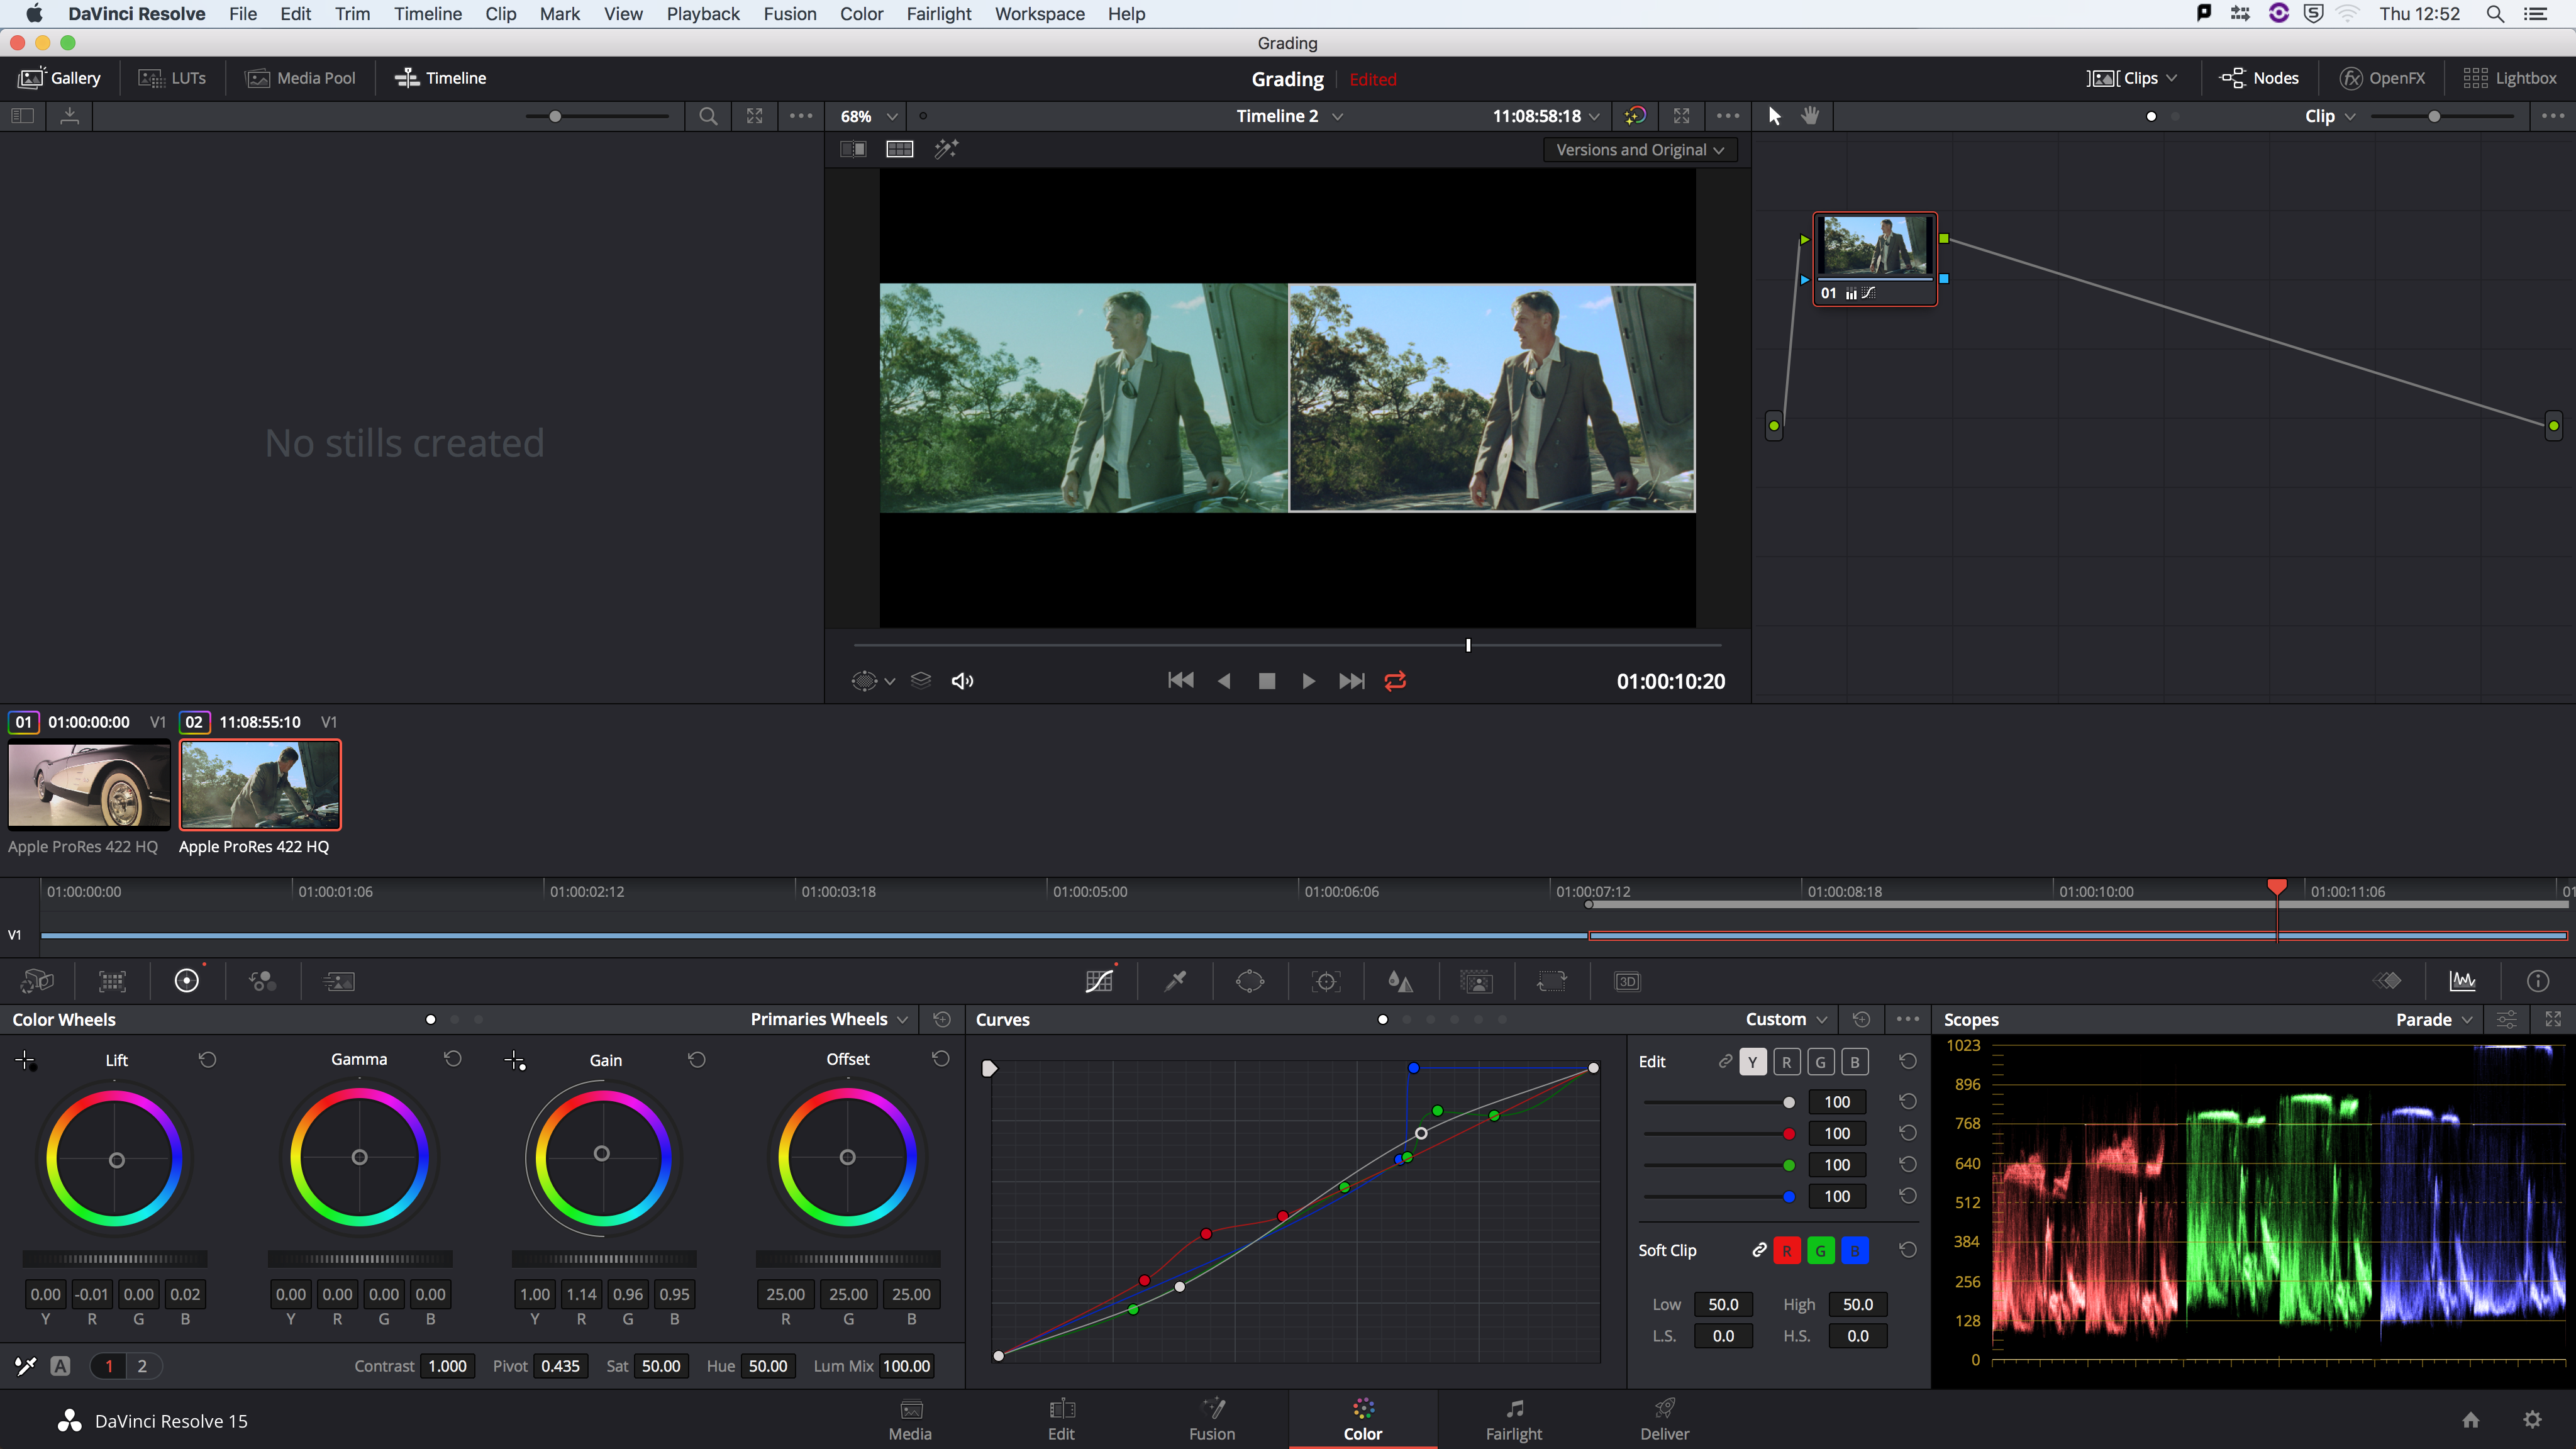
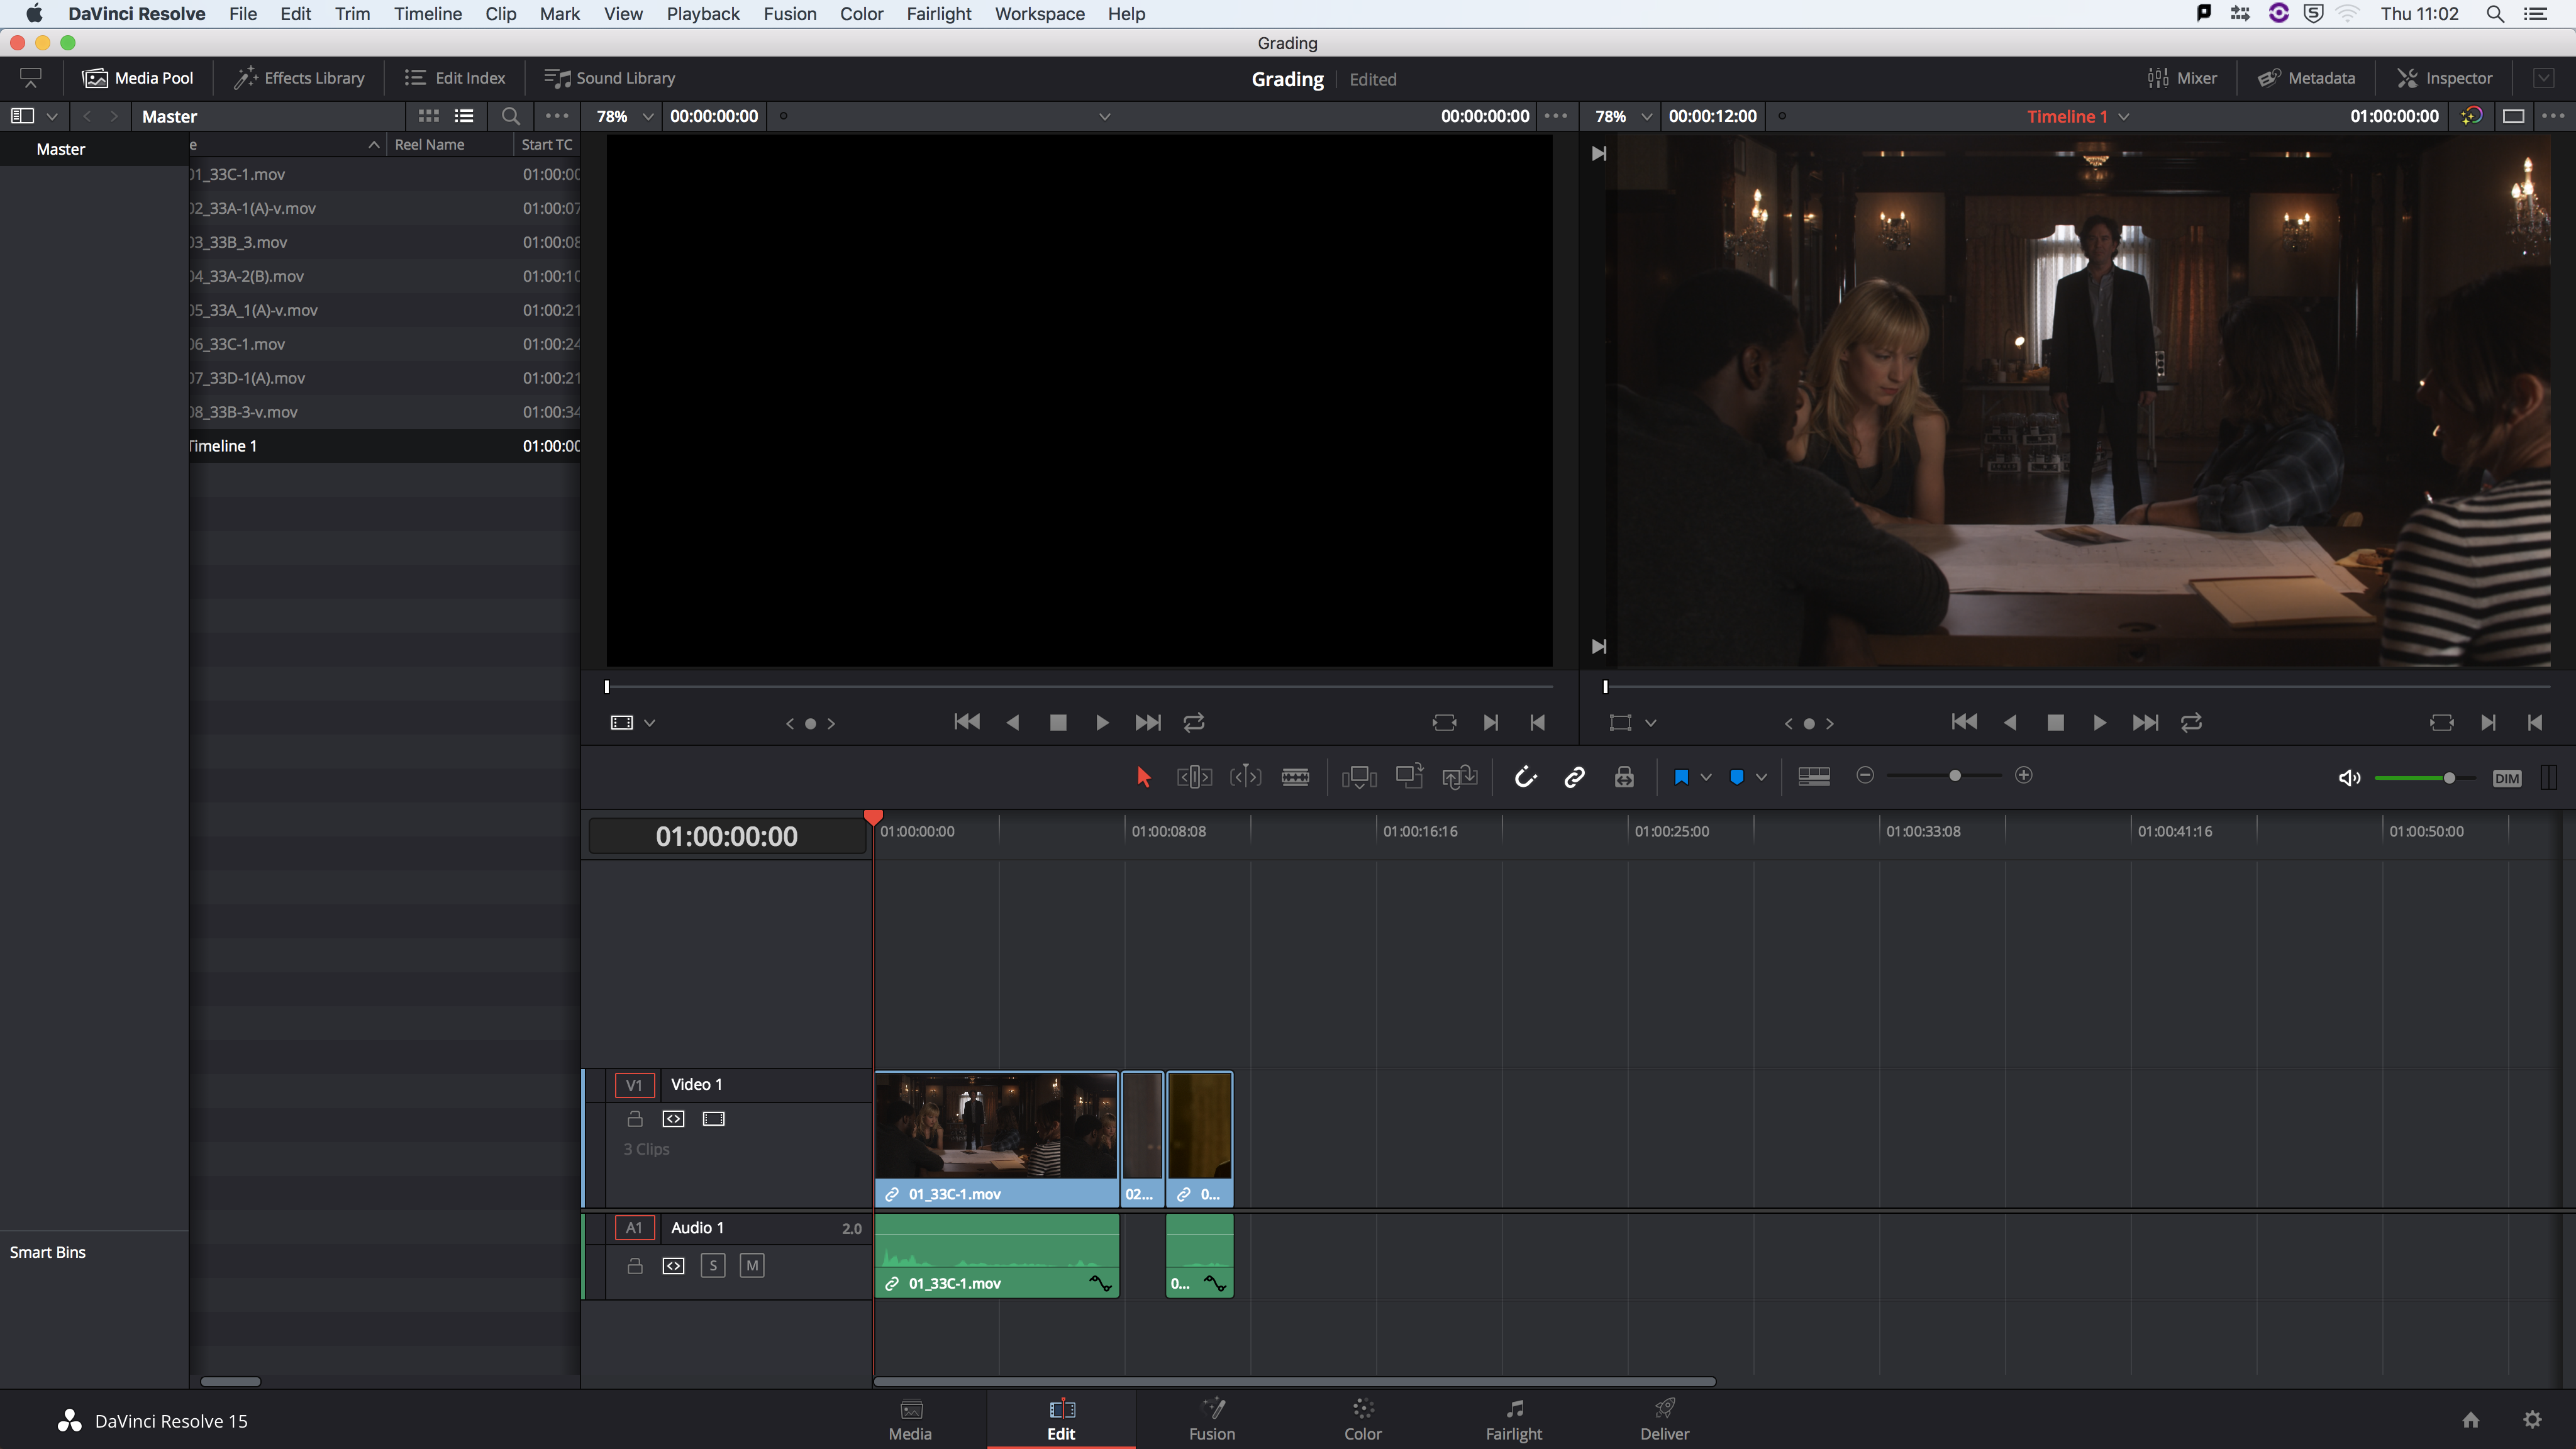
I export the project from FCPX into DaVinci Resolve, I never used this programme before for Colour Grading. I would usually use the Colour Correcting option within FCPX.
I begin first with colour correcting the scene balancing the colour before adding any stylisation to the scene.
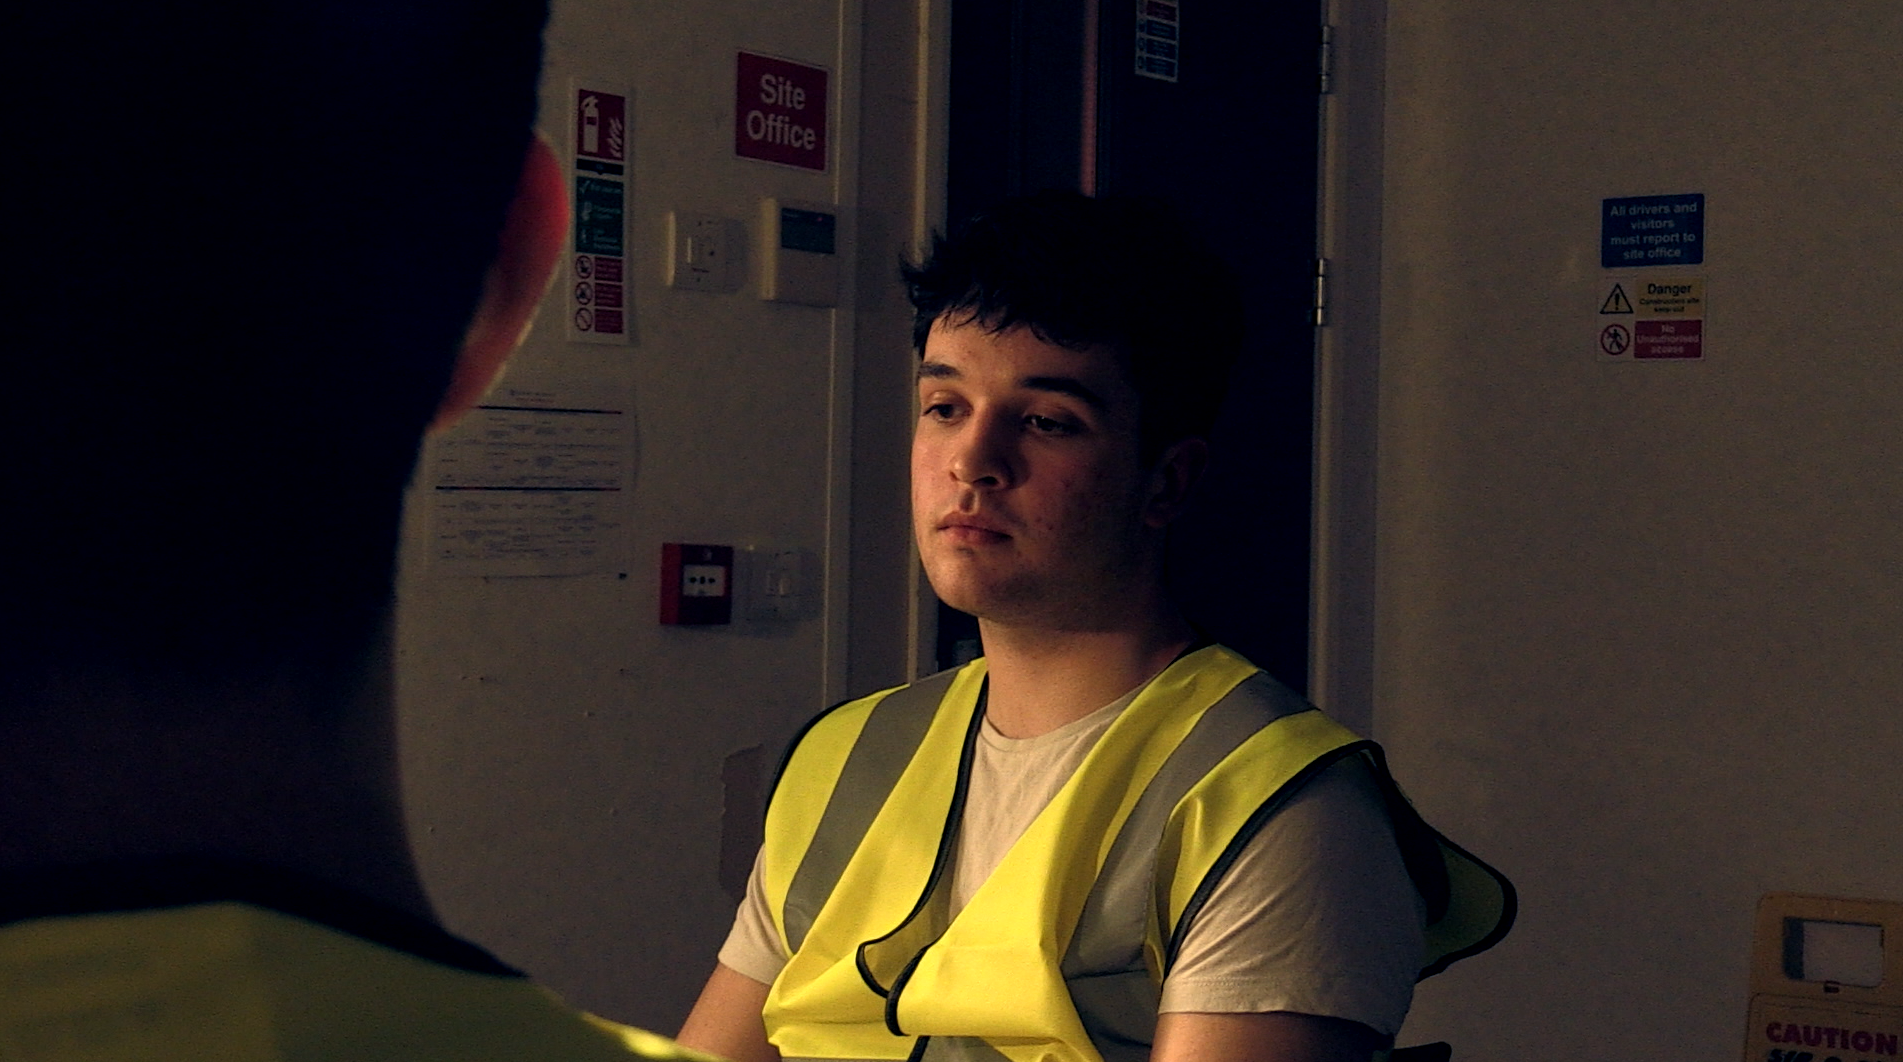
When colour correcting I noticed that the light was mainly directed at the Killer, and then bounced into the second character. This lead to the shots with the second character having more noise. I had informed the group that when filming dark scene it would be easier to overexpose than needed while filming and then underexpose in post to retain more details in the shadows and have less noise.
I also felt that the second charact face was too much in shadow and slight detail was lost compared with the killer.
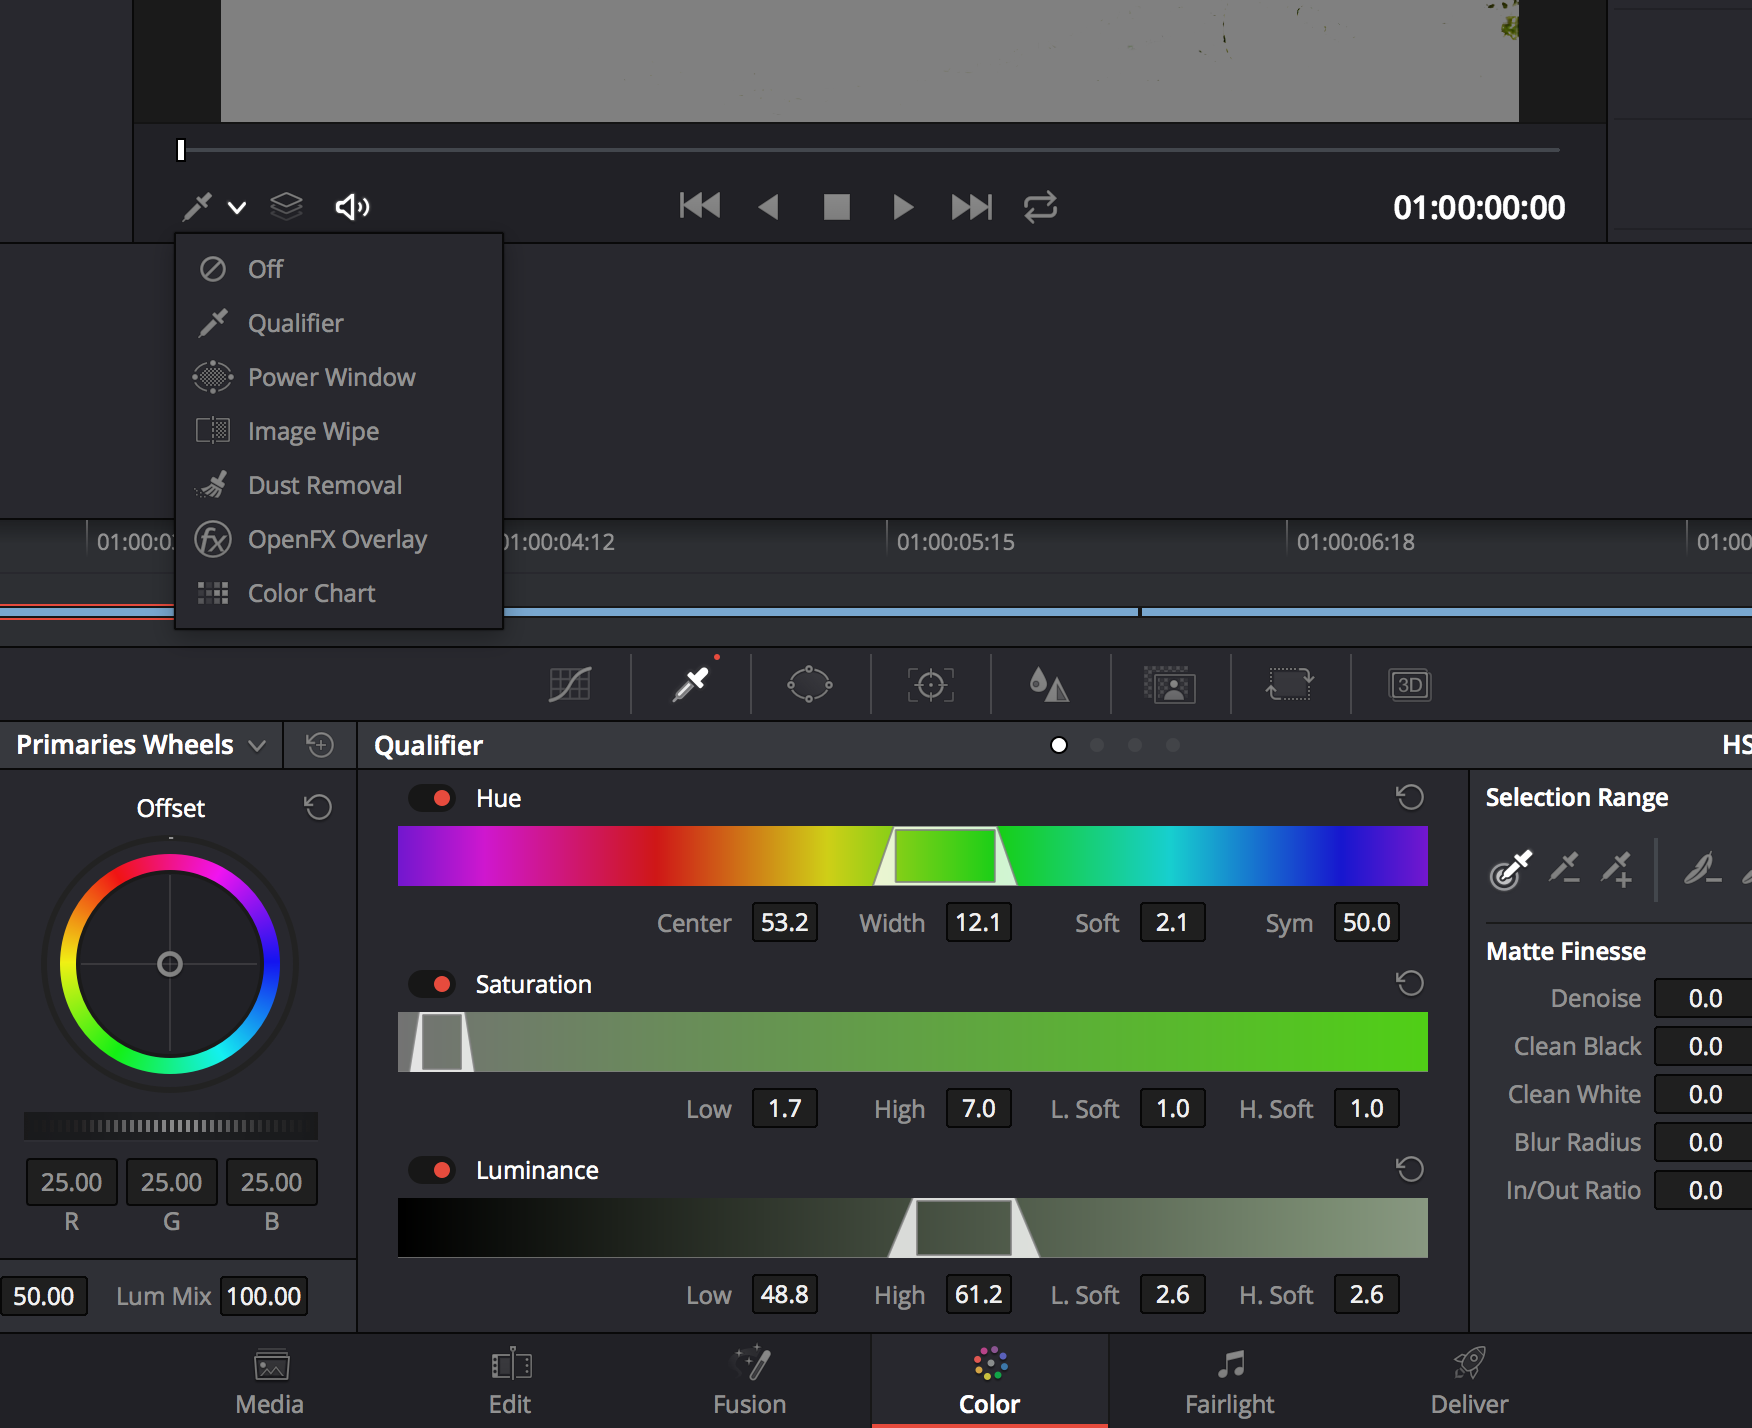
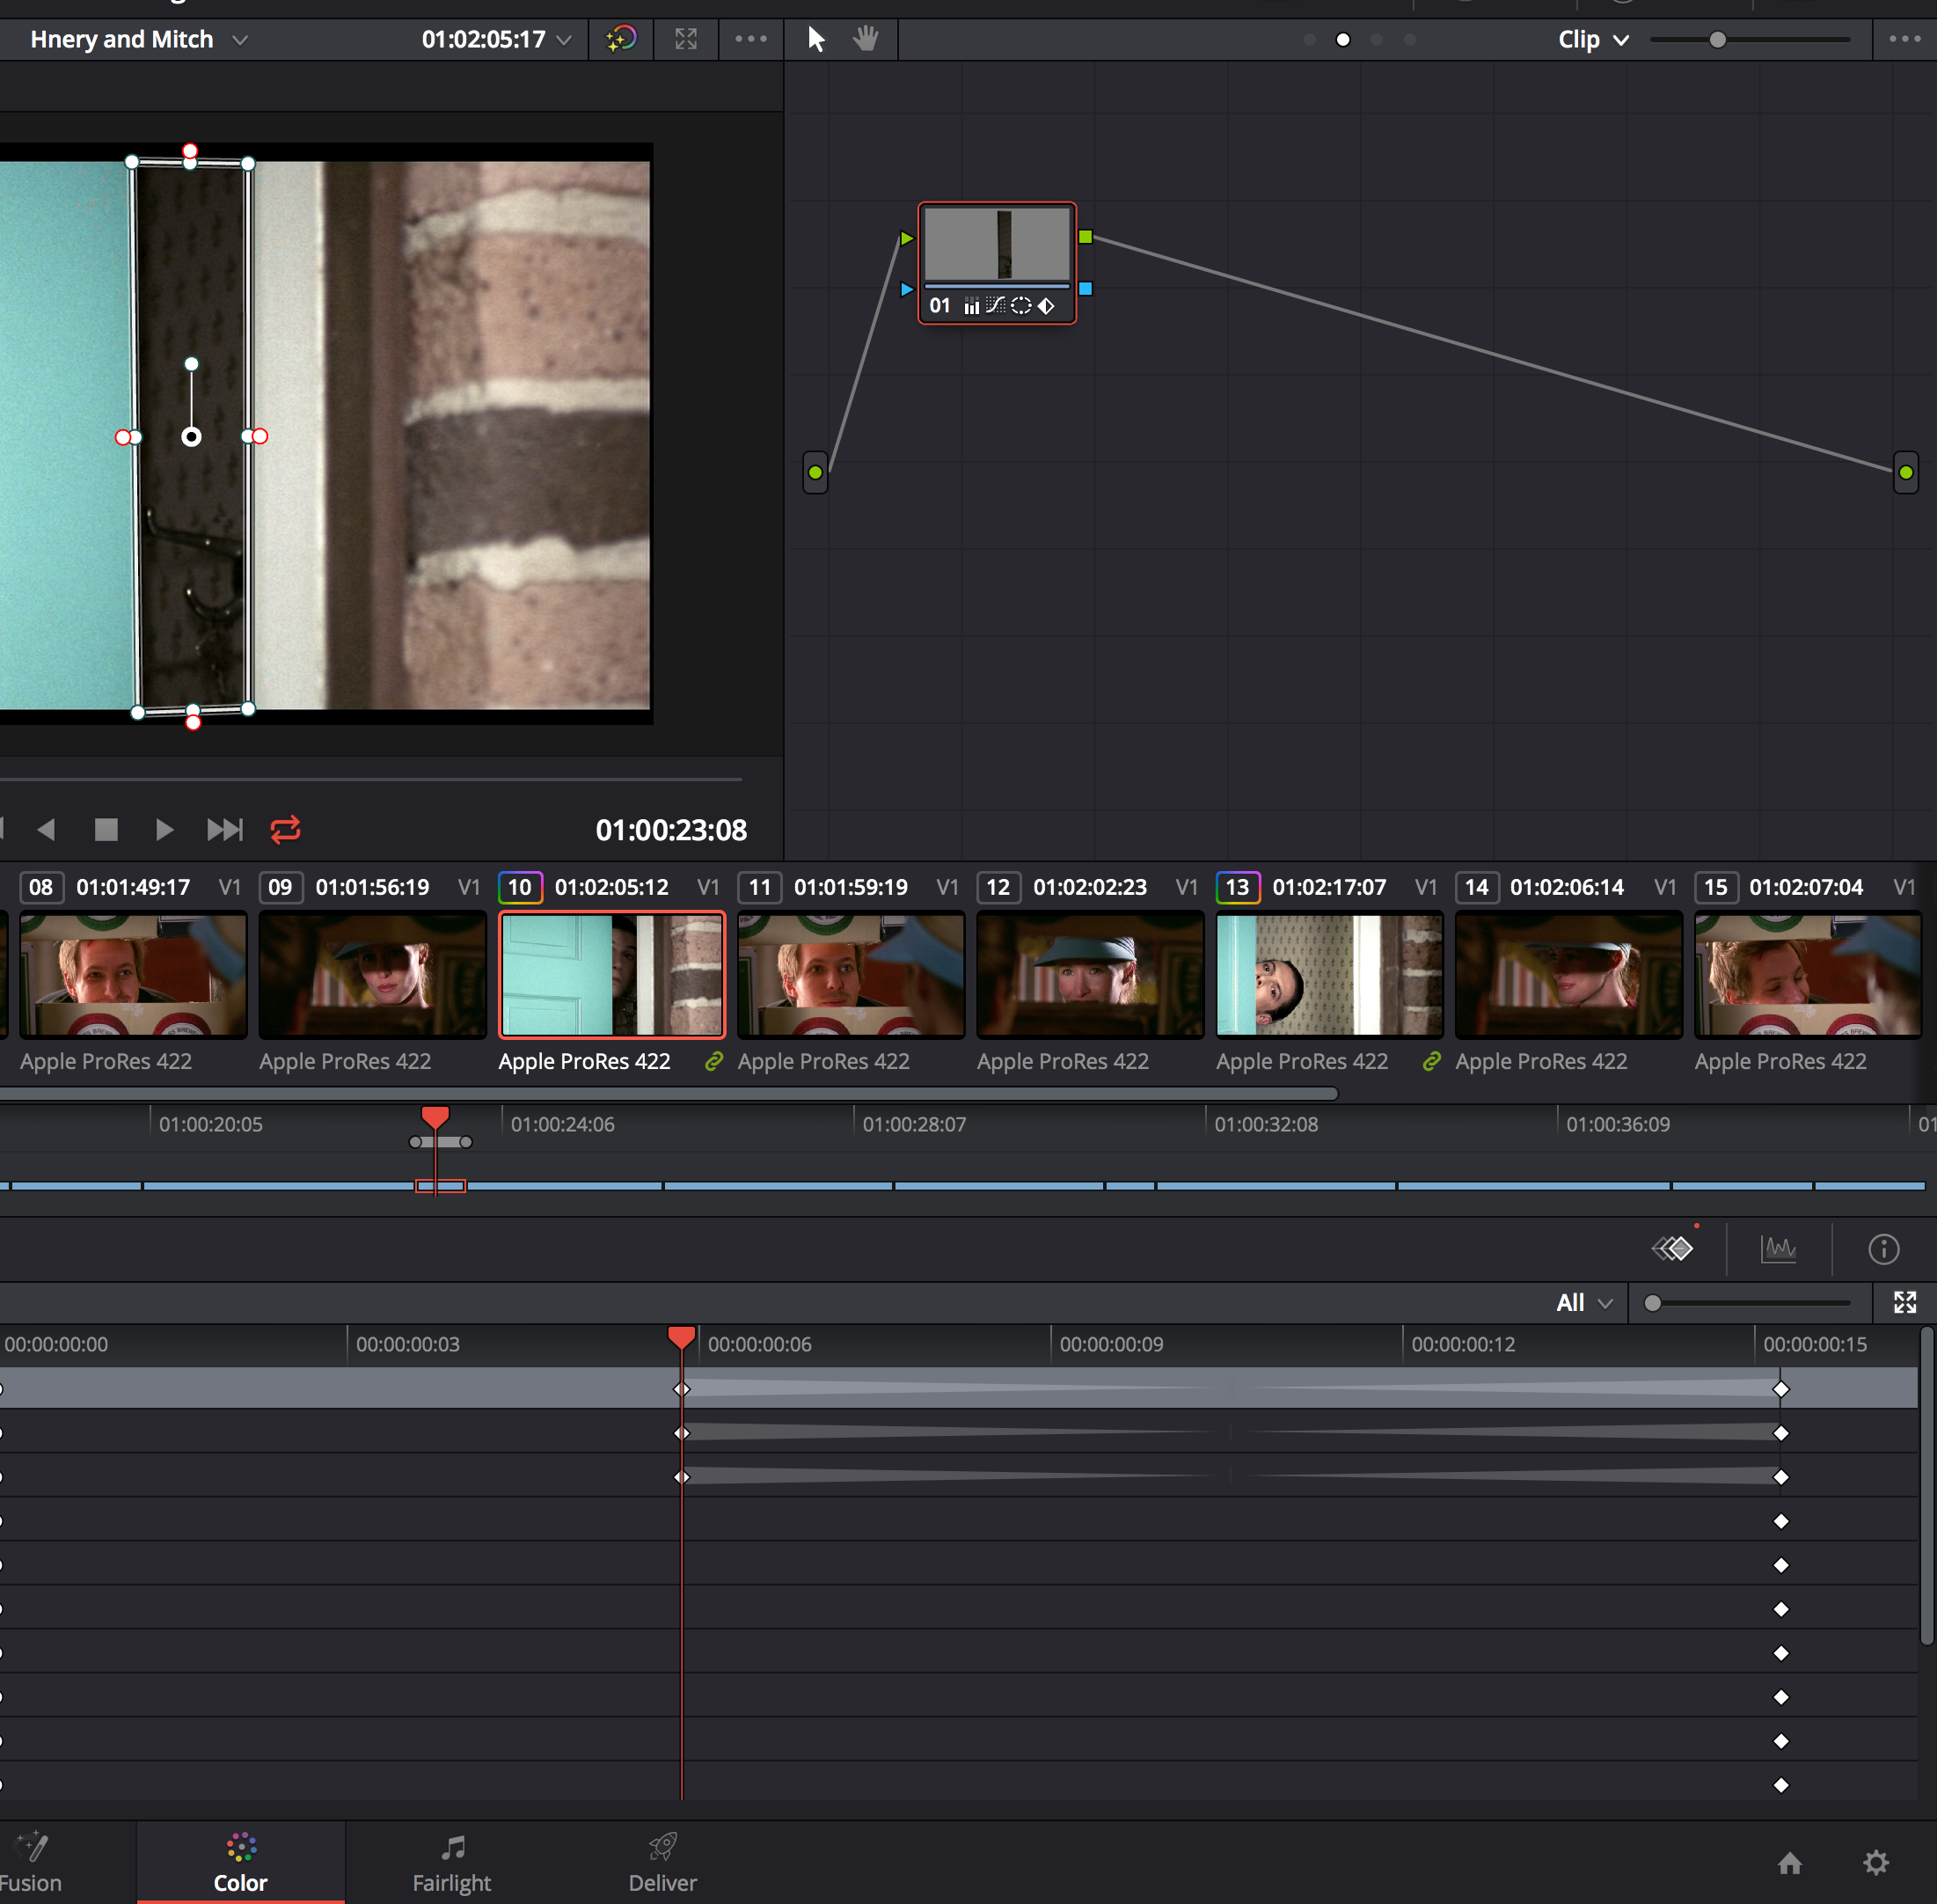
I start to see what option there were had to increase the exposure, I start to create a circle, that would mask the area I would like to add to the exposure.
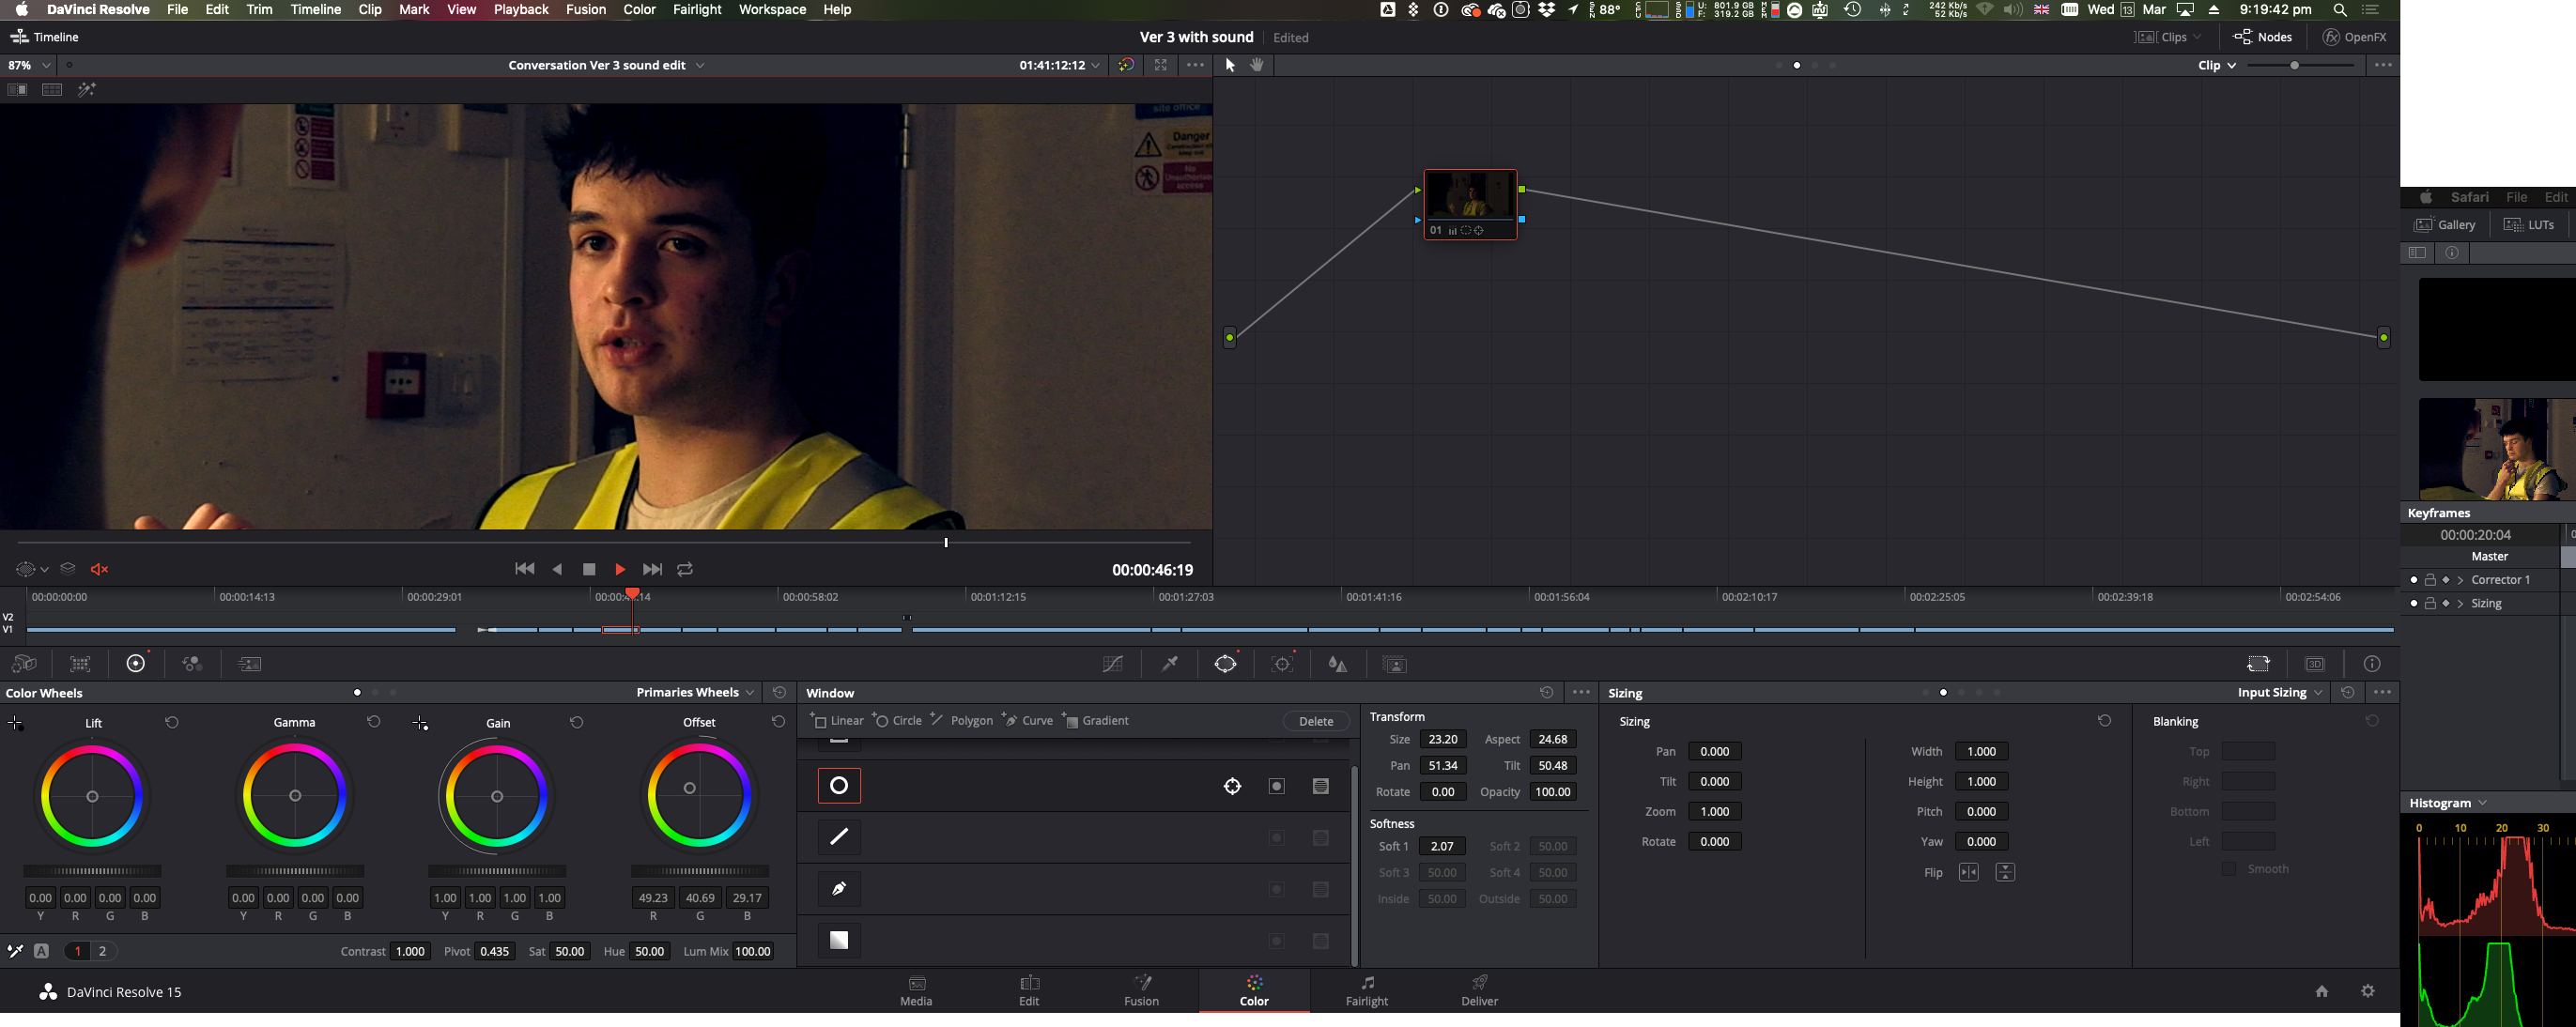
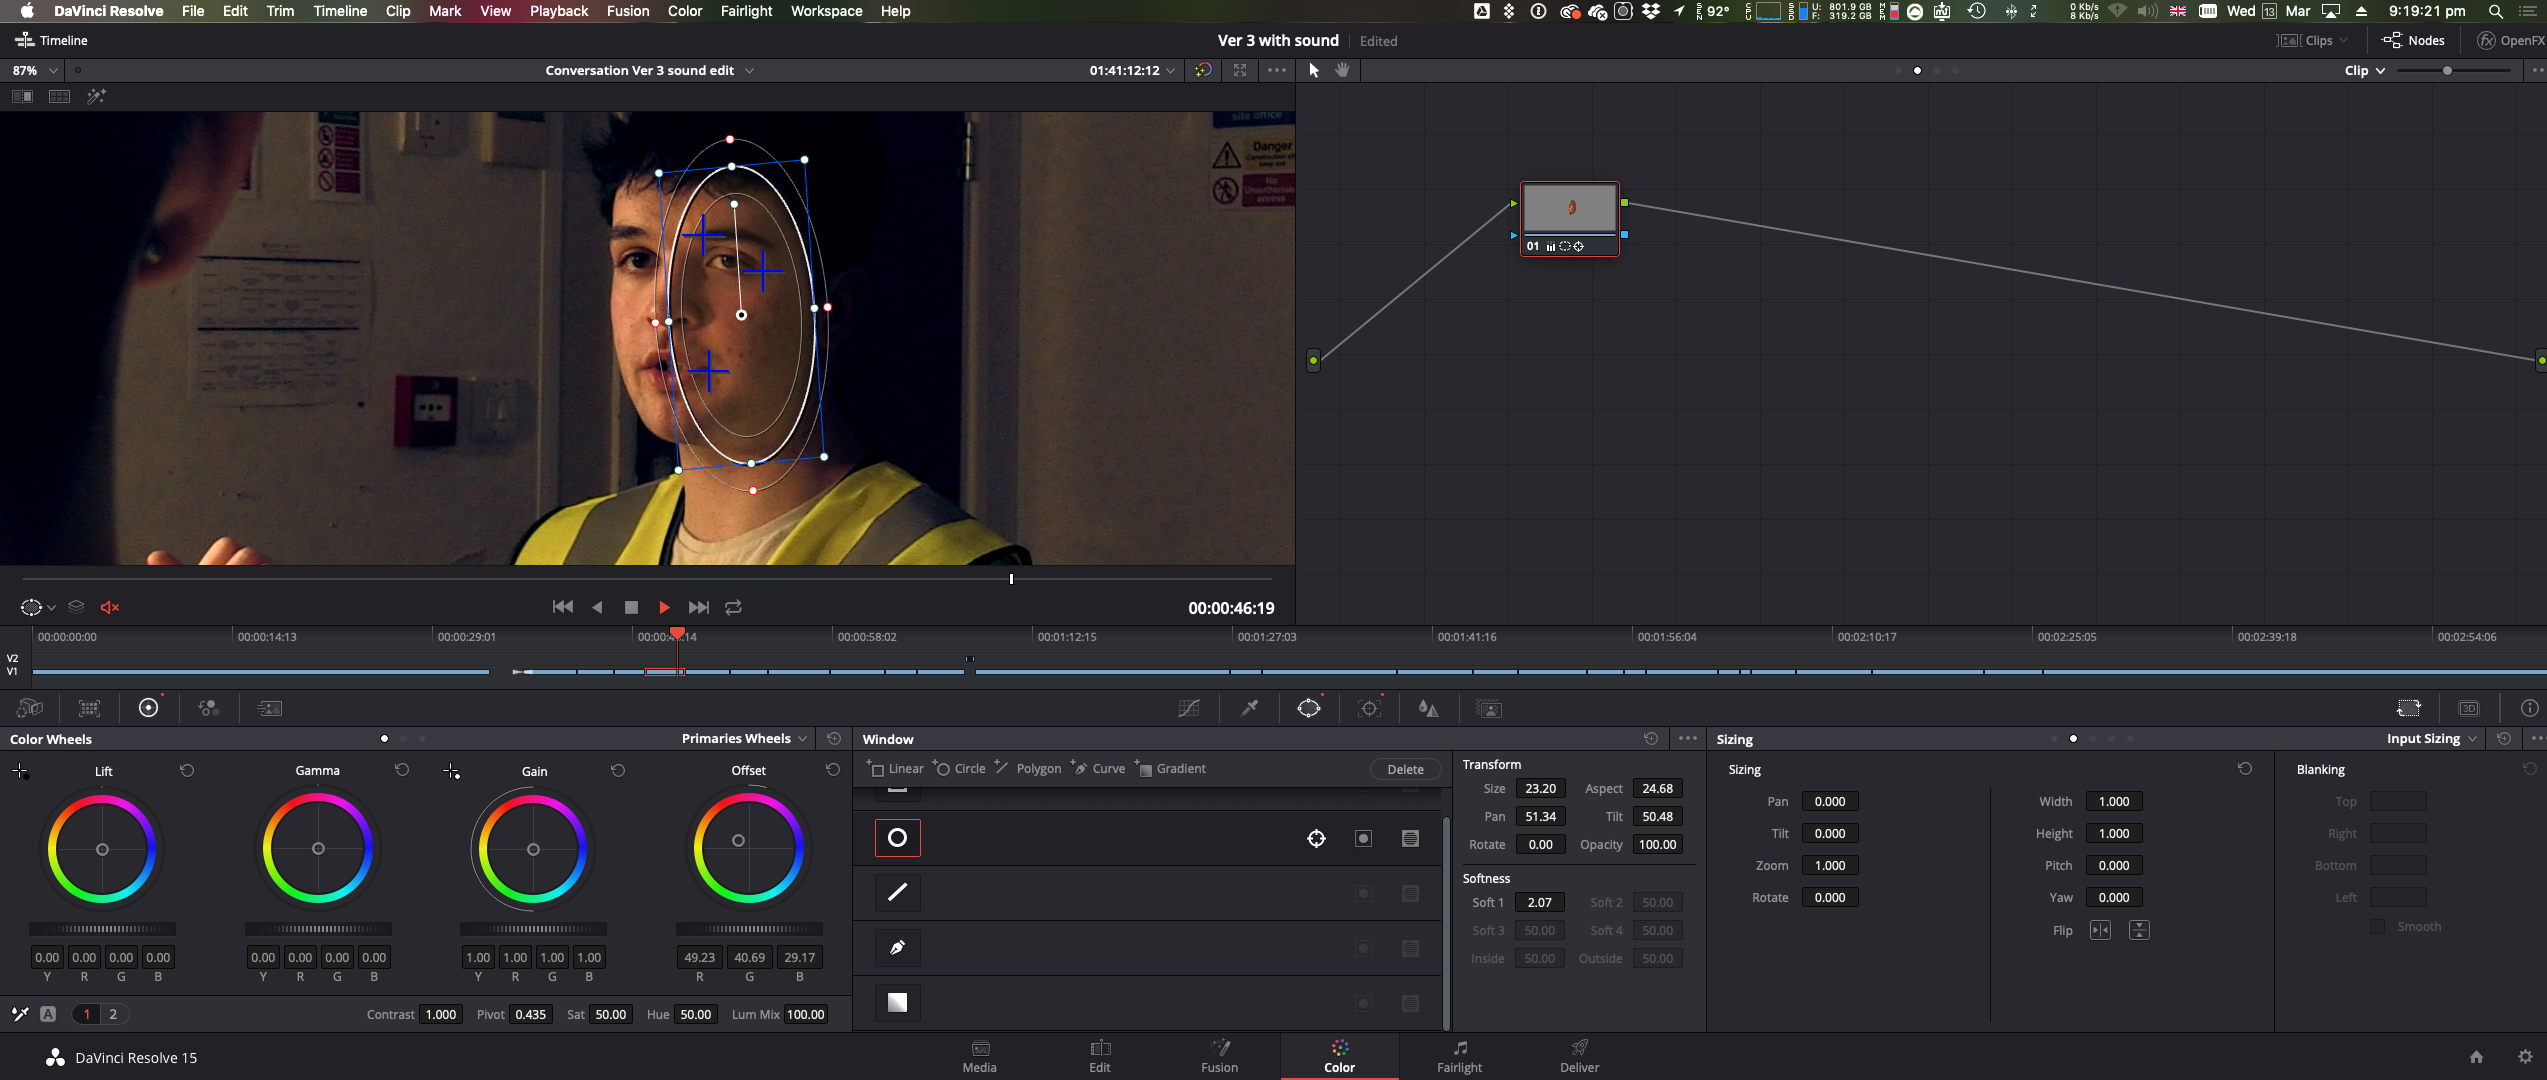
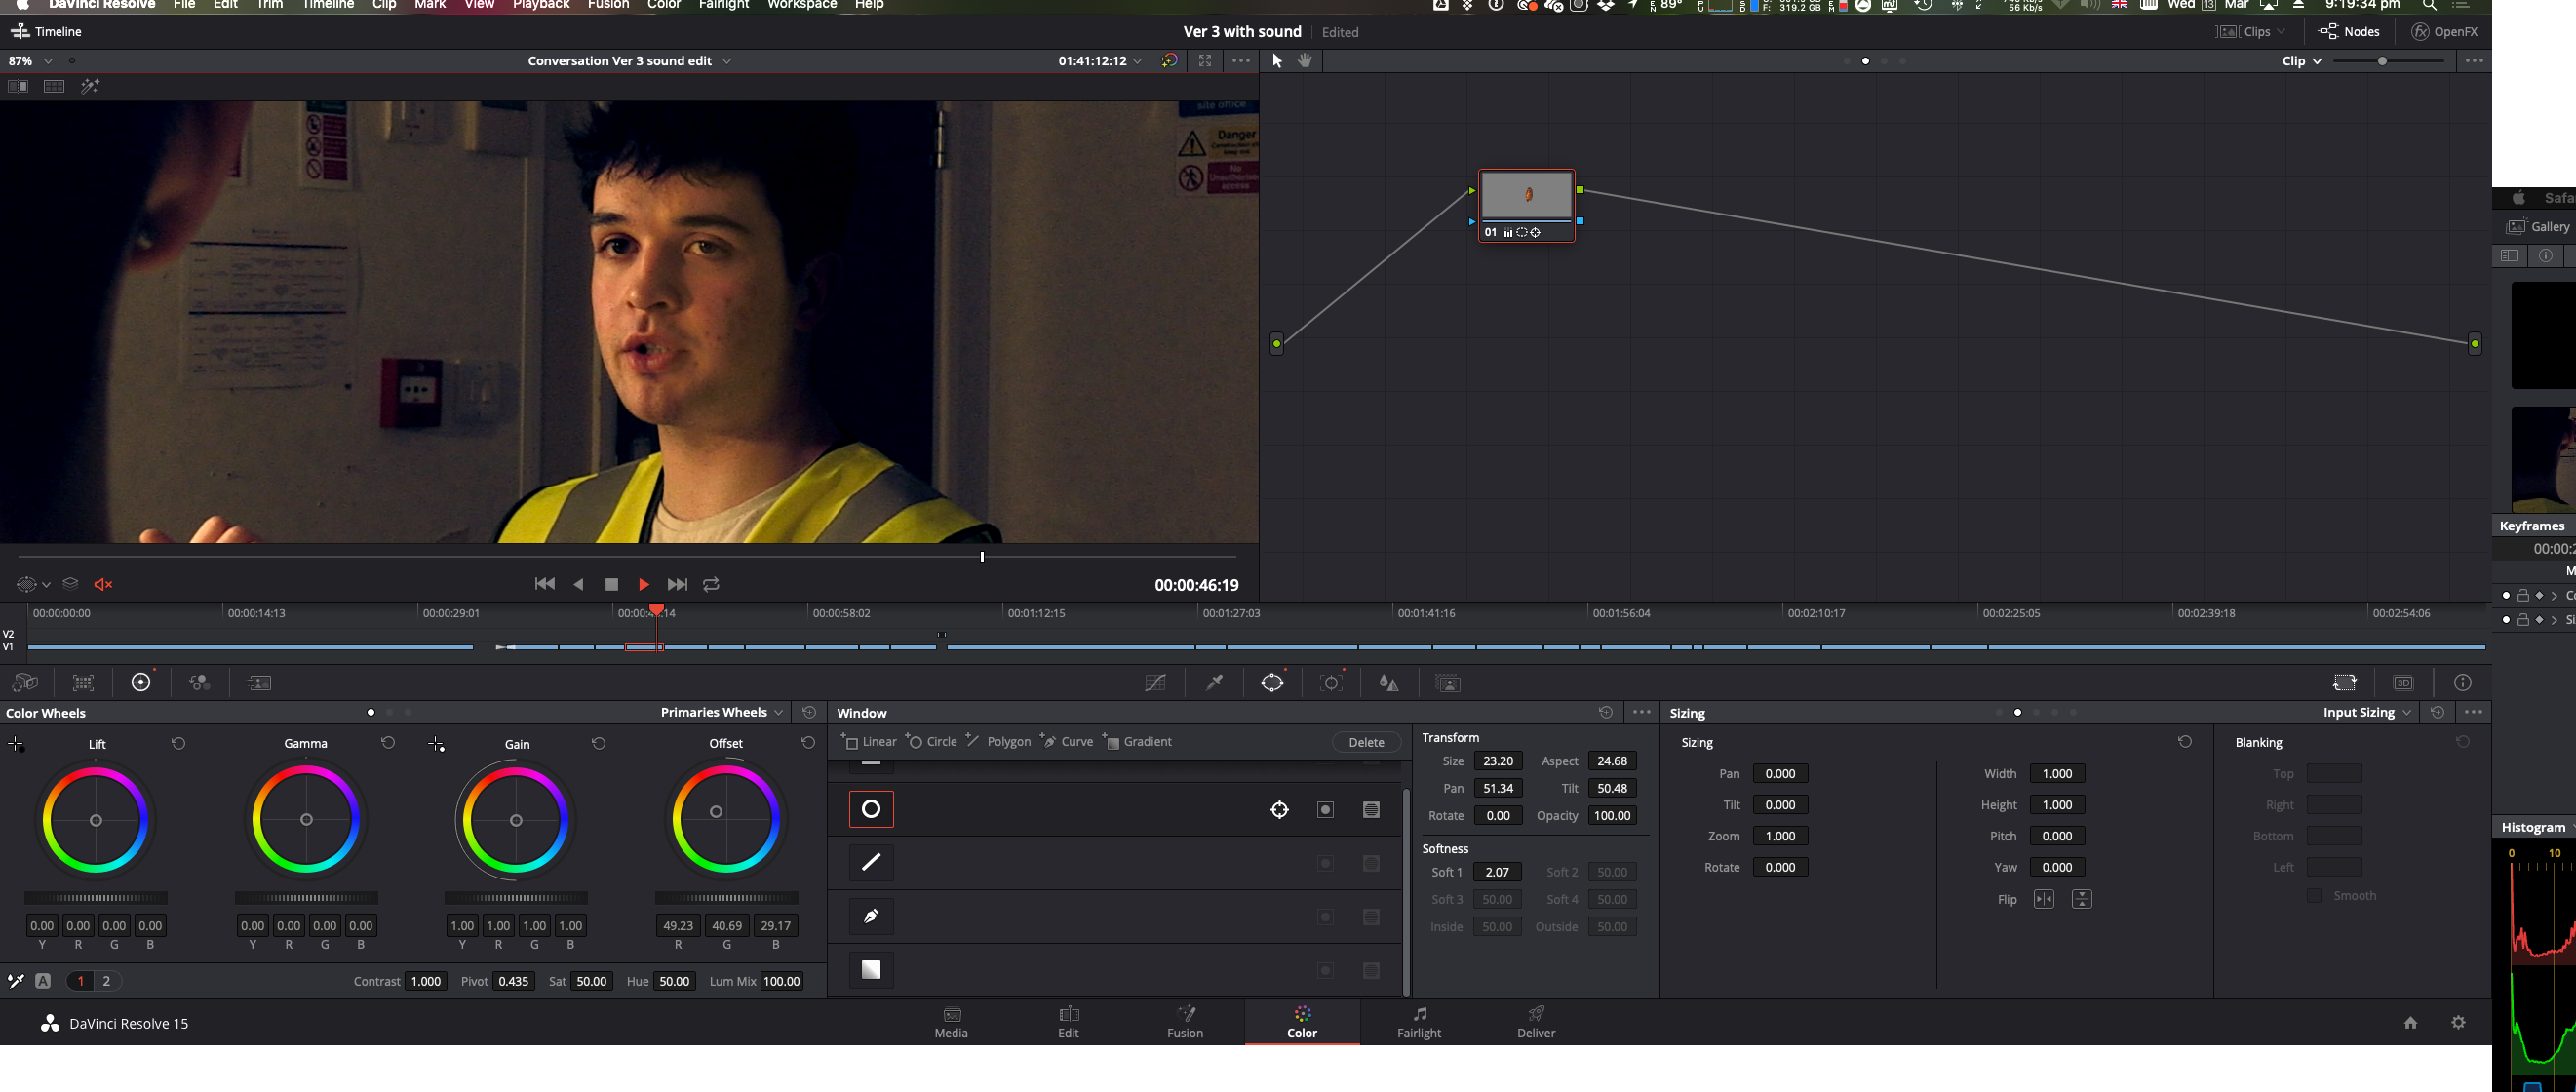
However, the circle did not cover all teh area around the actor's face. I start drawing an area around the face with the pen tool. But this did not look the correct.
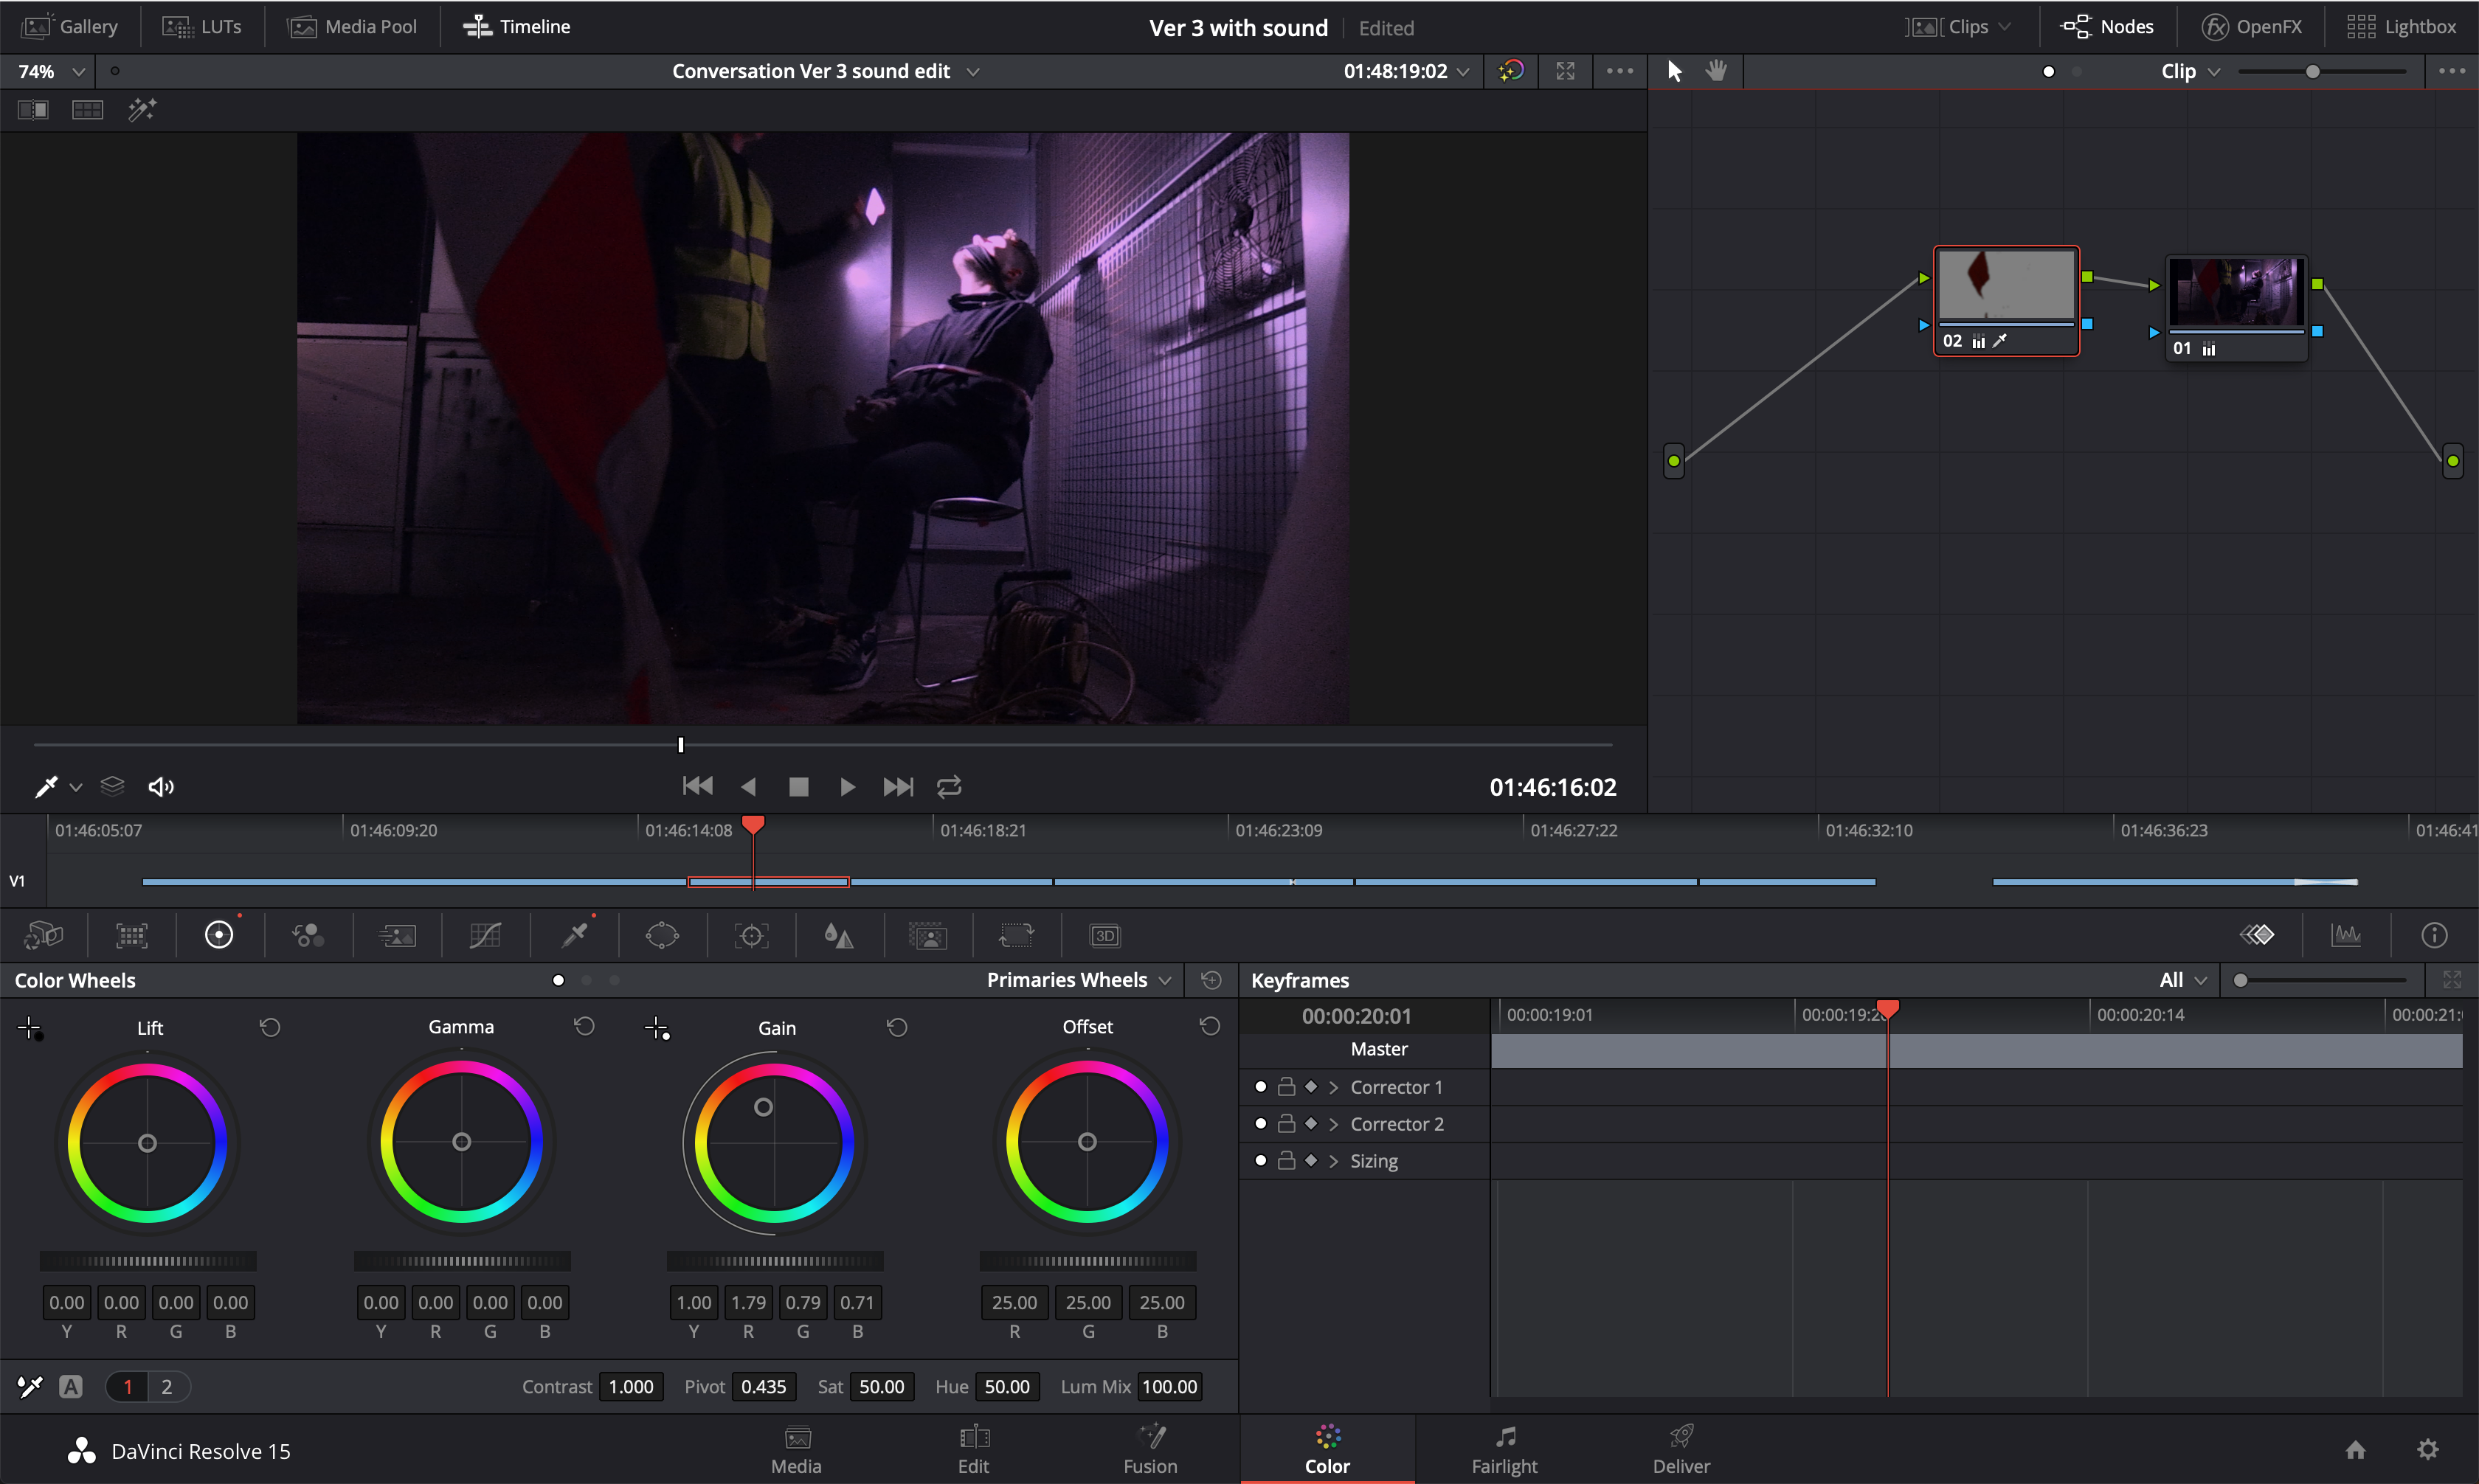
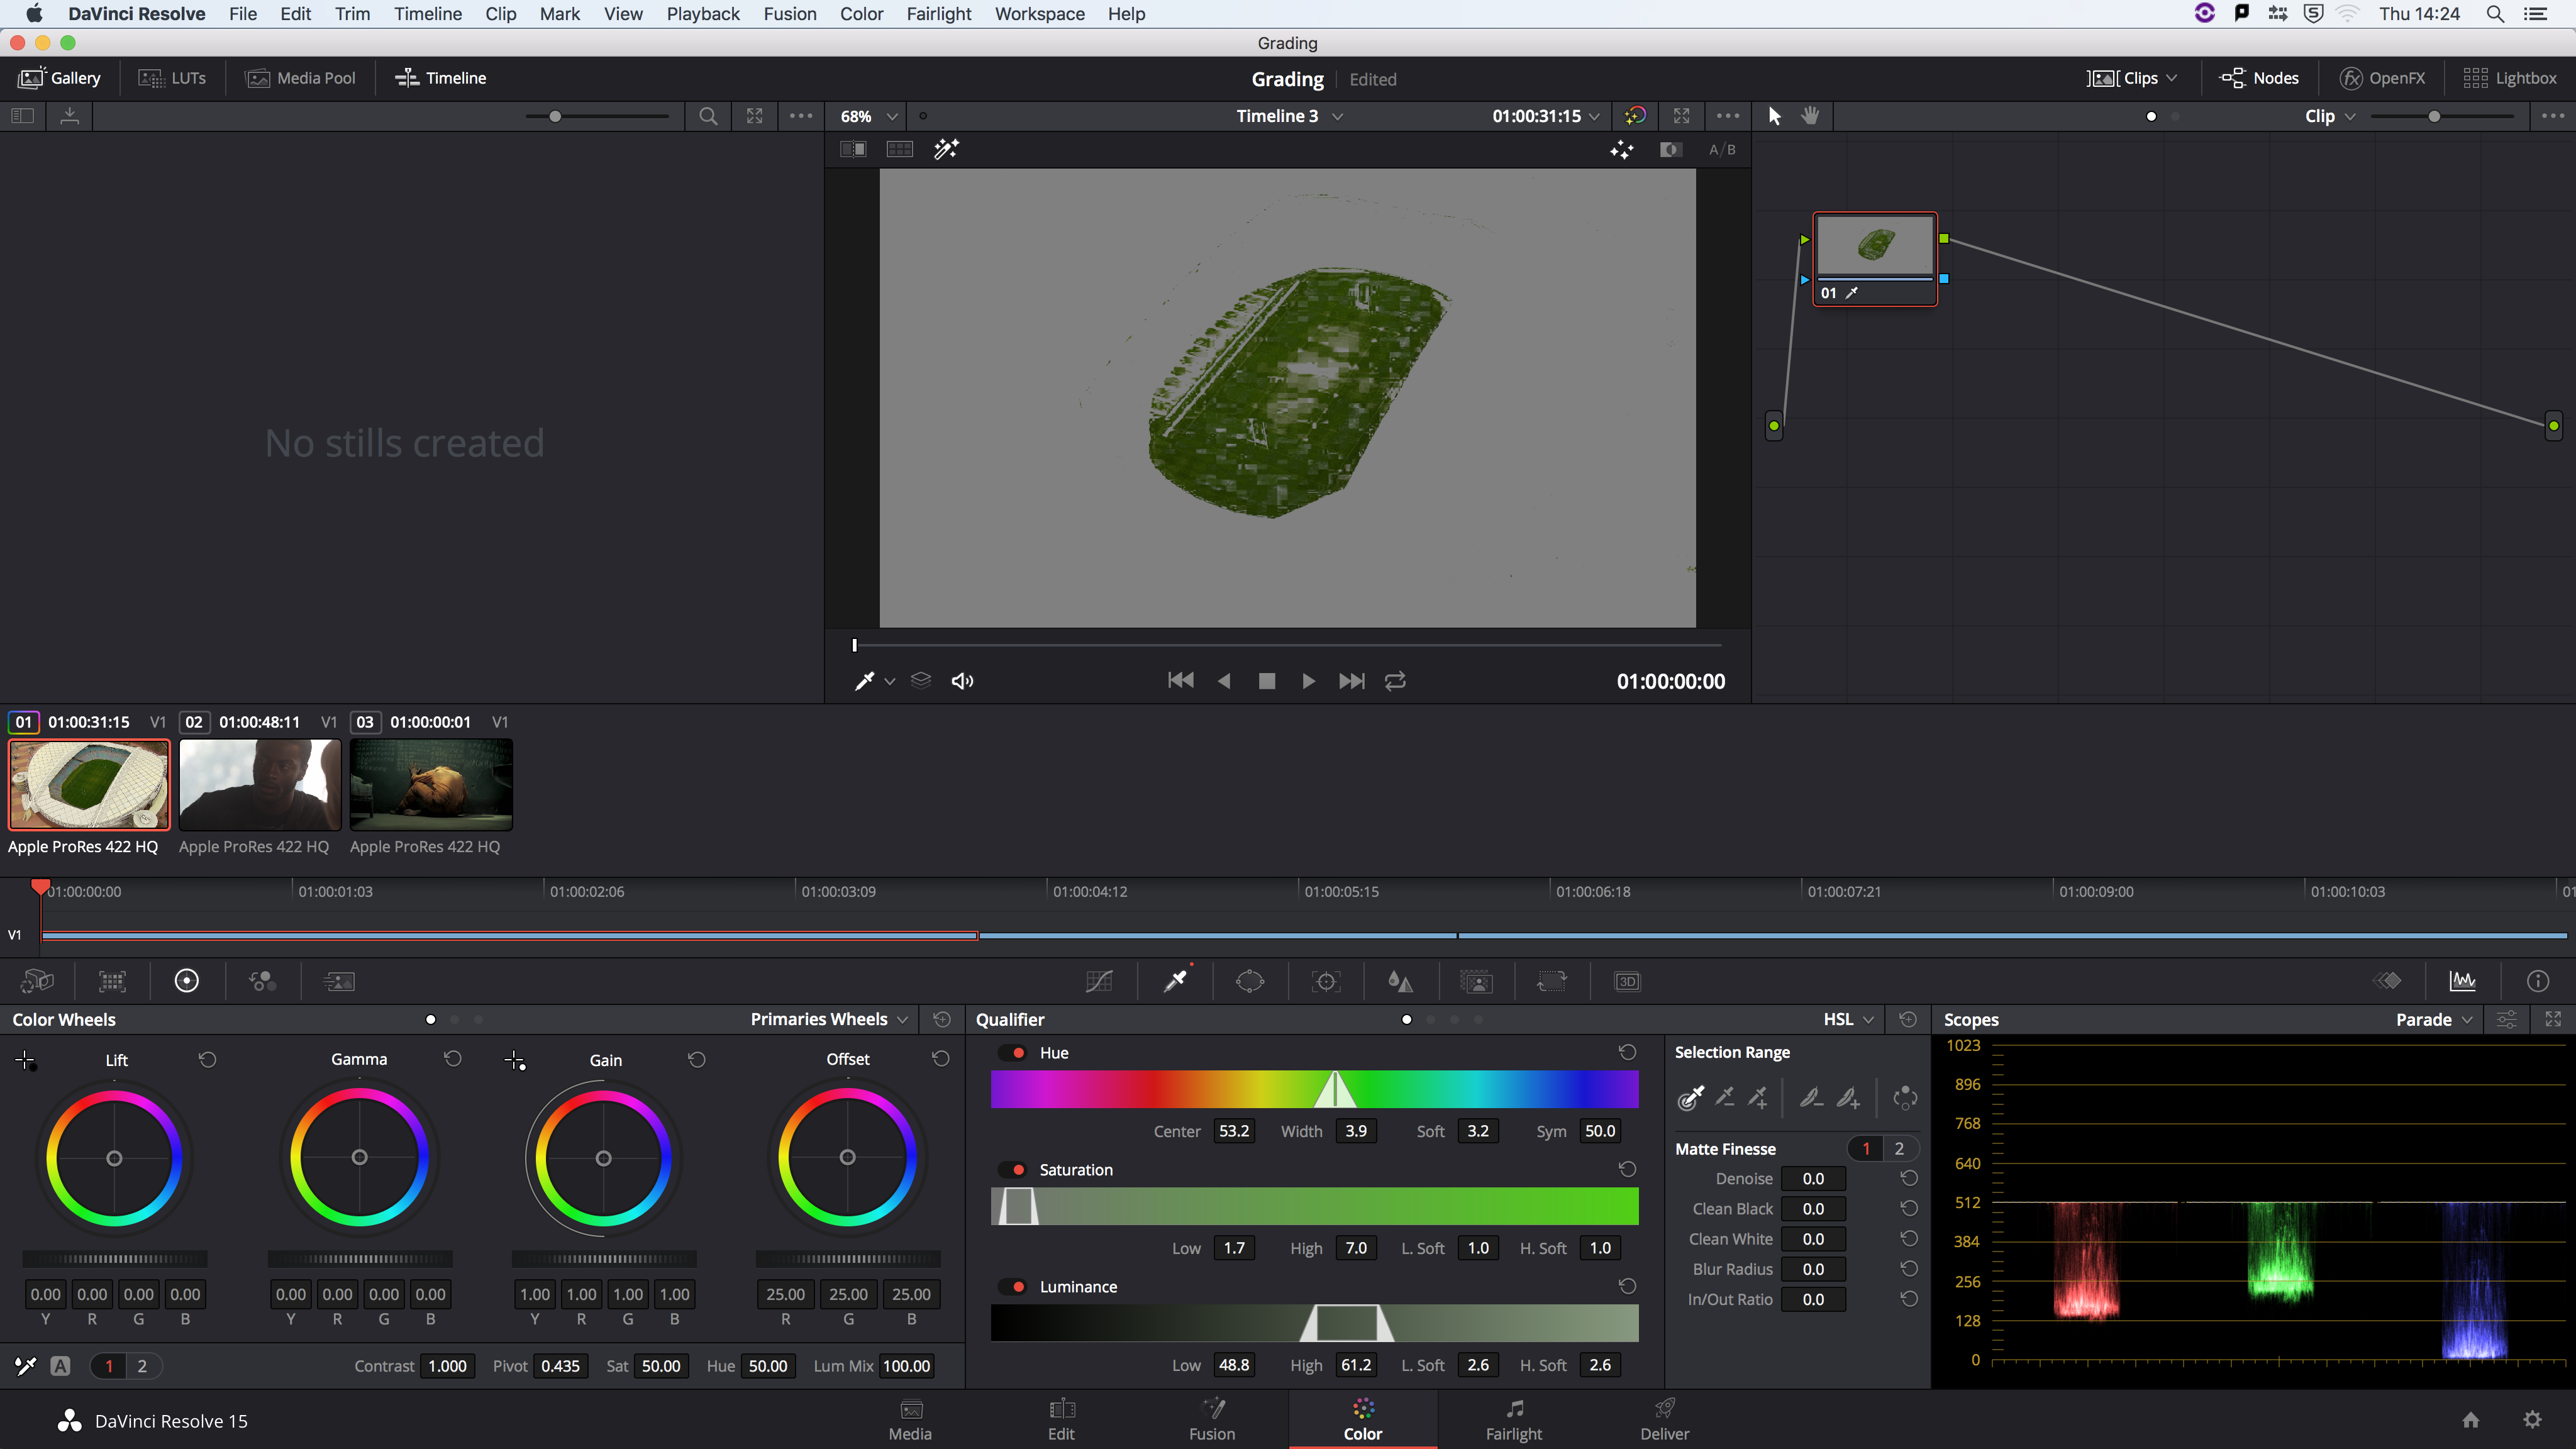
For the killer scene, we wanted the red of the hazard tap to be saturated through the movie, I did this by sampling with a qualifier and choose the red colour in the scene and increase its brightness.
I had the Raw First Draft finish using the conversation as the main drive structure for the cuts. I was not sure where to go from here.
Thinking that one of the main components are flashbacks. I needed to edit in a way to connect the story within the conversation with the shots. To have an underlying message that the Actor is a killer even though the conversation in "normal" that there is something more lurking behind.
it was decided that the killing will be left open to the audience while in the filming a third actor was used as the victim. The audience can decide whether the second actor will be the next victim.
I start putting together what was considered the first flashbacks. With the killer washing up his hands. Using multiple shots that were filmed. I cut together a scene of him washing the blood from his hands. The Sound here was recorded well and I was able to use overlay running water to make the cuts smoother. For the last shot of the sink, it was not filmed while the lights were set up. However, I decided that it assist in creating a mood to this scene and keeping it in was more important that it looking visually the same as the rest of the shots. It added to the passage of time. that the light was turned off and then killing had left the sink. But the shot alone felt not enough to convey this feeling, i add the sound effect of water drops to add to the atmosphere. I think it came together well and an excellent start to help me visualise an atmosphere and emotion to recreate throughout the edit.
Screenshot of FCPX workflow.

I thought about finding a way to aid the transition for the cut of the flashbacks. I took inspiration from David Fincher, Fight Club. How the Scenes flashback scenes were created using sound and multiple jarring jump cuts of the same scene to show that these were flashbacks of reality. An aspect of reality as if life flashing before someone's eyes. I looked at the conversation and search for a position that felt naturally the best position to start a cutaway for a flashback. I remembered from the dailies there was a scene with one of the actors felt flustered while shotting and asked to stop recording however the DOP continued to record. This really assists me in creating the clips and I was able to use jump cuts that were synced to a glitch sound effect to add to the atmosphere. I added sound to build up to the scene this aided the effect to not be a jarring jump out of nowhere.
Having completed that effect I started to put together the second section of clips that will be used for another flashback. I will continue using this way to cut from the flashbacks and but back to the conversation.
This would be placed in the midst of the conversation. bridging the First flashback and the end scene of the killing.
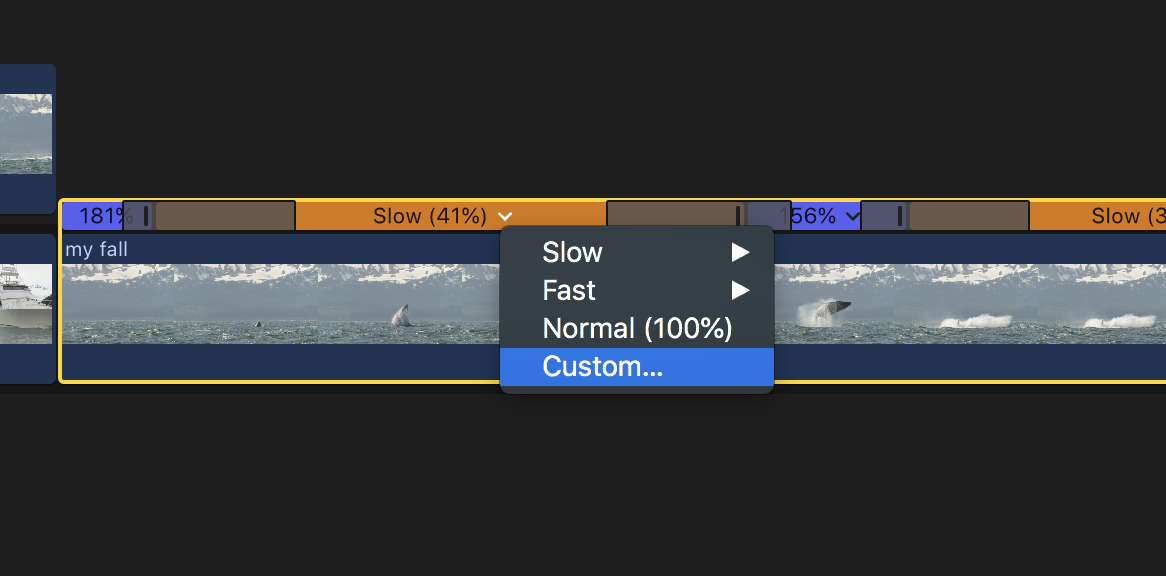
In the last scene which shows the killer killing a victim, the hammer scene fillmed with shadow. i felt the actors' movement was slow.
Here is the original take.
I had decided to add speed ramps to give the movement some speed to really feel the hitting adding realism to the hits. If i had time i would have added some blood splatter VFX. but in the time scale thought it was sufficient speeding up the movement and adding hitting and crunching sounds.
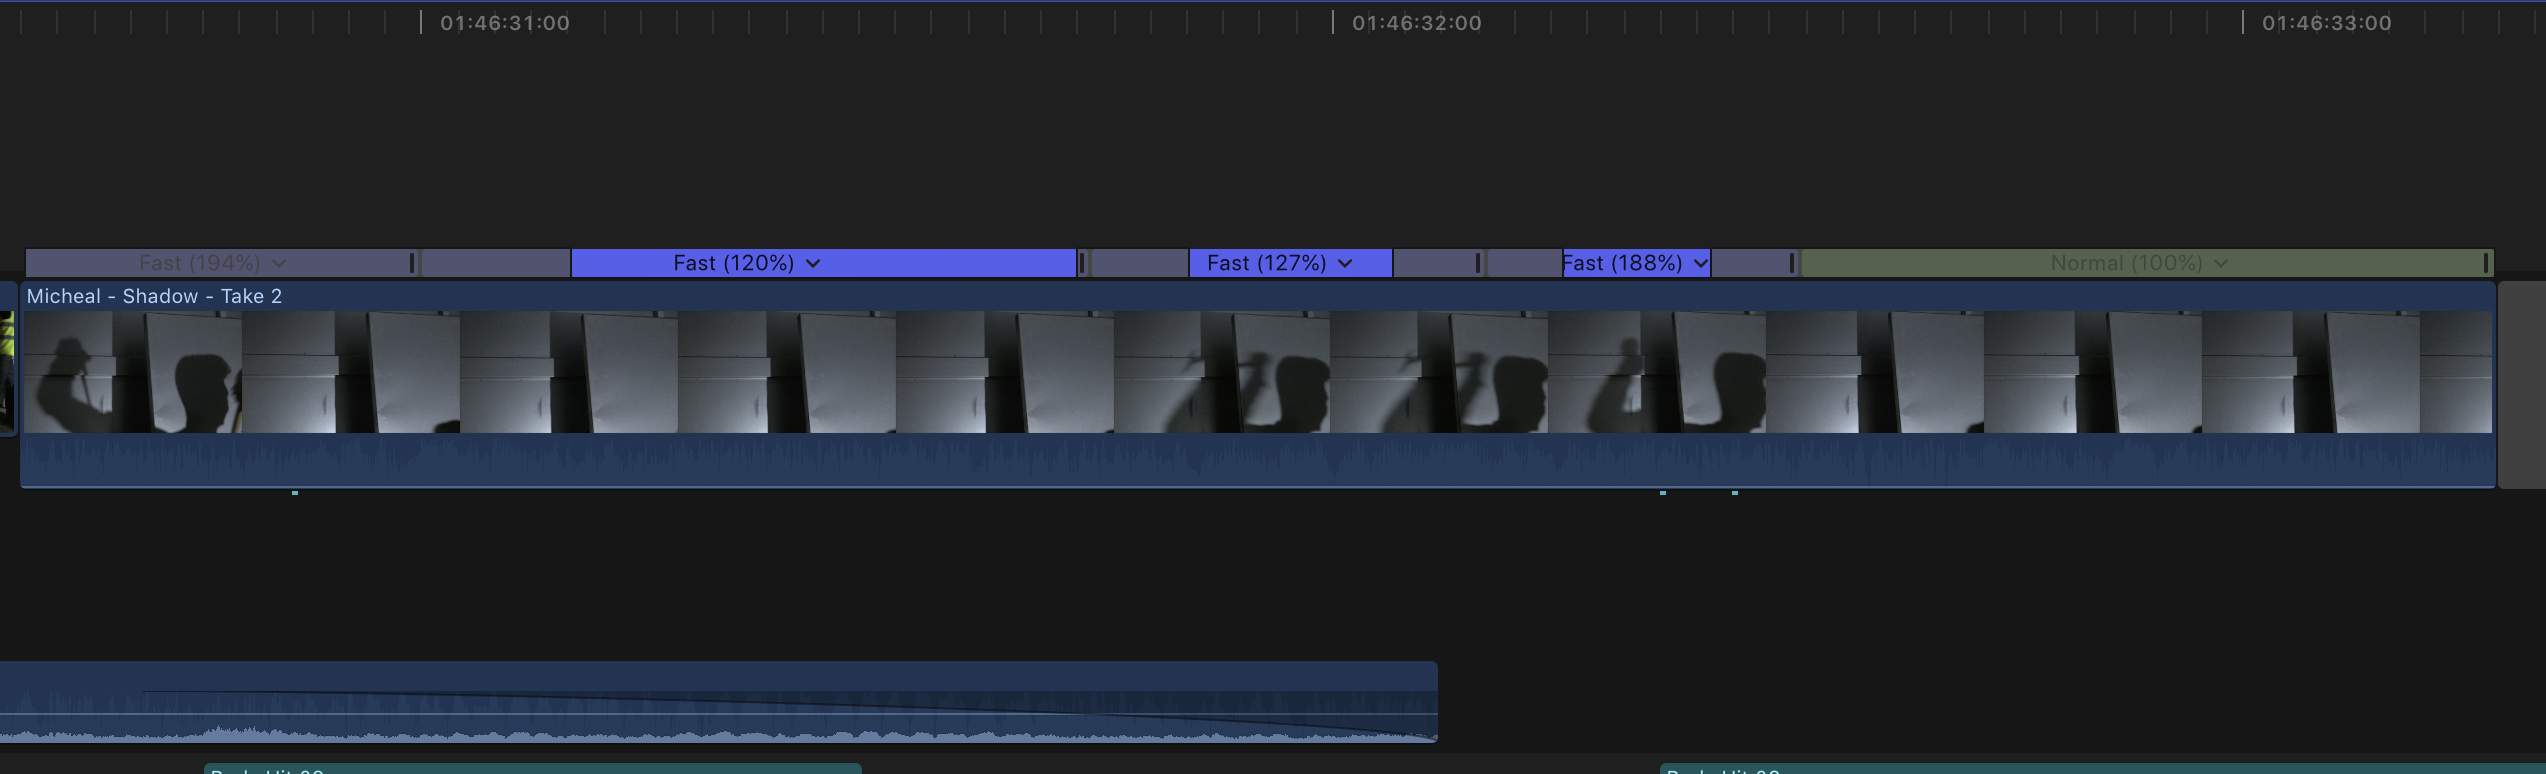
the final speed effect:
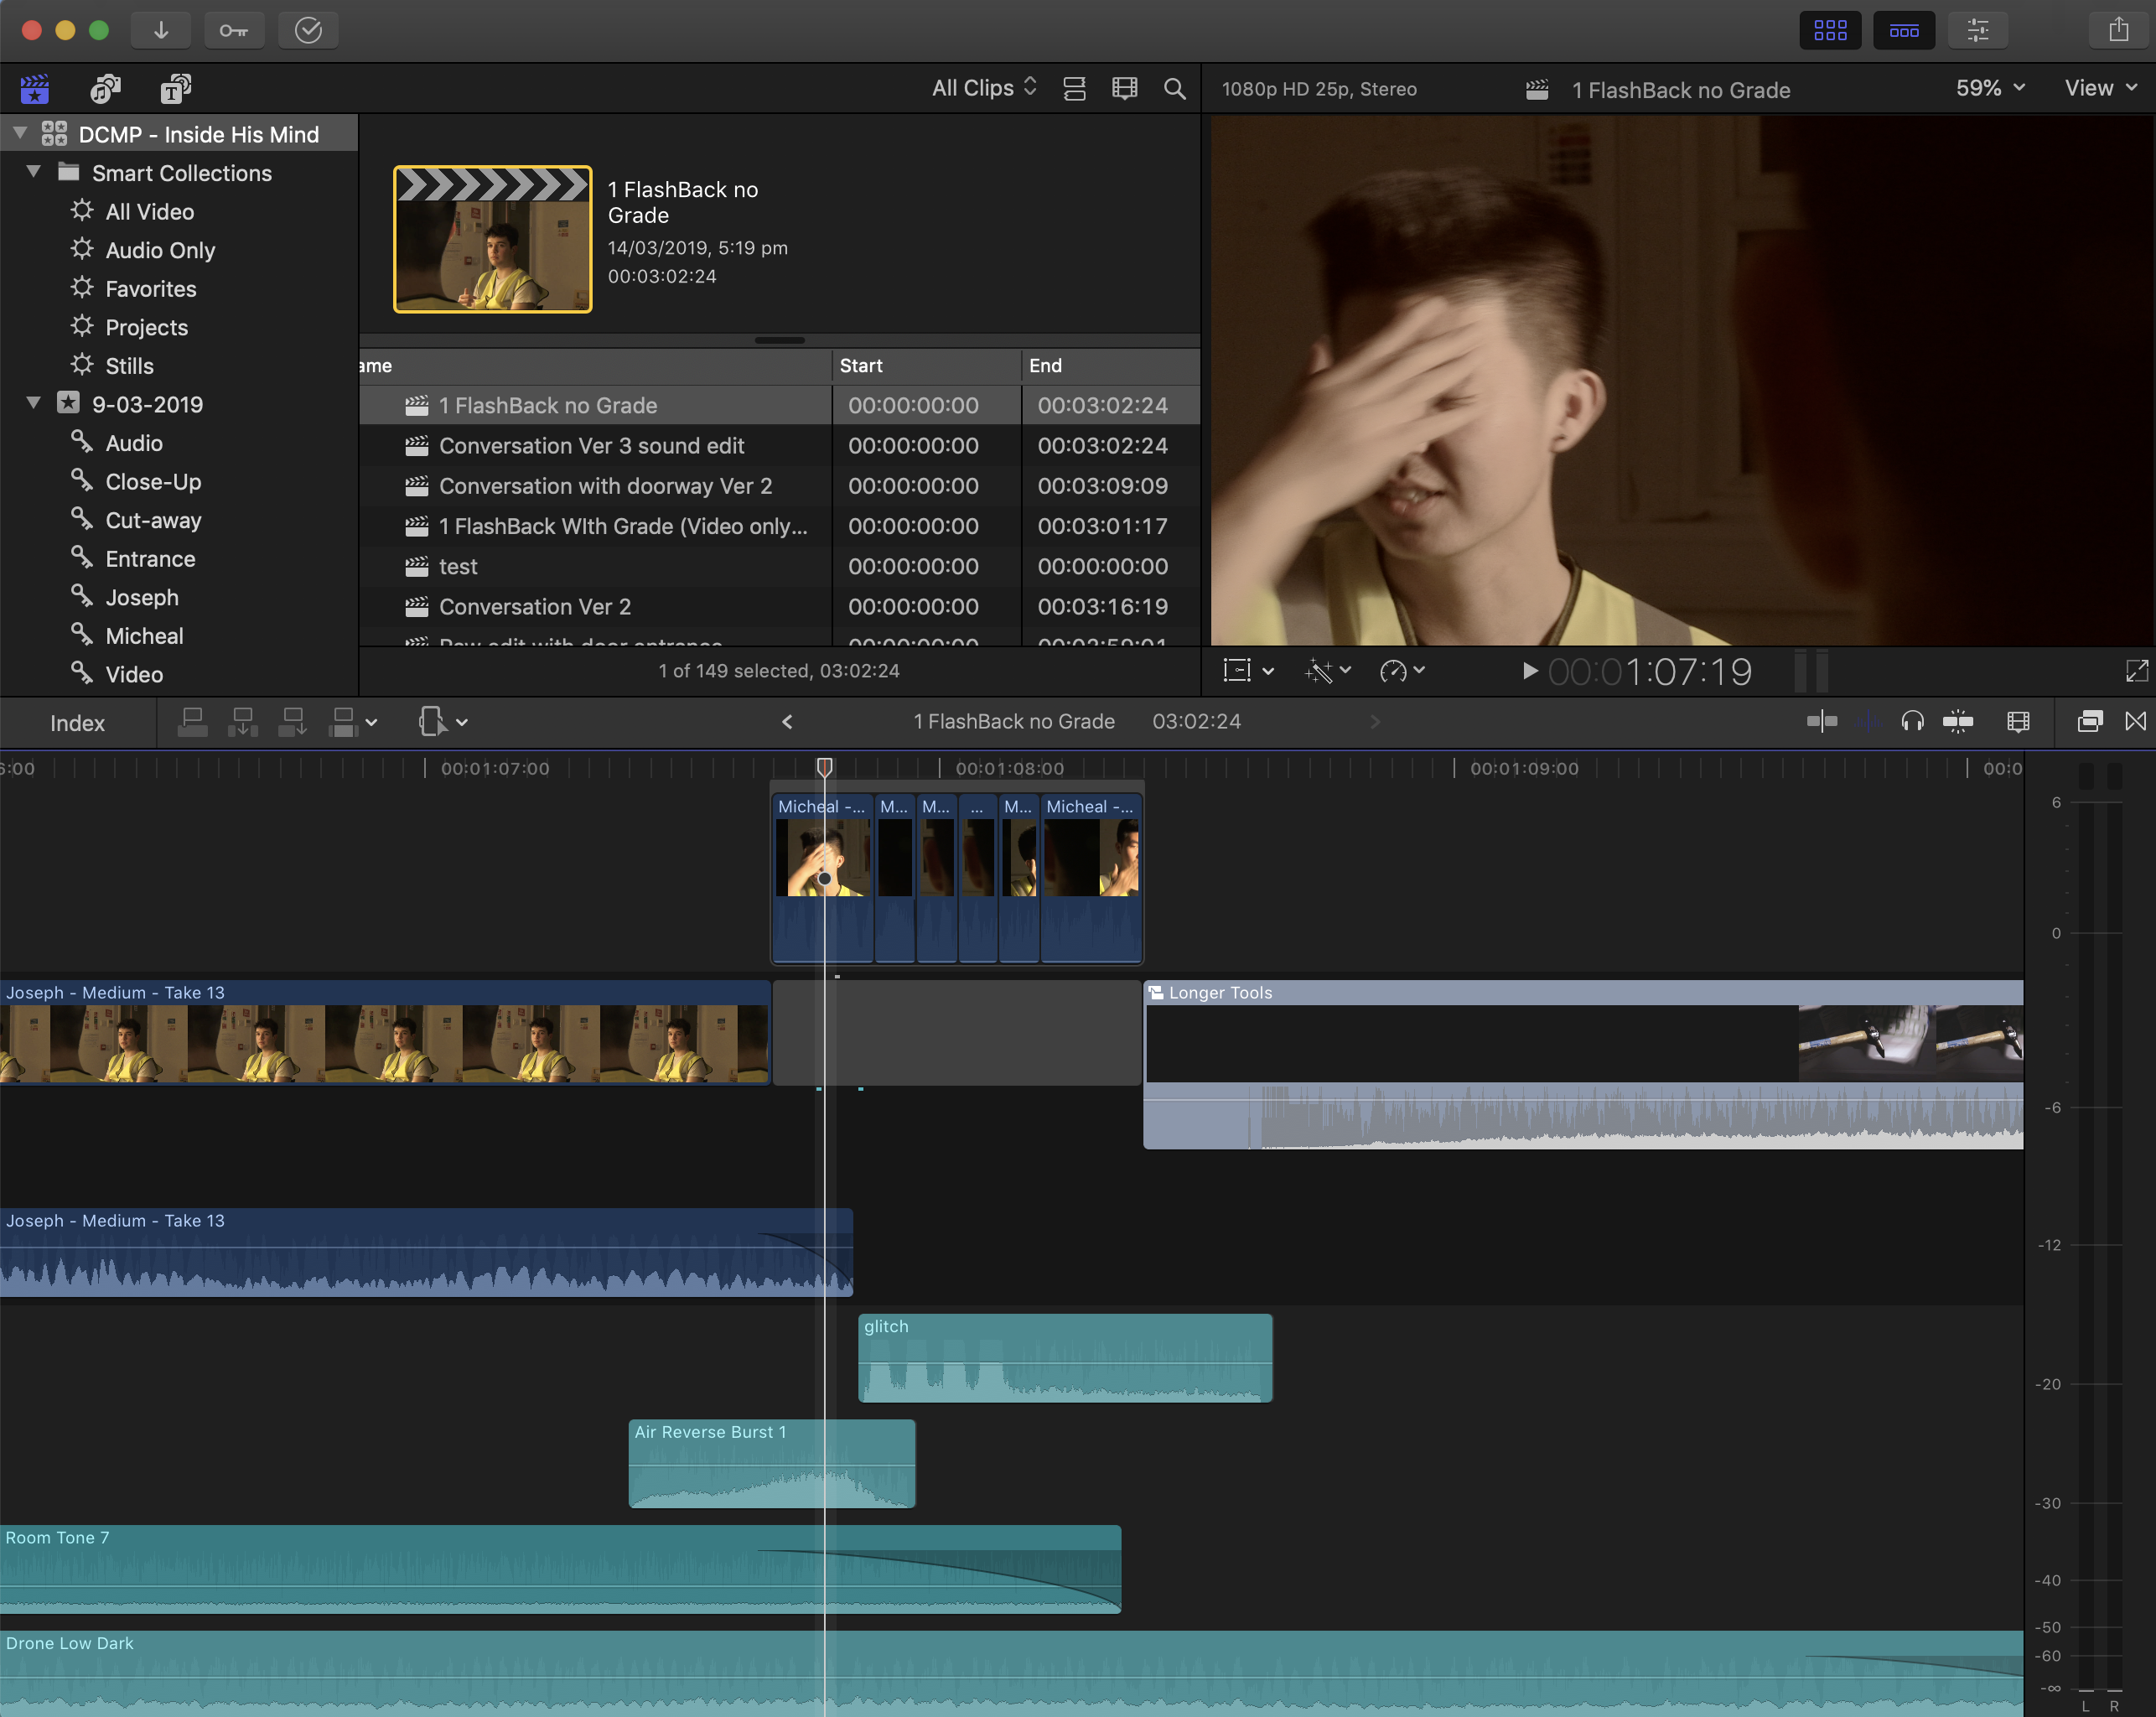
The edit of the killer scene looks like this with sound effects added. I also added a door opening scene to give the effect he victim is placed in a container room.
Now that most of the flashback are completed i can start to work on the on creating pacing and emotion within the conversation.
Having the majority of the cuts made and the shots placed the cutaway in the start, middle and end of the scene. The scene is starting to come together. one of the issues I noticed is with the sound. I was not sure why but it did not sound correct. It was usable. But I felt as when the sound was recorded differently between each character. I added a back hour HVAC noise throughout the whole conversation scene. This to me balanced the audio so there were no differences and no clipping from shot to shot. However, I think if the scene was long that noise could get annoying as it is a continues humming and bussing noise. But this is me trying to do the best within the time and skills that I have.
I had set up a meeting with the Director and the rest of the time to show the progress of the editing and to take and advise on what was imagined differently and if I was in the correct path. This meeting was agreed on the day of shooting with everyone. Unfortunately, the Director did not come to the meeting which I found it disappoint and lacked leadership, after the film shoot there was no communicated from the director. When reaching out to them on the Whatsapp group there was no reply. I felt i did as much as I could do. Only the Production Designer and Actor were able to attend. They were happy with what I had done so far and asked what it would look like if added multiple flashes back in the middle.
With the feedback, I started to create different edits. I used the scene with coil rope. I broke down the cleaning of the tools to more than one shot, Separating the cleaning of the hammer and the tools laid out on a table.
Looking back at the footage I found two edits that worked. I personally felt that the edit with multiple flashbacks did not work with the pace of the conversation. The edit with one flashback in the middle worked better. but this is only in my option. I continued to finalise the enter correct the sound for both single and multiple flashbacks.
I was not sure how to start the edit. I felt that because many of the shots that were discussed and shown in the storyboard (which was never shared with the rest of the group, making visualisation of the Director intention difficult) were missing. I had the script to assist in creating a raw edit. I wanted to start with the base of the conversation and change the edit to achieve some emotion and pace.
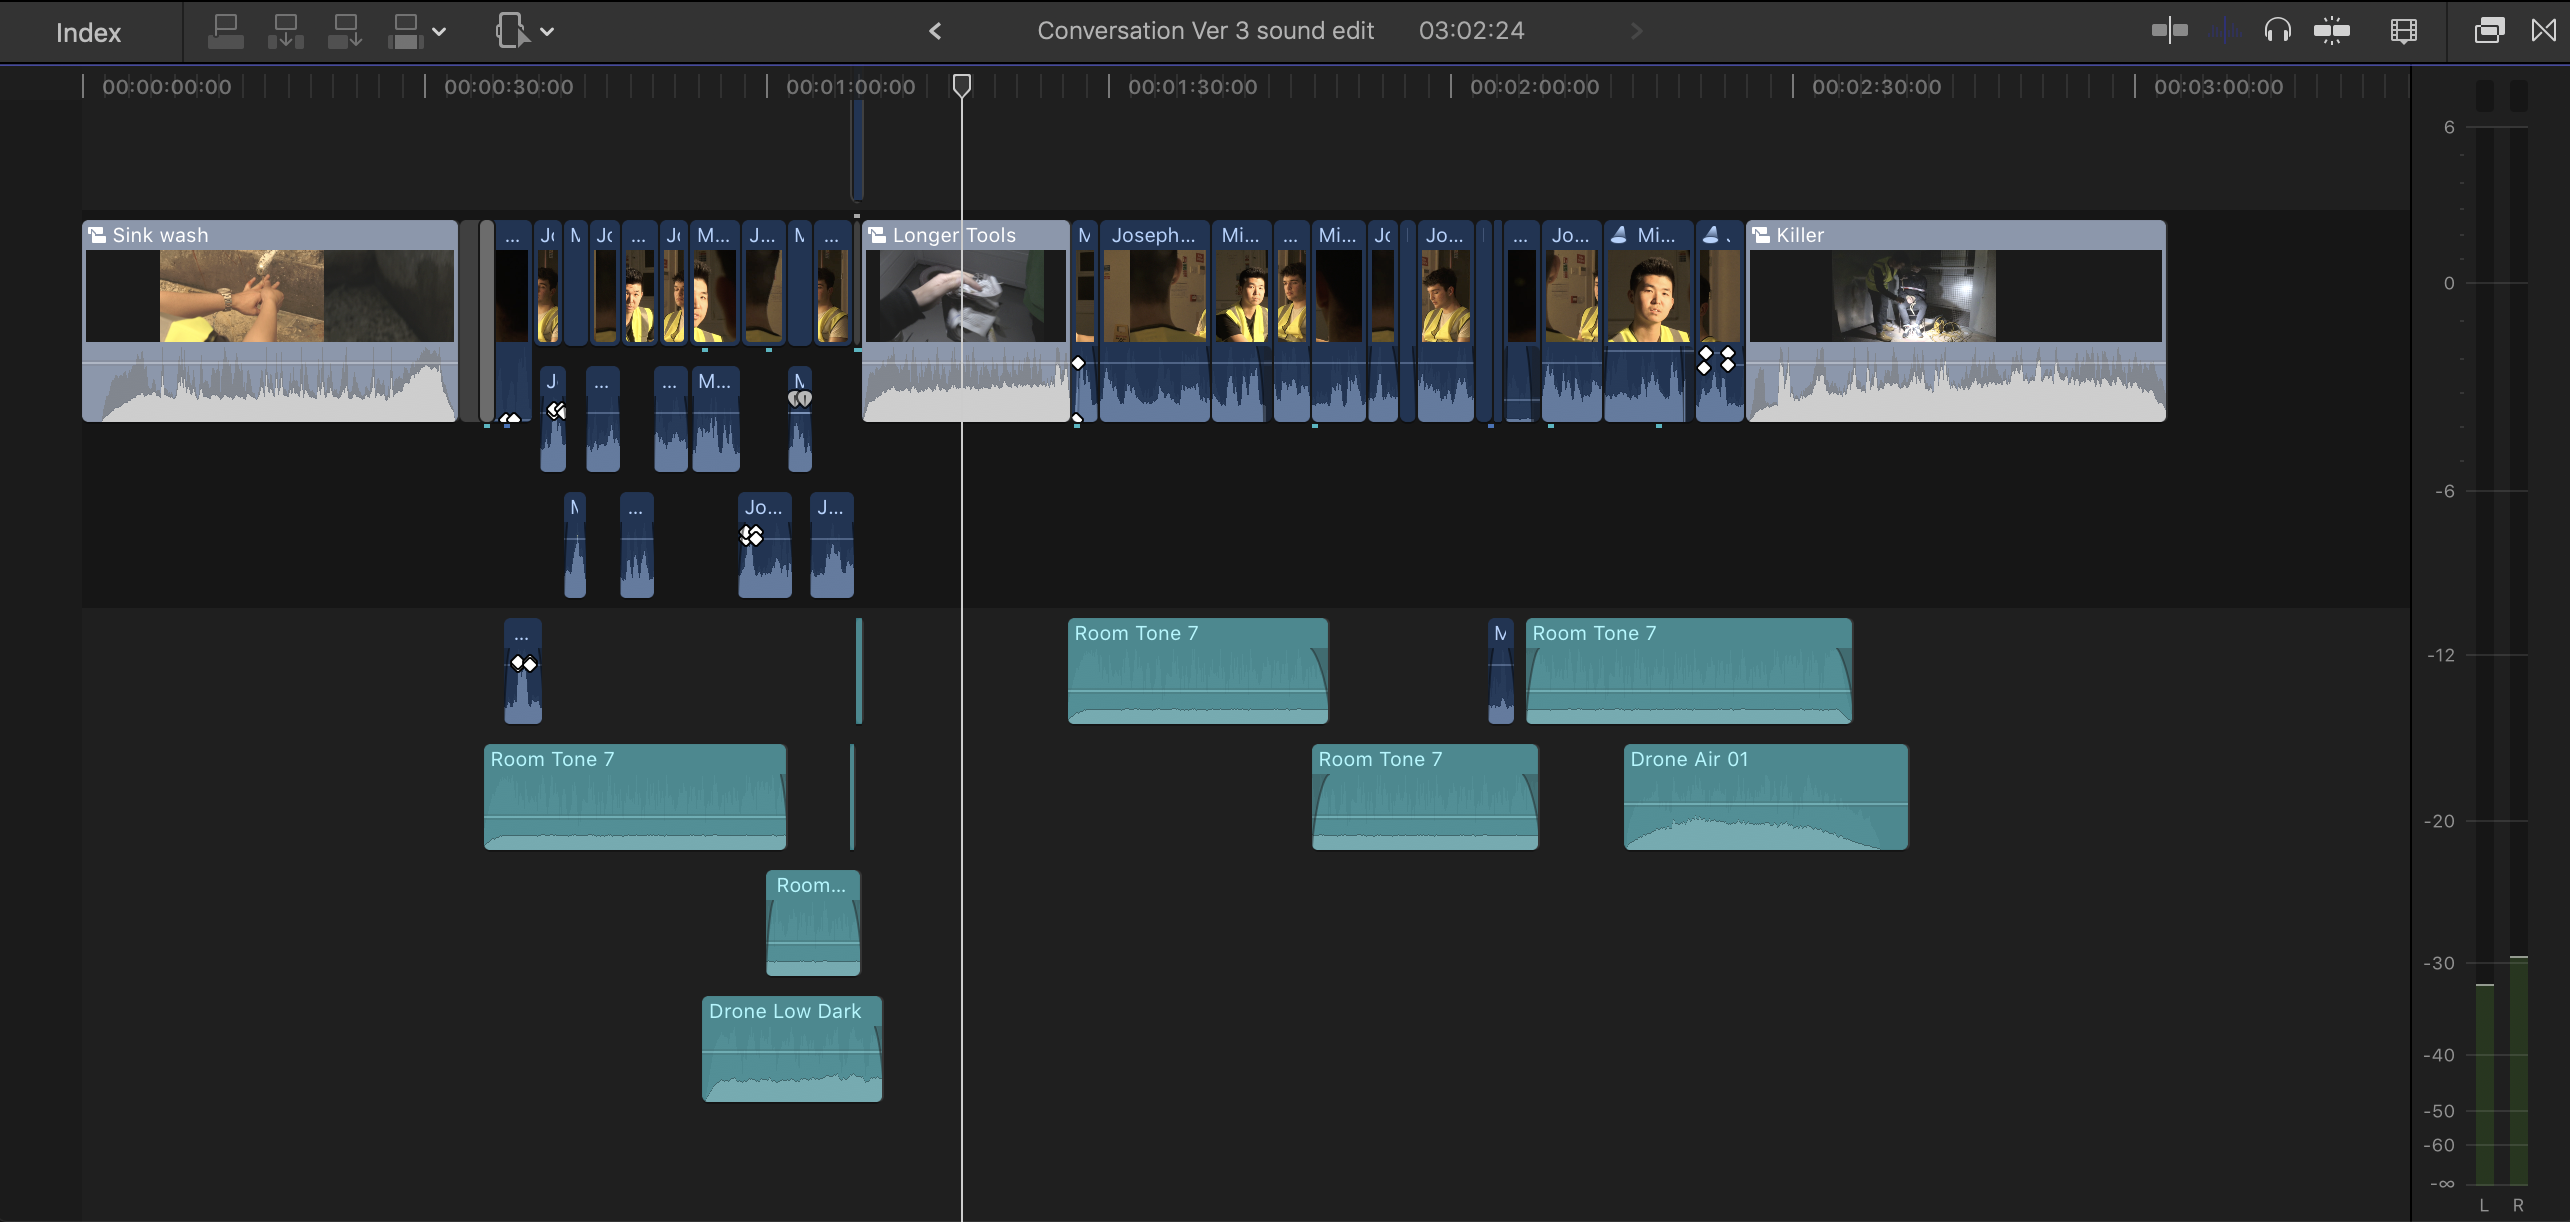
This is the raw edited of the conversation i felt was best suited to use.
However, the Director of Photography had wanted to see a version with the only shot of the doorway entrance. There were only two shots that could be used. unforutUnforunatly both had issues, one of them the character was looking direct to camera. The other the door frame camera the actor and did not look aesthetically pleasing such as the rest of the shots.
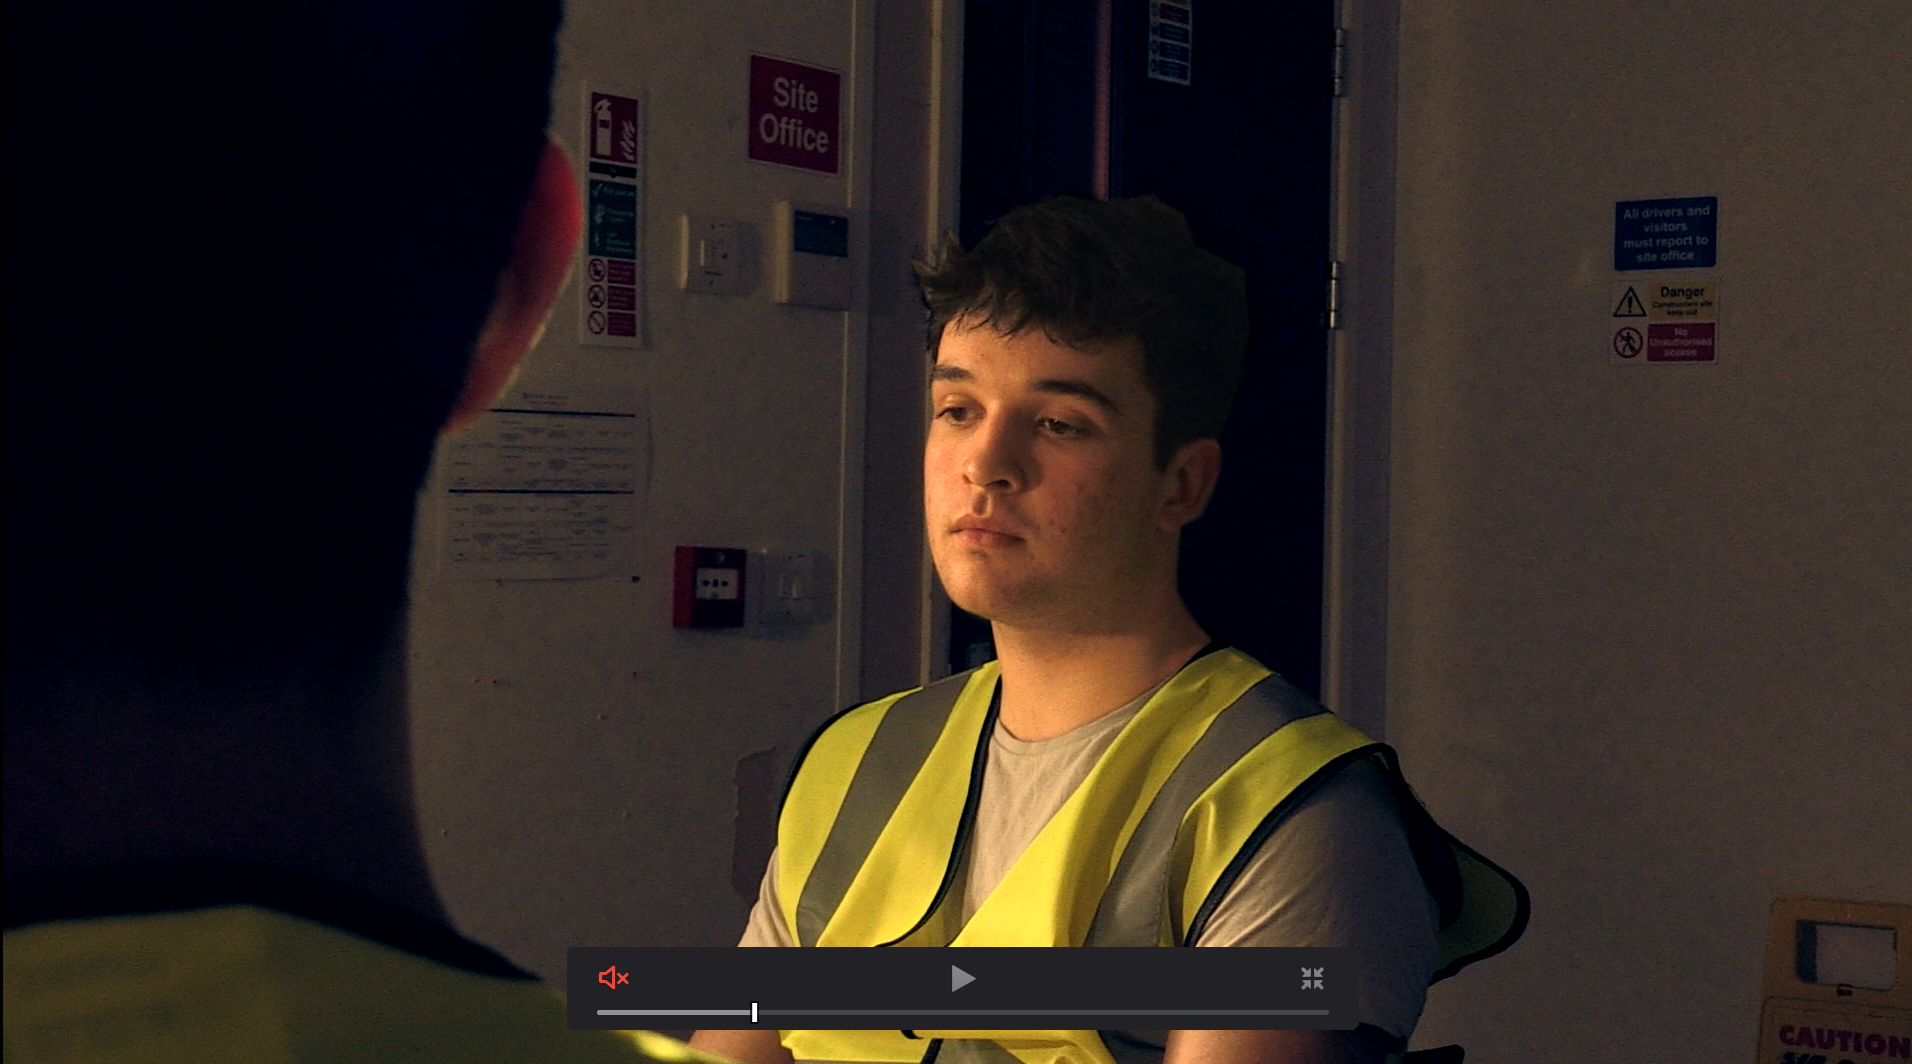
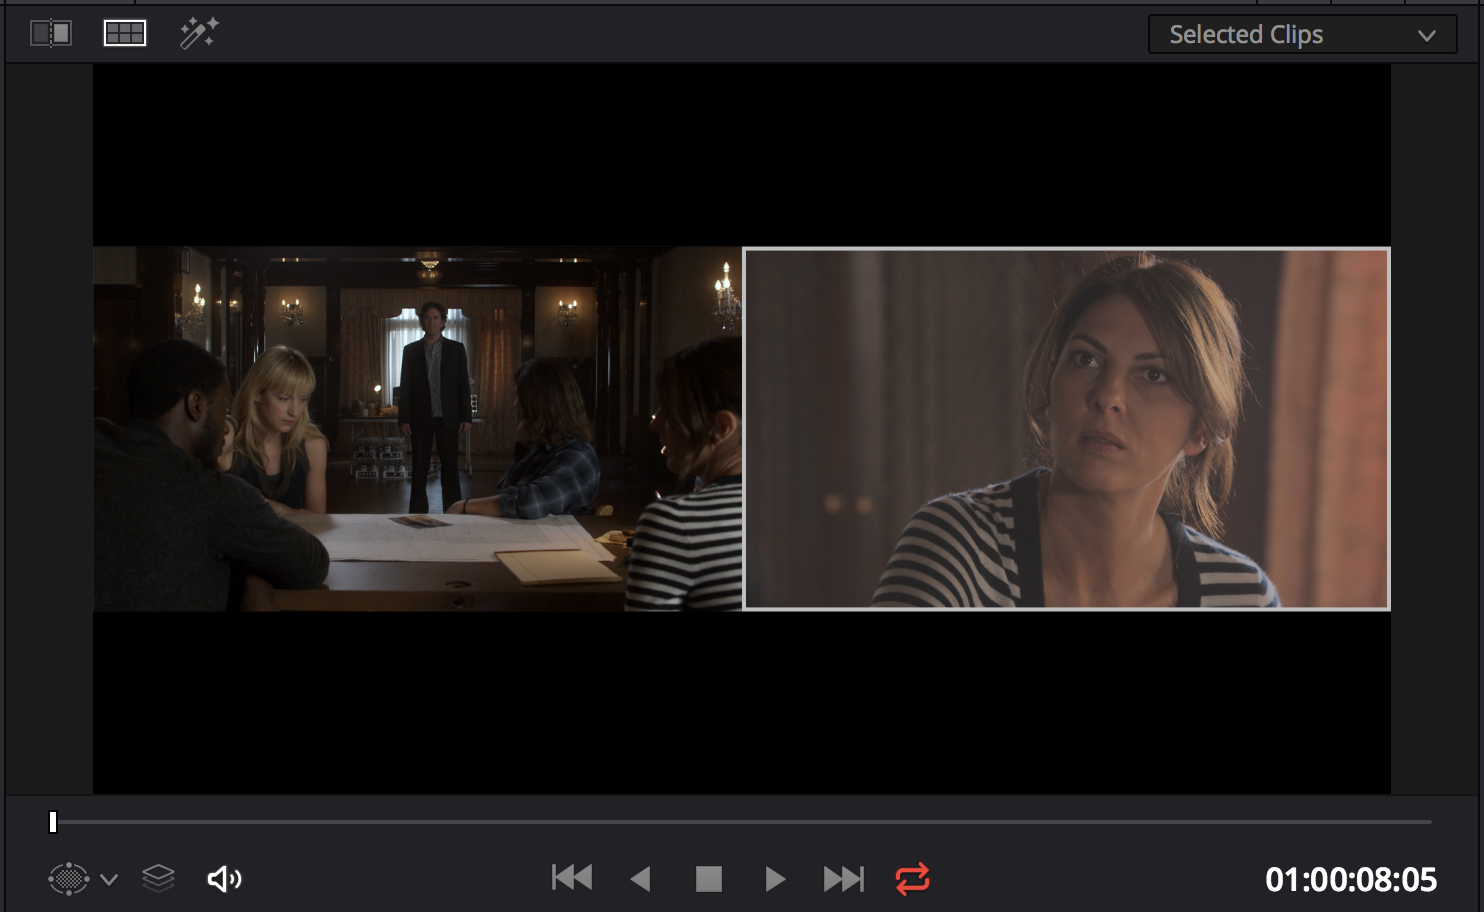
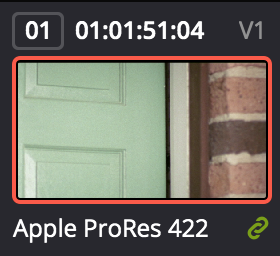
Actor looking into camera
Right Door frame covering actor
There was no reverse angle filmed with the actor entrance and walking towards the chair. I was unable to cut from this shot to maintain continuity. it would have been possible to use the shot where the door frame covers the character but for the shot would have to be held for what I felt was too long.
I had received the footage from the director a day after the shoot had finished. I was informed that at the night of the shoot the clips would be upload so I could start editing and have something ready to show the team.
When logging the clips to see what was recording. I Noticed many of the shots we had planned where not filmed. After consulting the team who were at the shoot everything i was given was all the footage from the shoot.
I believe on the day of shooting the time was mismanaged and fatigue led the team to make the choices that many of the unwanted outcomes will be "fixed in post". If a Shot list was created it would have made things easier to follow on the day of filming. If we took time out on how to place each shot and write down a list of the shots it would have made it easier to follow and not miss any shots.
There was also some problem that occurred with the actors who spent more time missing lines than correctly acting and presenting the lines. This led the scene with the actors taking longer to film. In turn, there was not enough time to film all the scene and angles Discussed.
Some of the team did not correctly perform their roles. While others took on more than they could handle. When reviewing the Raw footage, i hat noticed the Director of Photography and the producer giving a lot of the direction the actors this could have made him miss out and forget about the other shots that needed to be taken. If the Director had been more involved with the Actors, it could have been possible the Director of Photography could have focused more on his role.
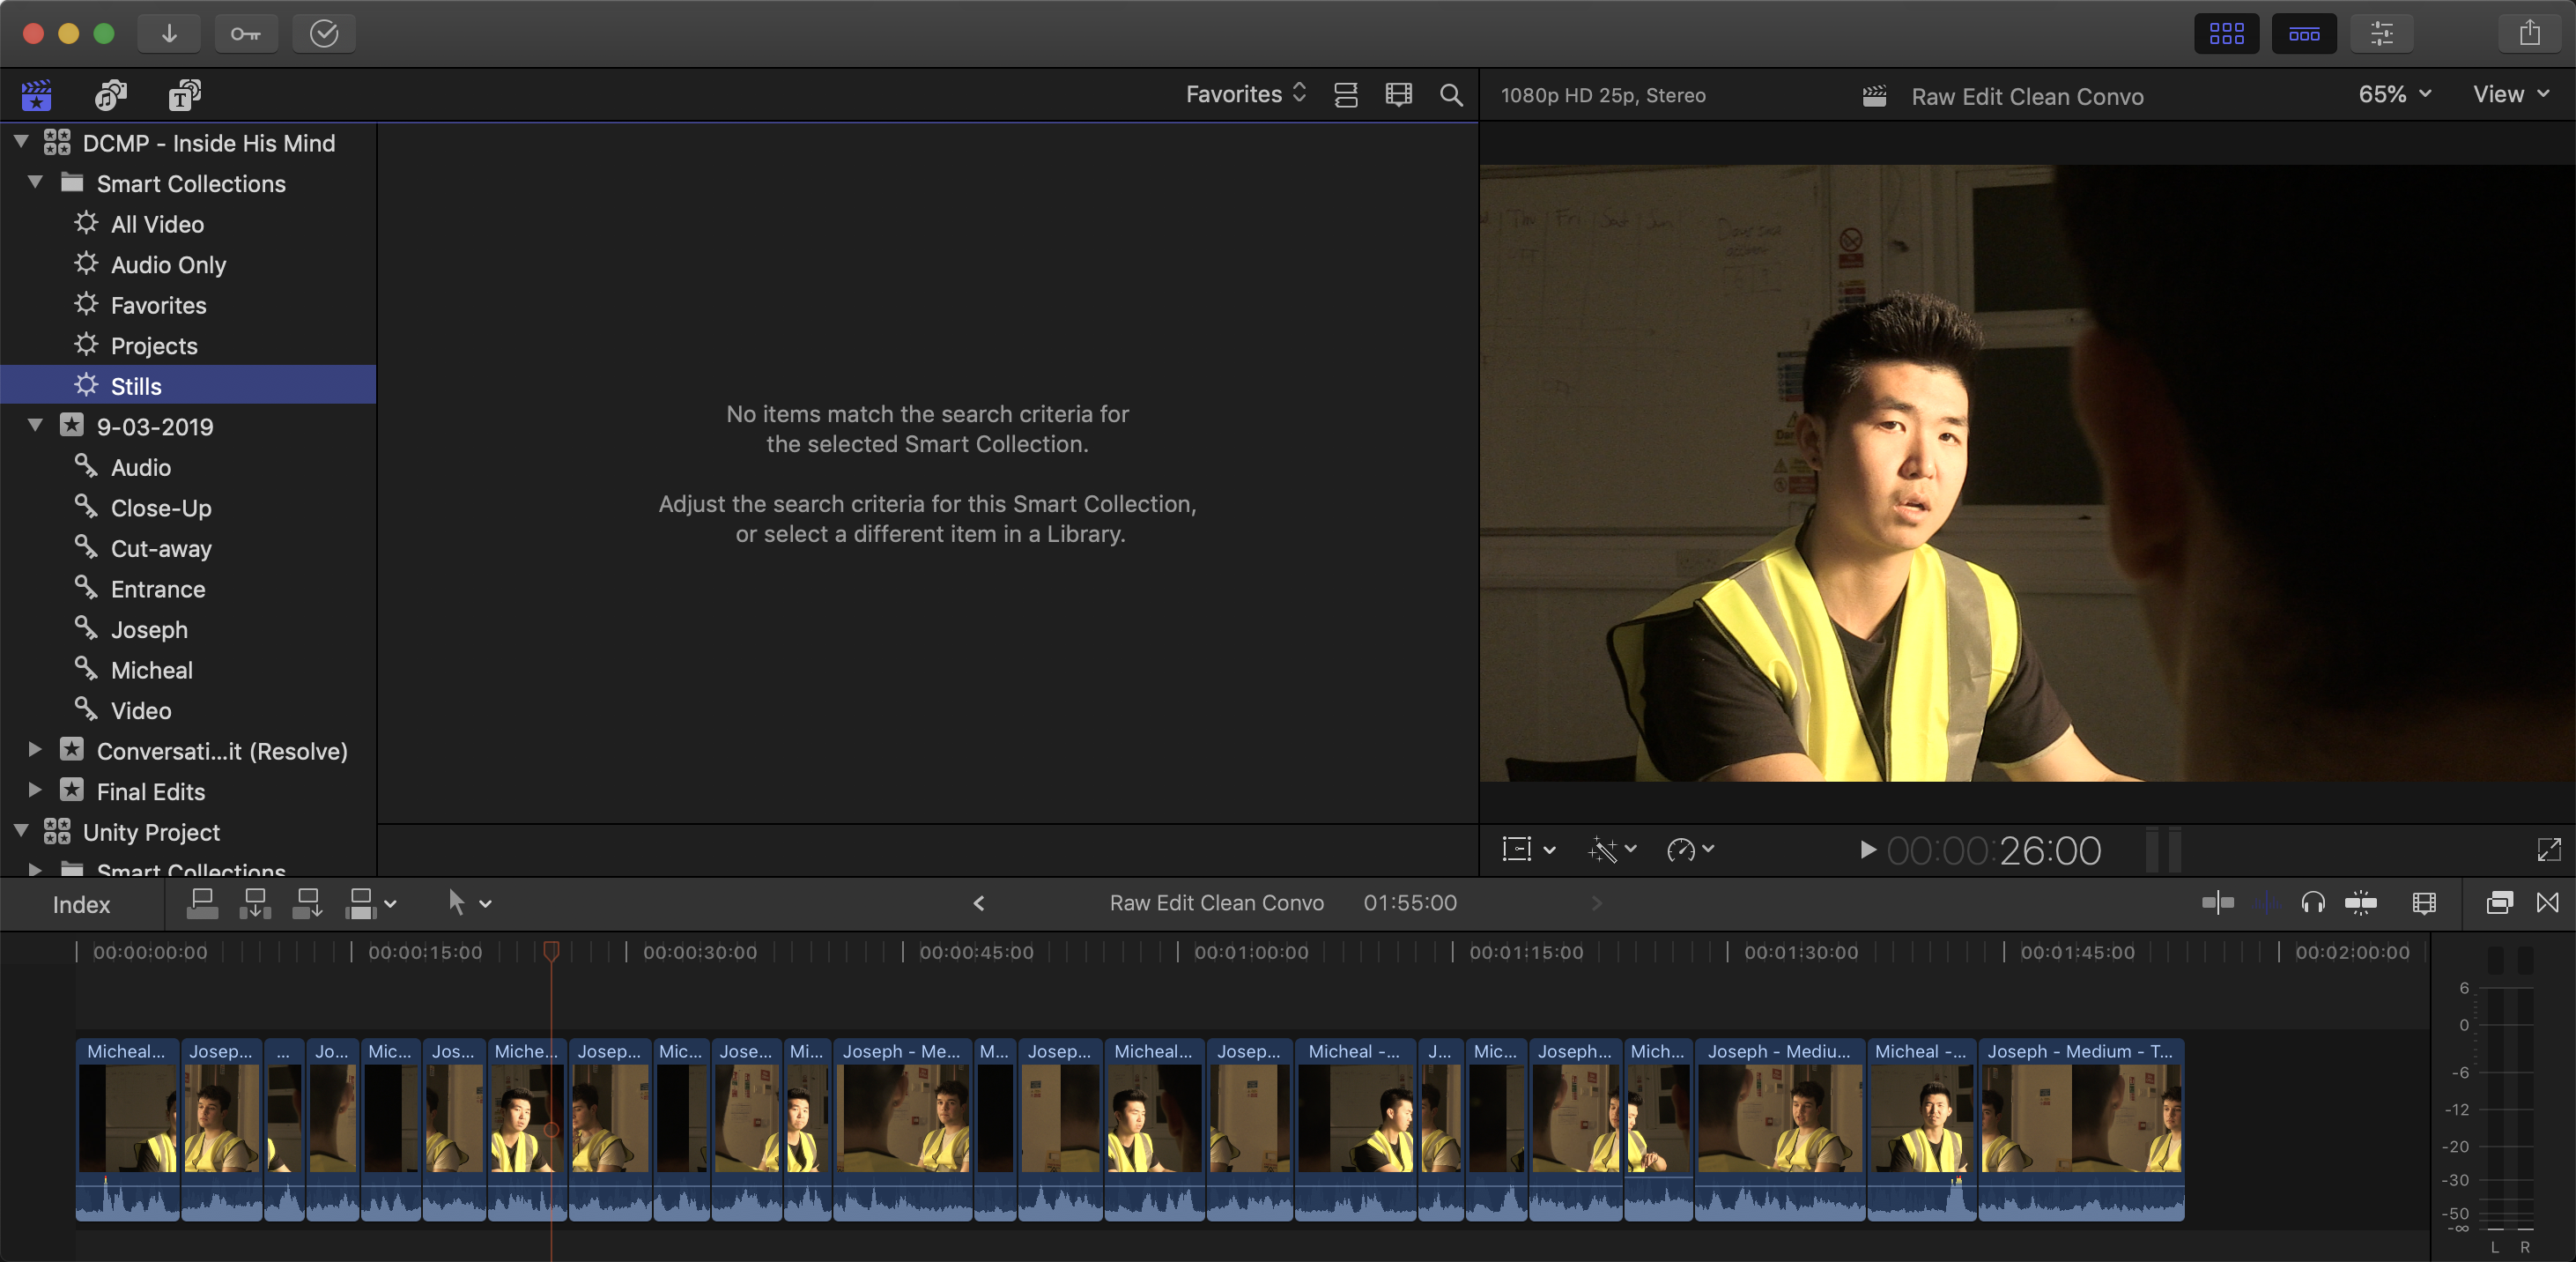
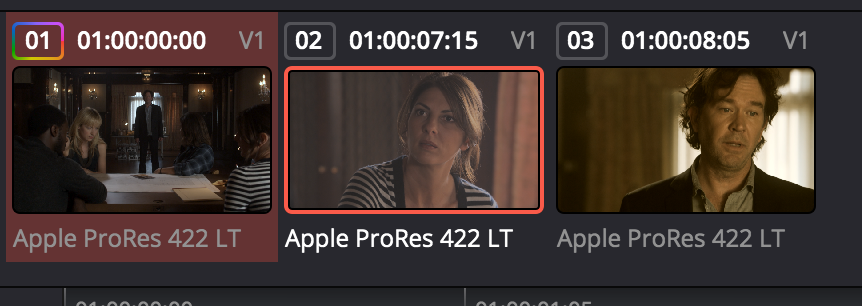
The footage I was given.
Each character was shot over the shoulder, with a Medium and Close Up Angle. There was also a hand handed shot of following the character walking through the door was filmed too, Unfortunately, the revere angle was only filmed with the character sat down and cutting between them it would break continuity.
I could not use one angle of the entrance shot as i felt was too long and too shaky. So cutting to a scene of him already sitting down would break the continuity. And using that shot of the entrance one angel in the conversation would have had to be used for too long.
One of the actors had noted and was in the recorded shots and would it make more sense to recording the opposite side with him walking in rather than already sitting down. However, the Director of Photography had noted that it is not a problem and it would be fixed in the post with the needed cut.
As the team were recording a short film for the first time, professionalism was lacking. Many of the team members continued to have a conversation during the filming and this was present in the sound that was recorded.
Group Organisation for Pre-production
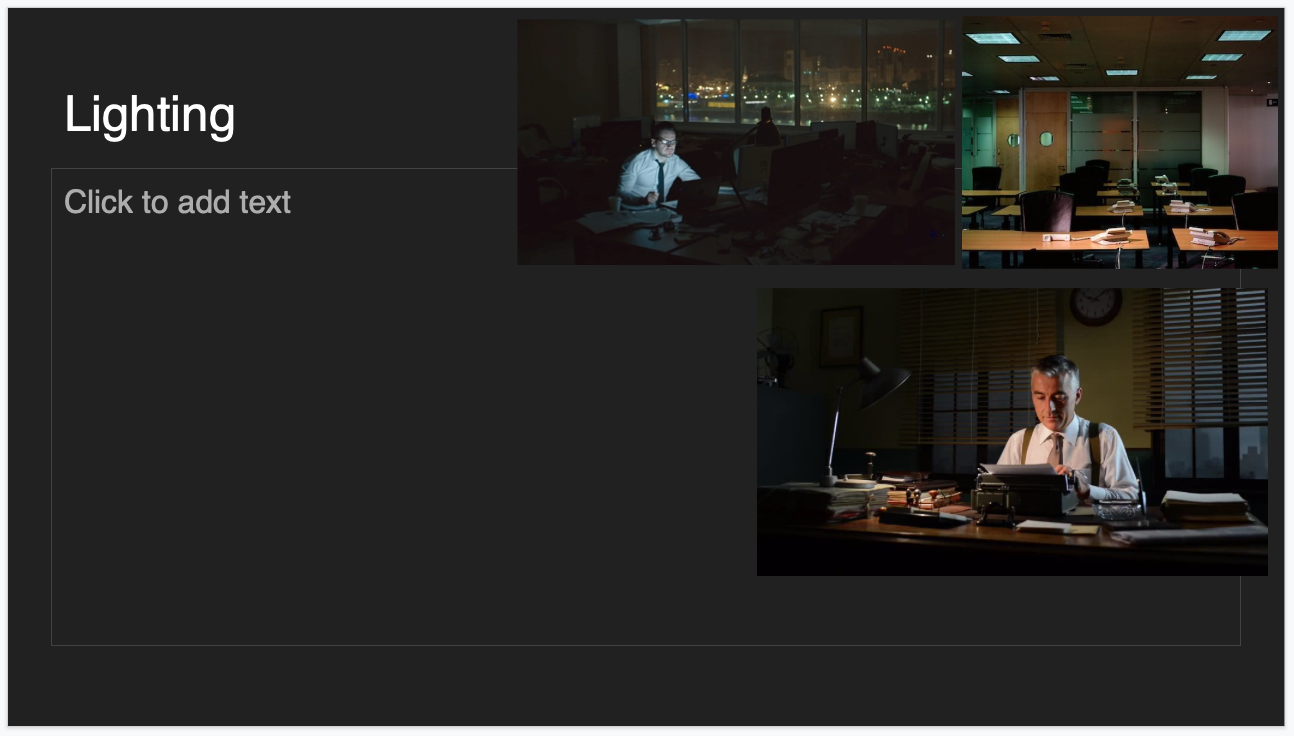
I Was informed that many issues arose during the shoot. A decision was made on the night of filming that they would be fixed in post. the second character was not light the same way as the first. I was informed that there were many issues. It had started to rain and this made leaving the light outside.
Seeing lighting with the naked eye is very different from seeing how the camera picks the light. Each camera has a different sensitivity. It is always easier to Overexpose and light a sense and decrease the brightness during the post-production stage to keep more of the details with how the footage is compressed while recording to the codec.
The director was not Involved with the actors and many of the direction was given by the producer or Director of photography and this made their own job more complicated. the Delegation and understanding of roles were mixed and therefore the efficiency of the group working together was not at its optimal. This led to mistakes.
We had decided to meet on Tuesday few days before the Crit. and i can show the group what i have rough cut and what i can change to achieve the directors vision.
Seeing the footage I was given, I found it hard to mentally construct the conversation scene as the director intended. This was the main section of the film.
Normally in a production majority of the footage recorded does not end up in the final edit. There was a total of 22min recorded. The final project did not have an estimated length.
The idea I had when I started looking over the clips was to search what footage had great composition and that was lit well and sounded excellent. Foruntaunly in his occasion the majority of the actor's performance was not varied making labelling the logging easier.
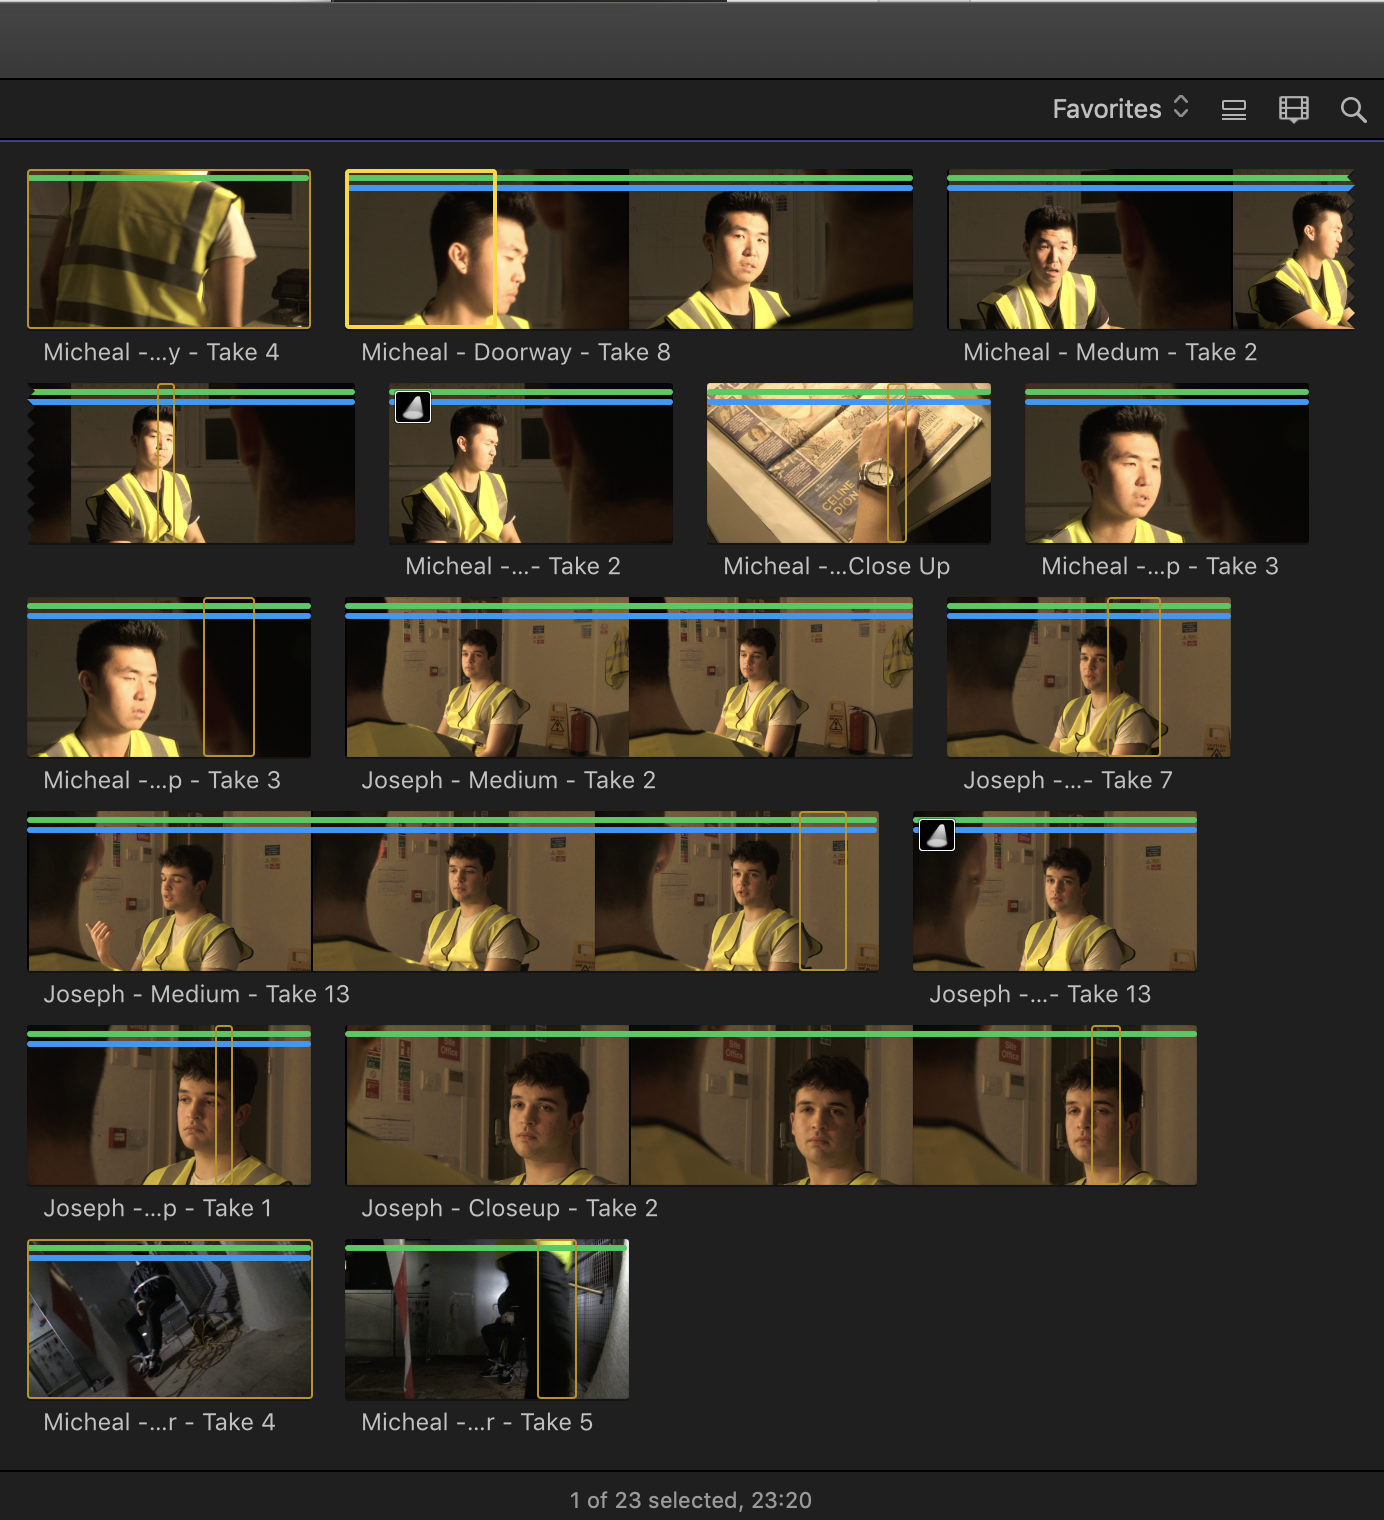
I looked at every clip and start to label and tag each clip and each section that stood out to me. Using the final cut pro keyword system, I start adding a favourite section and rejects out that were not acceptable.
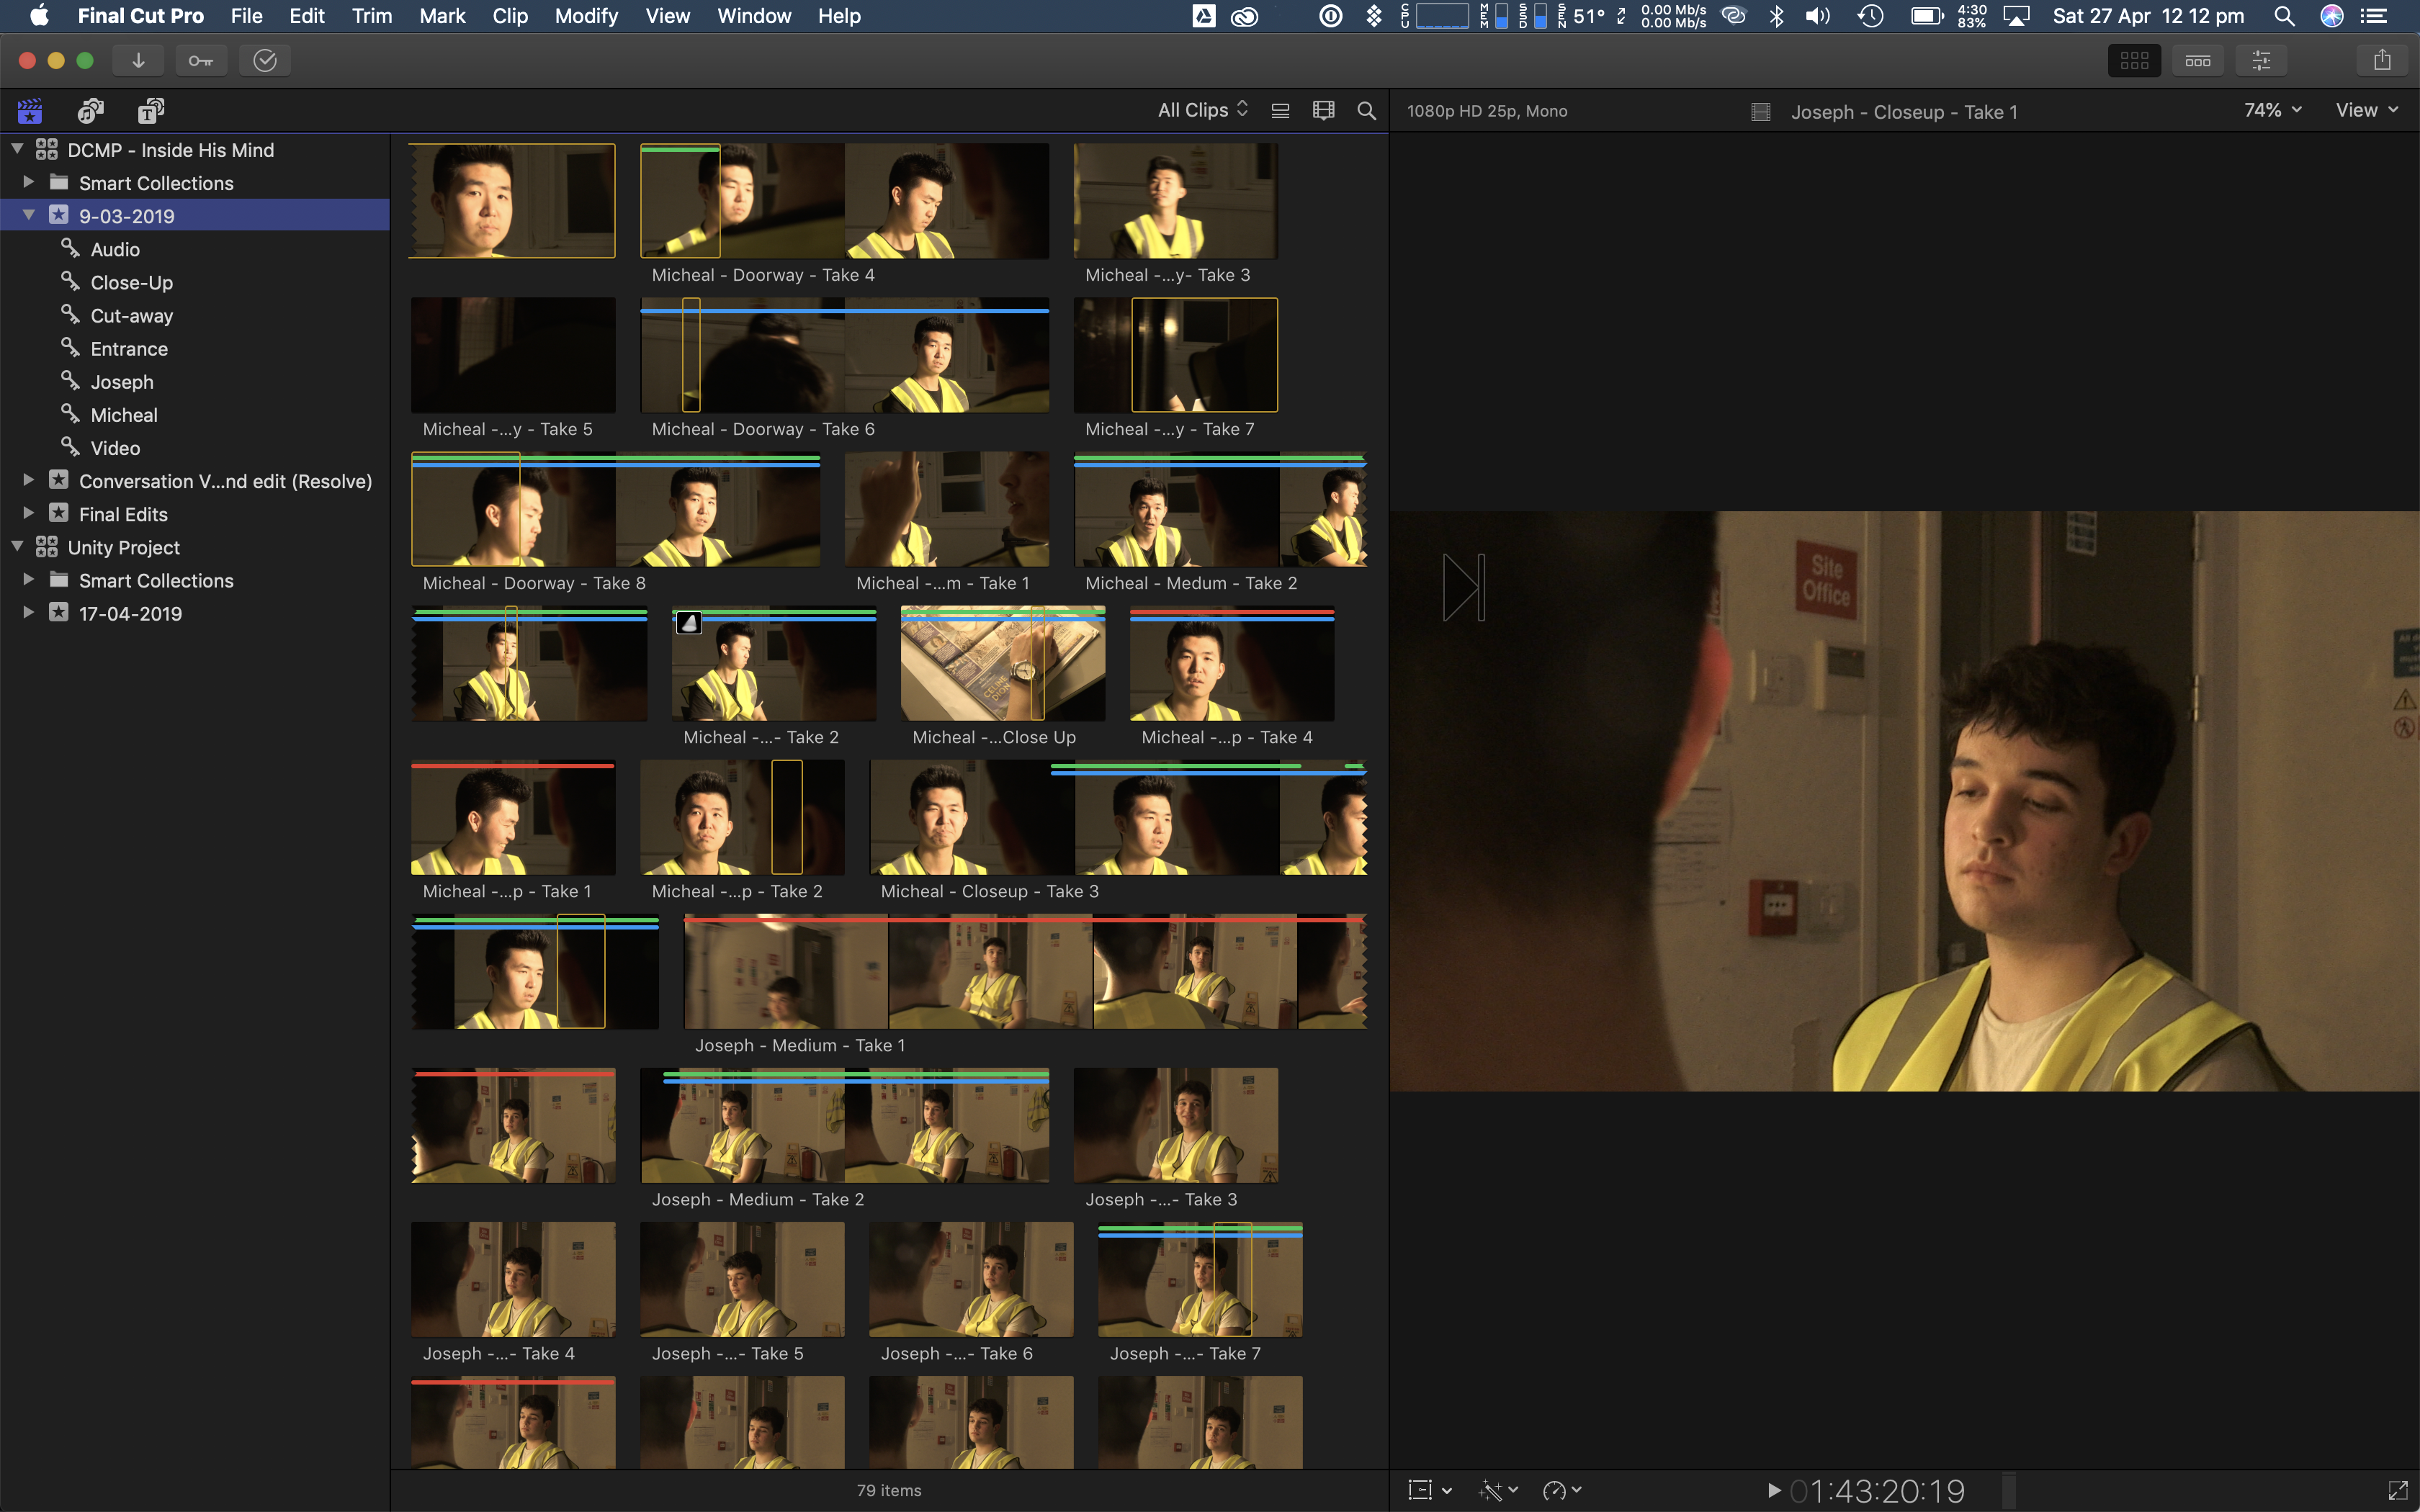
After viewing all the footage. I had noticed that I only had almost 3 minutes and 30 seconds of usable and acceptable footage from the conversation scene.
I felt like i had little material to make the best scene out of, but this should not be a problem when I have a better perspective if the final product that I could achieve.
Day of filming. As the Group decided to film in the evening, This means starting the recording the conversation scene in the dark. The majority of the filming was delayed until the evening time. as stated before, however for an aesthetic reason did not happen. Starting at an earlier time would have given more of the day to reshoot anything if needed and to be prepared with extra time if something had not gone to plan.
I was able to be present during the day of the shoot and I would be able to help out with the sound until around 6 pm. I had talked with our assistant director to take over the sound recording when I had to leave. I showed him how to read and adjust the sound levels. Also to watch out for where the directional microphone is pointed, as this would affect the volume of the conversation.
During the day all the cut aways would needed to be filmed
- Cleaning over the sink
- Arranging the tools
- Teing up the Victim
- Preparing equipment such as rope.
The Director of Photography and I had ended doing most of these shots ourselves with the ability we had. The first shot, Washing and Cleaning over the sink, Only the Director, the Director of Photographer and myself. Had gone to the Blue Shed to film at the sink. While the rest of the time complete the set design, Which should have been completed the previous day, also this too much longer as the majority of the group and spend working hours socialising and having chats about topics other than the film production this decreased the effective time we had for work.
Unfortunately, many of the scenes above were filmed without the Director and whilst everyone having a conversation in the background. The attention and motivation seemed to be less after the first scene was completed.
The scene of the tool was done while people were having a conversation that meant the sound was not usable. This seems to be the outcome of many of the shots. The Recording of coiling the rope was recording outside. Therefore the traffic sound was picked up by the microphone. As the University is situated near a hospital, the majority of the time there were sirens in the background audio.
By the time all the extra shots were complete, the group had started to wait for the sun to set. I had left the team at this point.
At the end of the shoot, the footage would be uploaded to a Shared Google Drive for everyone to access and for me to start logging and ingesting the footage.
From the experience of the rehearsal shoot, There seems to be disorganisation and demotivation from the Director to direct the actors. and help them and motivated them to get the best action. The actors were left to their own accord to act how they believed was necessary. This Created a very... simple and basic emotional performance. They had not received instruction to pause or take a breath pace out the converstaion event to try something different. The only decision that was made was to swap the actors. Because one of the action English was their second language. It added to the character of the killer as he seems nervous and words were difficult for him to say.
None of the team made notes down the shots they were decided to be filmed. Only the blocking was rehearsed and discussed. On the rehearsal day many of different camera nagels or movements we had planned to try it was decided that it would be left out and left to try on the day of shooting. I had wanted to try to Film a rehearsal shoot and watch together as a team on a monitor with sound to see what we are able to achieve. As for many of the group it was their first time using such filming equipment. It would be an excellent stage to iron out any issues for the actual day of filming.
If each member of the group was motivated by their role and pushed to get the best this production would run smoothly with not issues.
Story Board
The Director had created a Storyboard, Drawn by Hand on the day of rehearsal. However, this Storyboard was not shared or explained to the team. I found it very hard to converse with the Director to fully understand what the image they had imagined for this short film. It was Promised to us the storyboard would be Scanned and upload to be shared with everyone.
However, I had never received the Storyboard and never really knew how to go shot by shot and what structure I should follow when I start to edit.
Completed Risk assessment for Filming in the Portakabin.
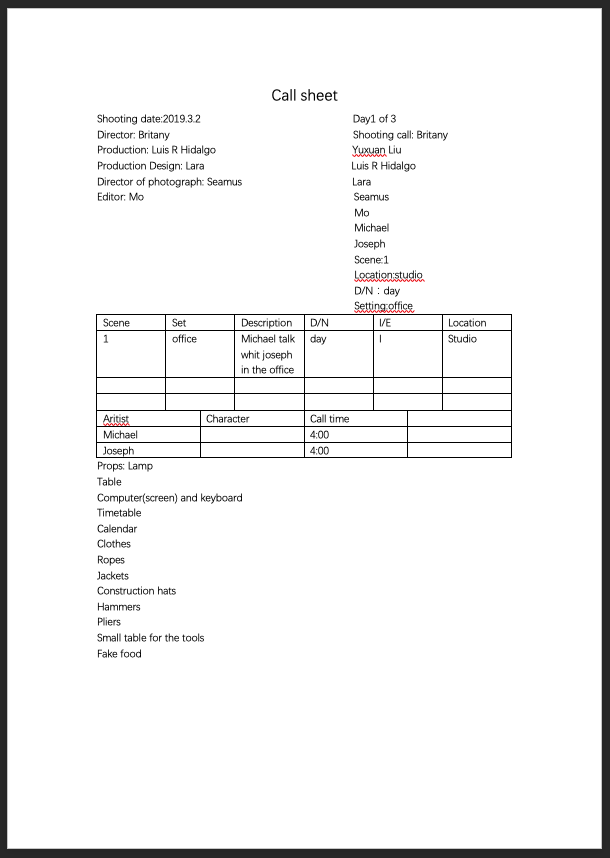
Call Sheet for Filming
Completed Treatment


Unfortunatly, Not all the treatment was complete by team. Some of the treatment was not completed by the respective roles.
The Producer and Director decided to meet few days before the scheduled film shoot. We met with the equipment Camera, Lights and Microphone Boom. This made blocking camera positions and movement much easier.
I would have recommended to actually record some test foot and view it back on monitor to review the blocking and shot composition. This would have been helpful in achieving the best outcomes for our final shots.
Looking at the area we have to film in, here we decided that the best way for the characters to enter and how they interact with each other.
We tested different ways for the characters to enter... what action they could be doing. We had tested the conversation happening the end of the day/shift or during break time. But we decided due to the nature of the theme being a thriller it made sense that it was after the end of the day. In the evening when fewer people/colleagues are around.
The set was started to be put together by the production designer, Printing safety signs and buying High Visibility vests to add to the nature of room being a Construction Site office.
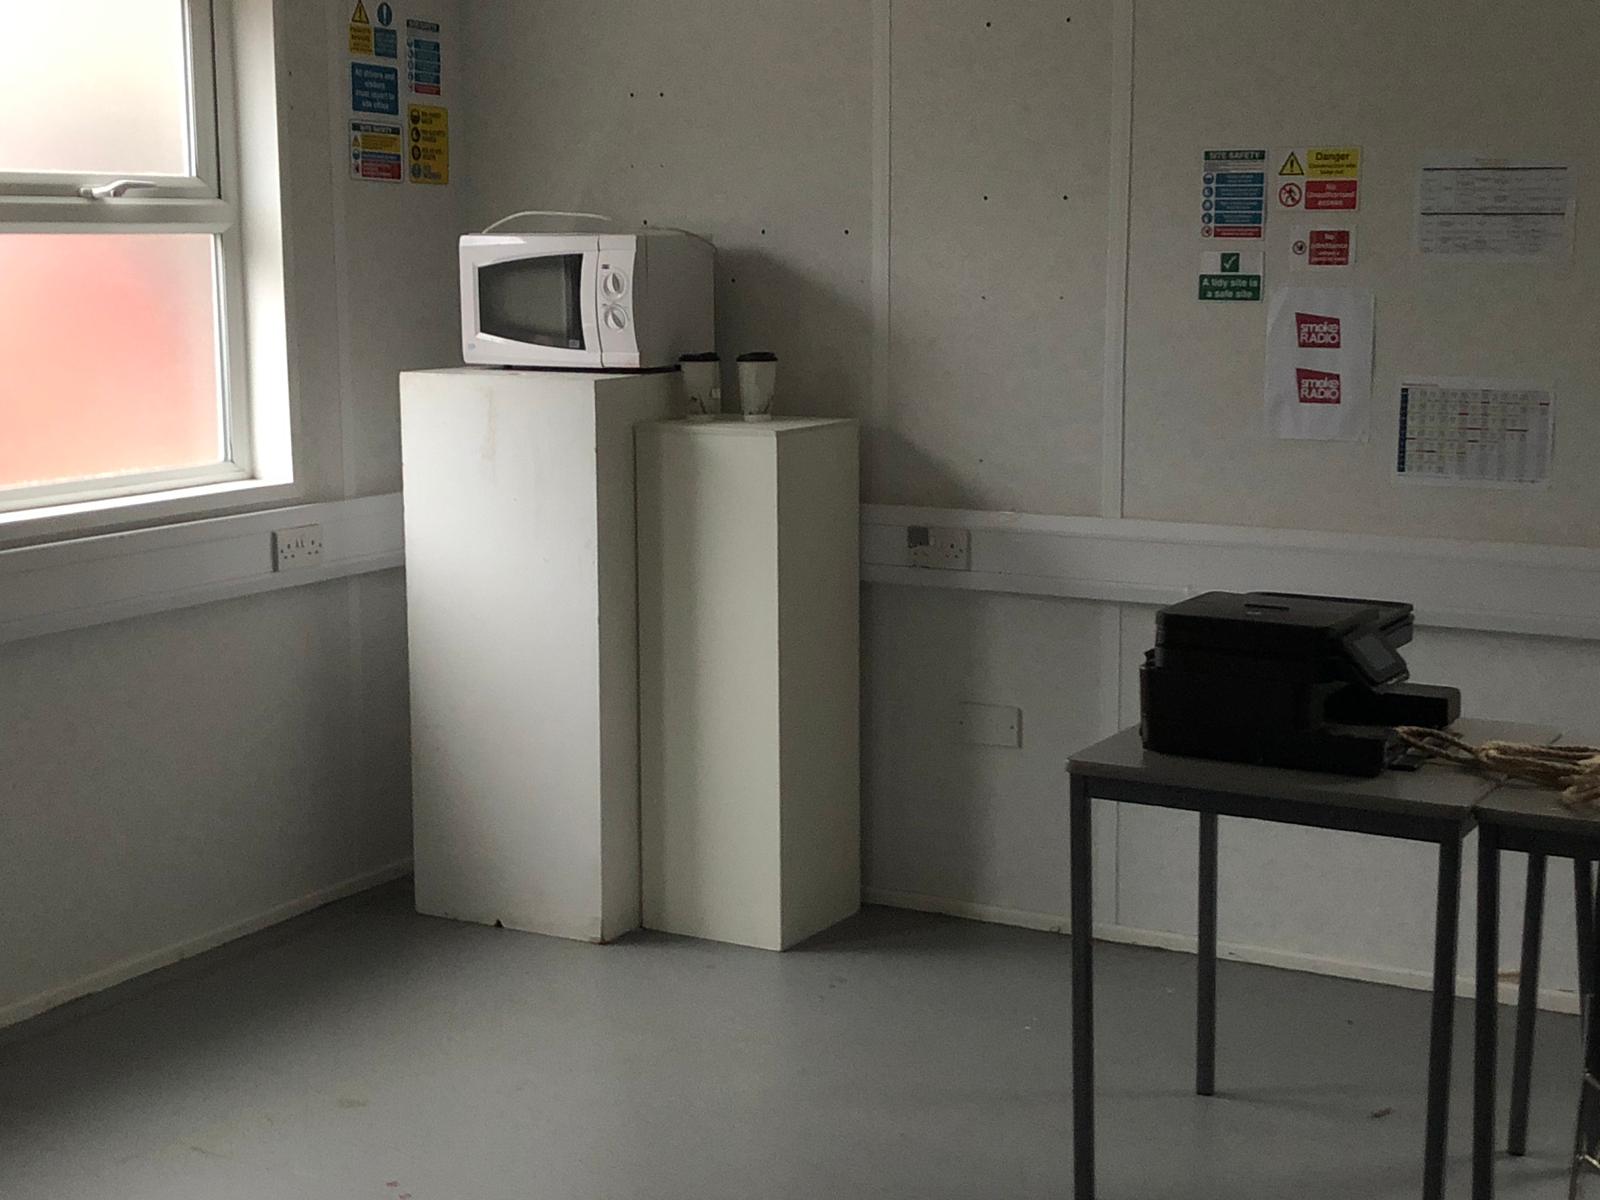
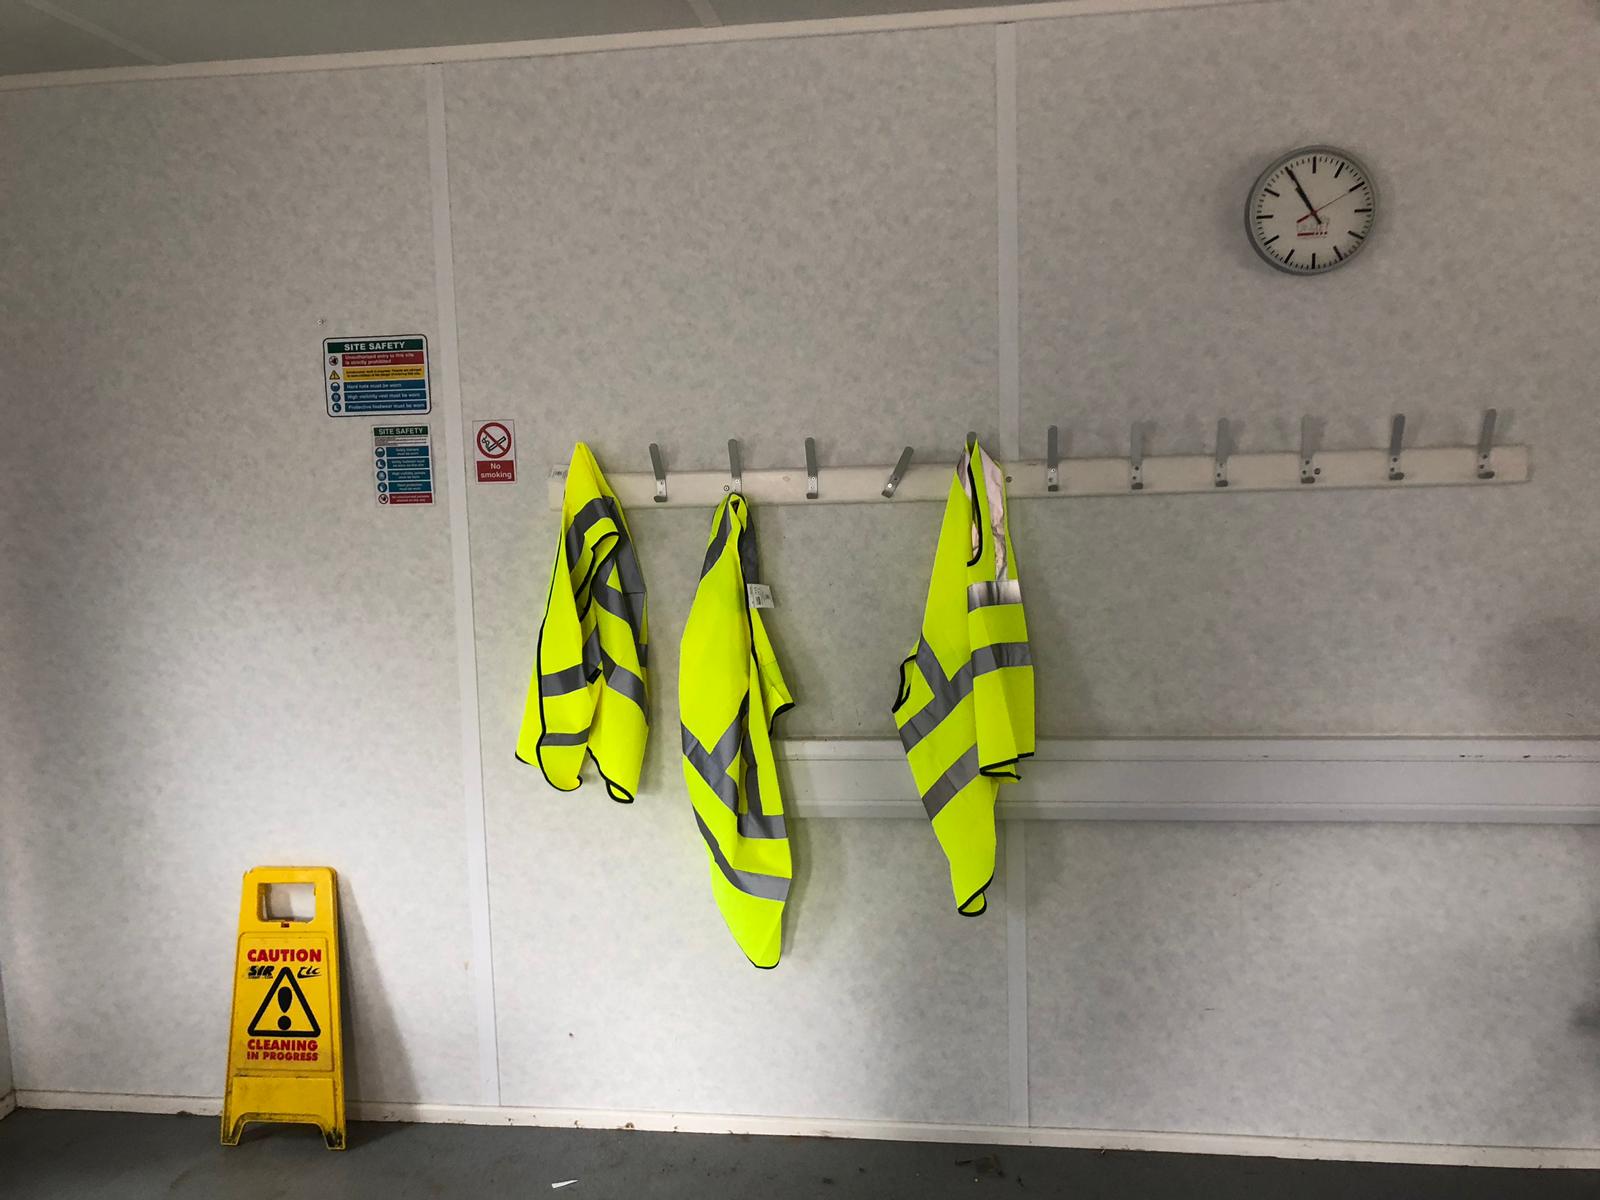
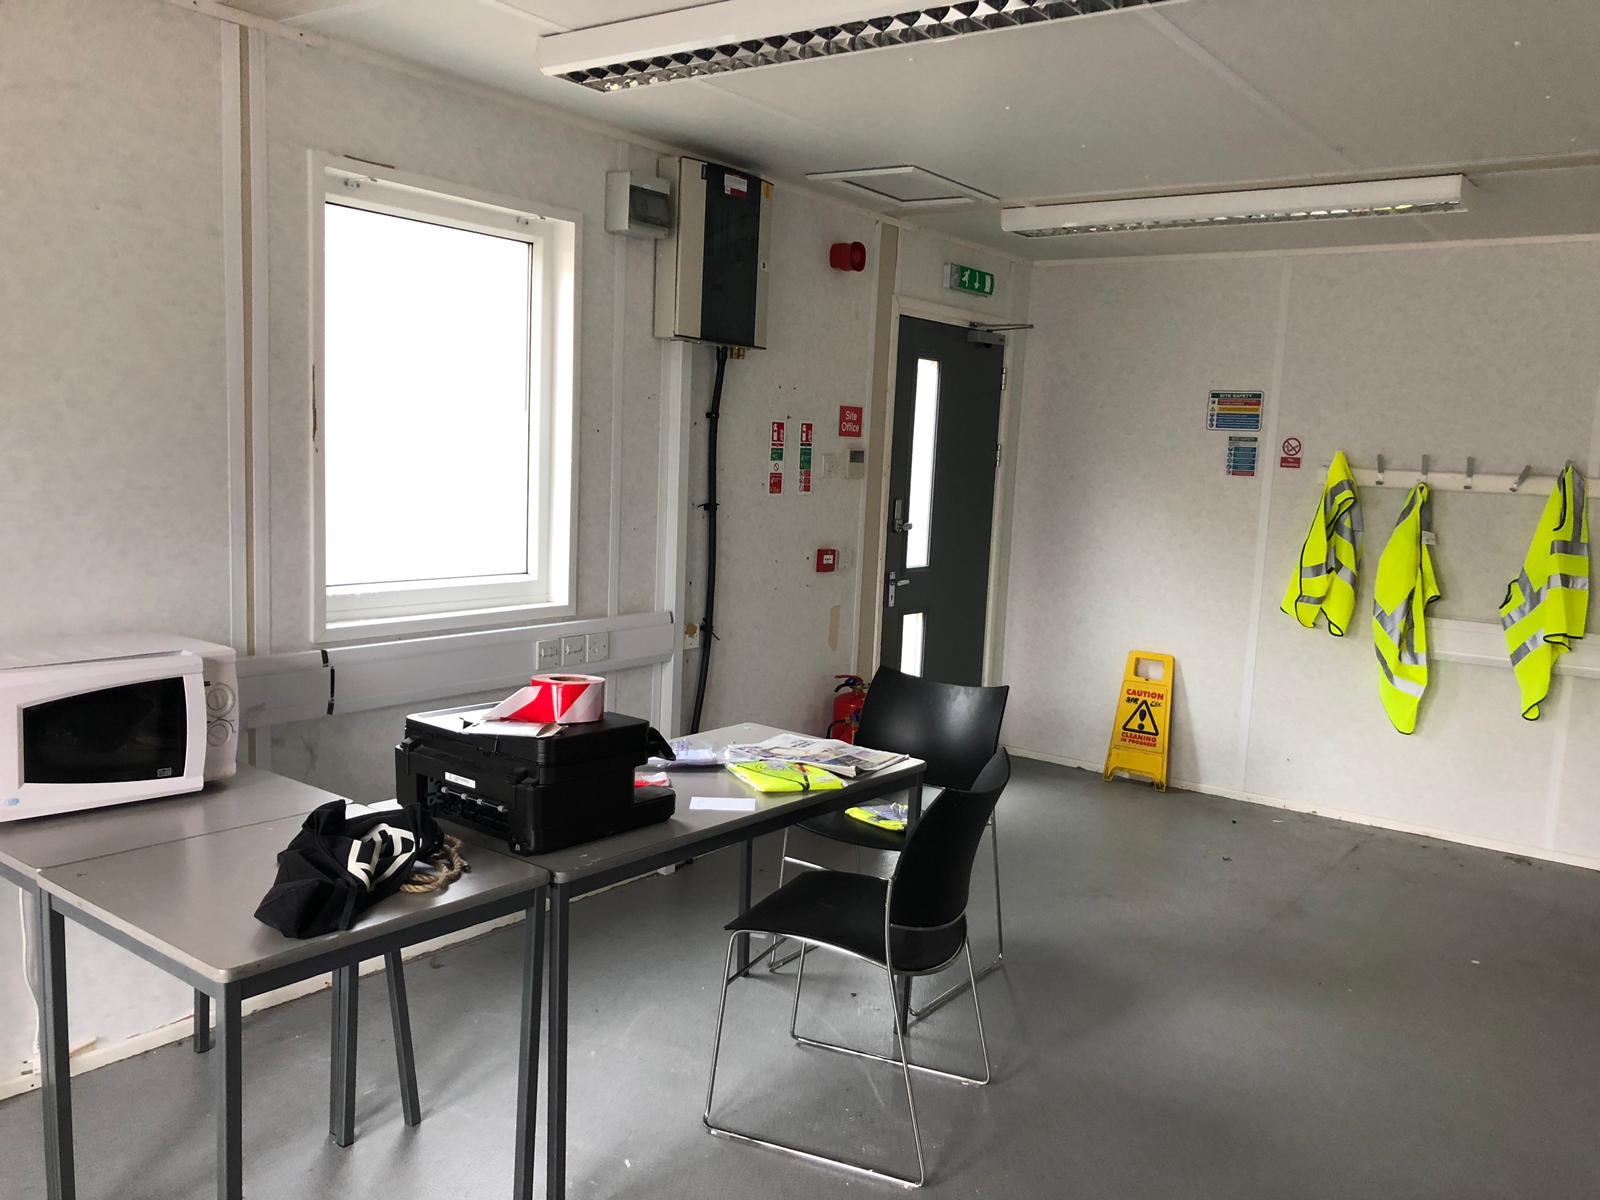

The Set is starting to come together, Simple items create the intent atmosphere and look needed to convert the room to a construction site office.
Further Workshop - Idea discussion and shoot planning.
As the editor for the team. I need to work closely with the director to recreate the image and vision with editing.
I would need to create the necessary pace, using cuts to create the necessary emotion, that is intended to be protraied in the scene.
Some of my responsibilities are but not inclusive:
- Sound (Conversation/ ambient/ Sound effects)
- Cutting
- Colour Correction
- Colour Grading
In this sessions the group members changes, there for roles has to be swapped around, to accomodate new students who where not there in the 1st week.
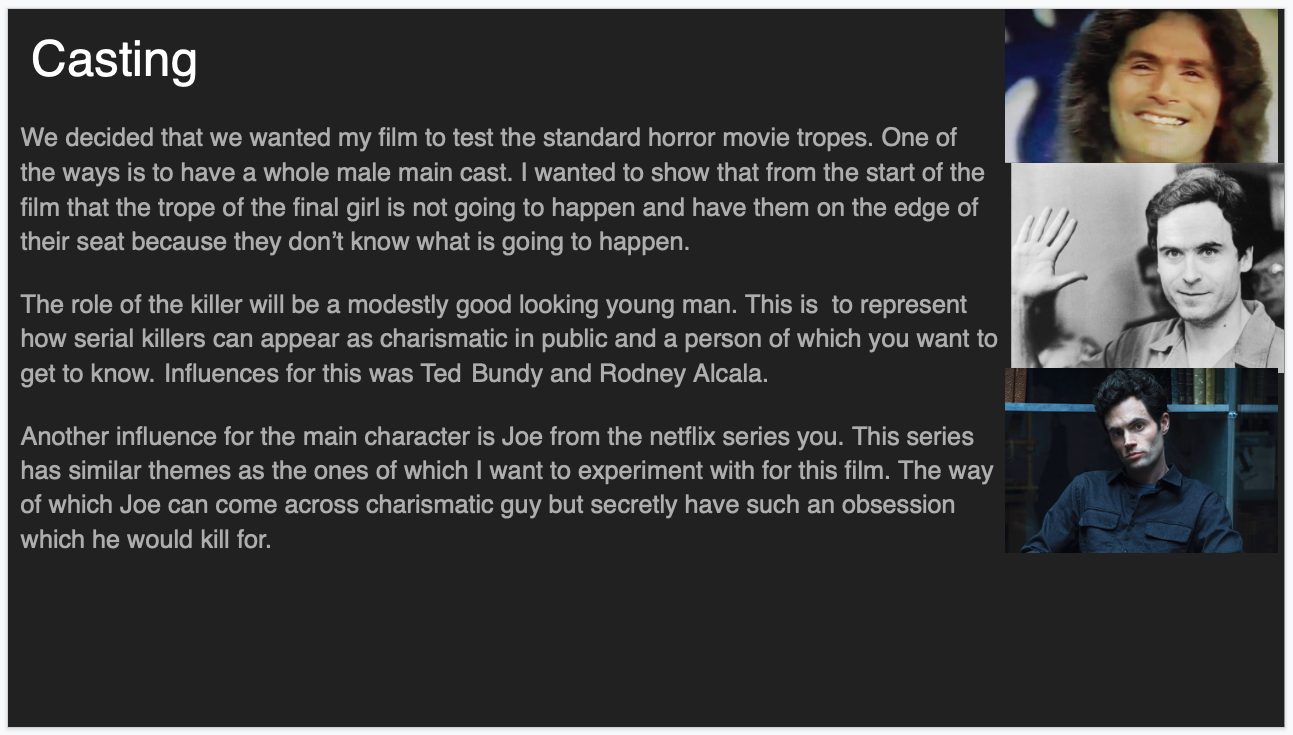
The idea for the script change and the ground finally decided to focus on a thriller themed scene. One of the characters is a Killer and the other unaware asking unassuming mundian questions, however the killer begins to feel interogated.
With the use of flashback, to show that the newspaper was intended to be used in one of his murders.
At this current stage the ground was not sure if the flashback, should go to the past to show. a previous killer or to the future to show what the killer intends to do with the character asking the questions.
The Group was motivated in working together and listening to each person perspective and opinion. A whats-app group chat was created with everyone in the group to ease communicating.
The Production designer decided to film the majority of the scene in the PortaKabin and not in the Blue Shed. This added extra logistics of getting the key to the Kabin on the needed dates and to make sure there are not classes with other courses if they are using it.
Below is A document created by the group.
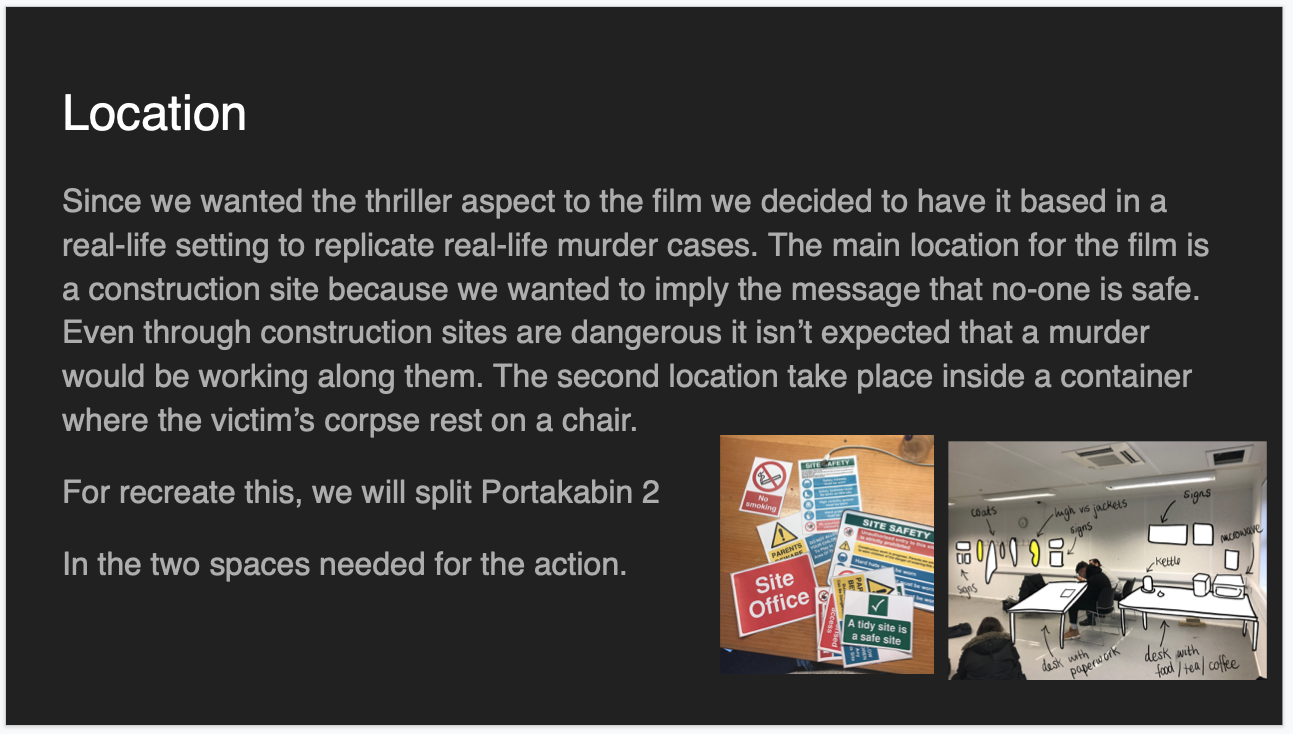
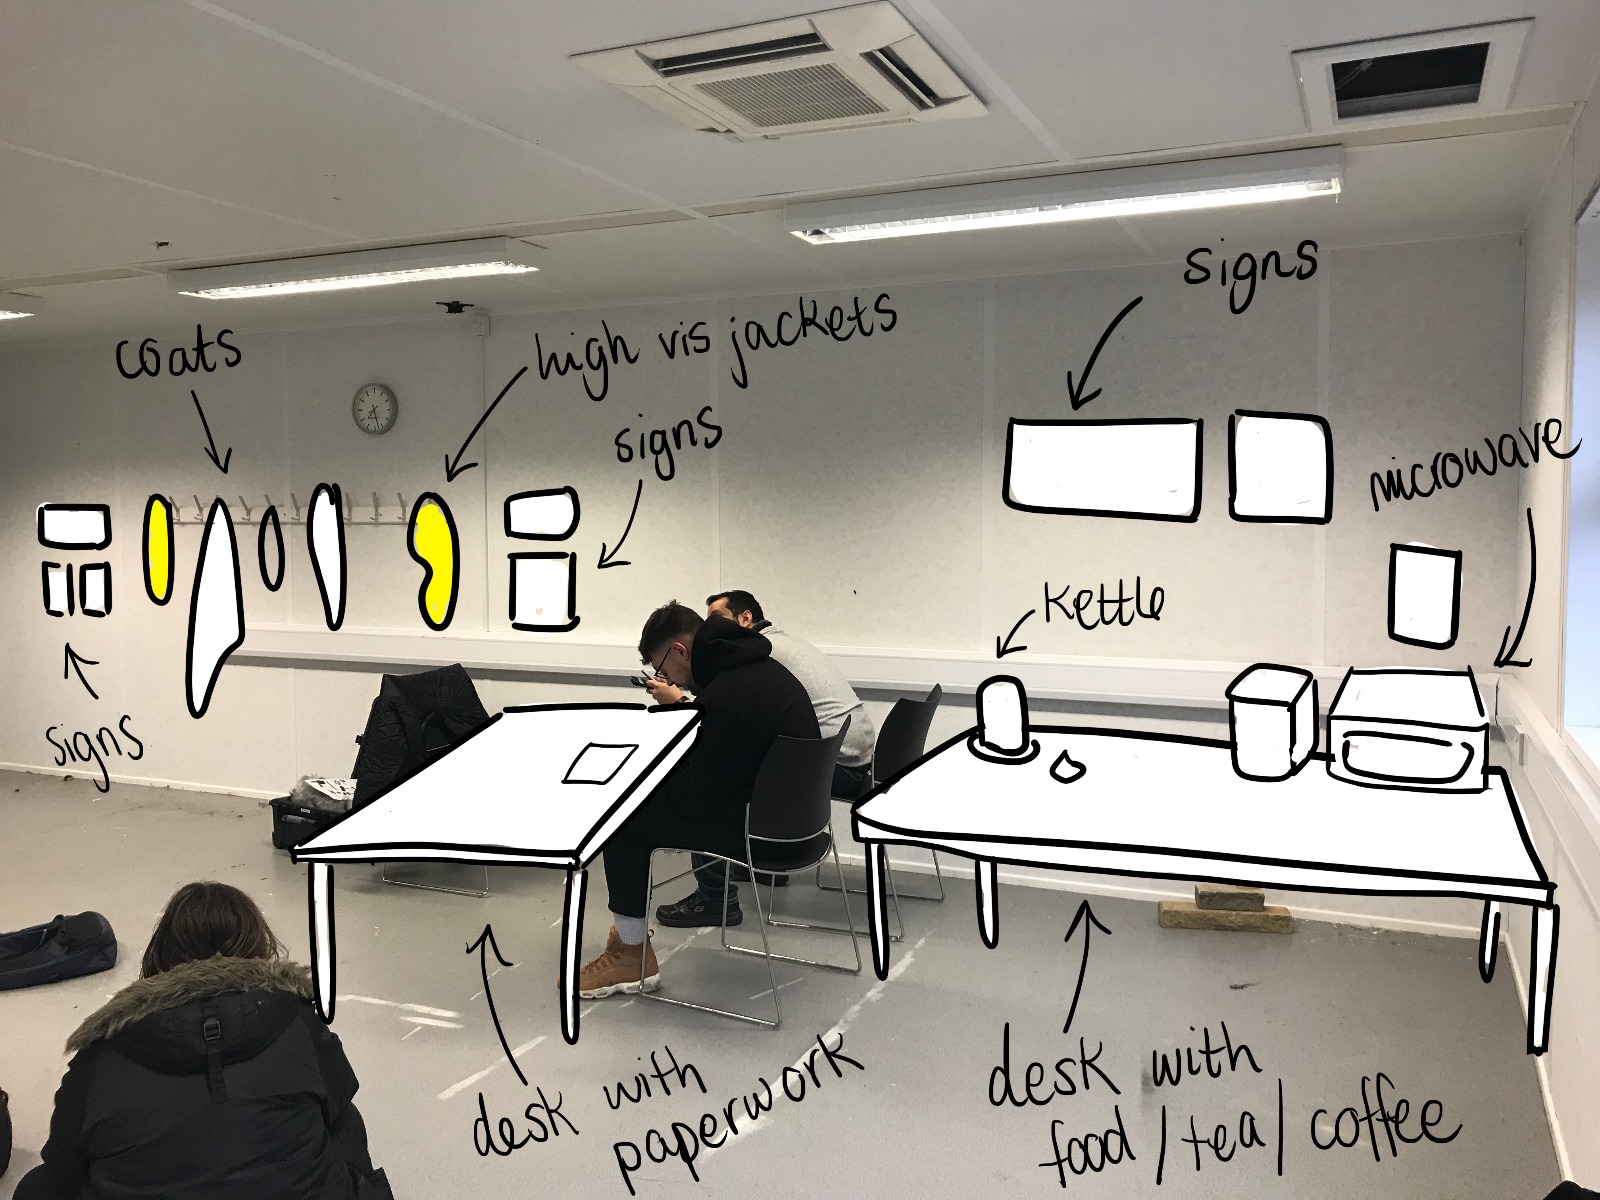
The Production designer had start placing an idea of how thing will look like with in the PortaKabin. They created an image below:
DaVinci Resolve Software
Introduction to Davinci Resolve, not only it is a colour software, it is able to be used as a fully fledge editing software. Able to ingest media and manipulate video, with many video and audio tracks.
- Can edit in any software after edit is complete and after has the ability Transfer/import project files into DaVinci,
- Colour Grading is the over all term to correcting image aesthetics
- Done on original clips in full quality
- Sometimes can be done before the edit start
- Colour grading is Divide into two parts
- 1 - Correct colour/white balance
- Correct mistake on recording
- 2 - Stylisation and grading
- Warm cool, high contrast and etc.
- To look blue/cold can be added and not done in Pre-Production.
- Warm cool, high contrast and etc.
- 1 - Correct colour/white balance
- We never rely on looking at the image and our eyes
- Video looks different on many different types screen.
- Many Screen are monitors which are optimised for text display.
- There are other screen that are optimised for video.
- There are Many different verity of calibrated screens - each output a different colour quality.
- Edit suite consist of:
- At least 1 computer Monitor
- Small video monitor on desk
- And large video monitor, usually on top or to the side.
It is normal to transfer media and project files into DaVinci Resolve and colour grade the media. The Interface with in DaVinci.
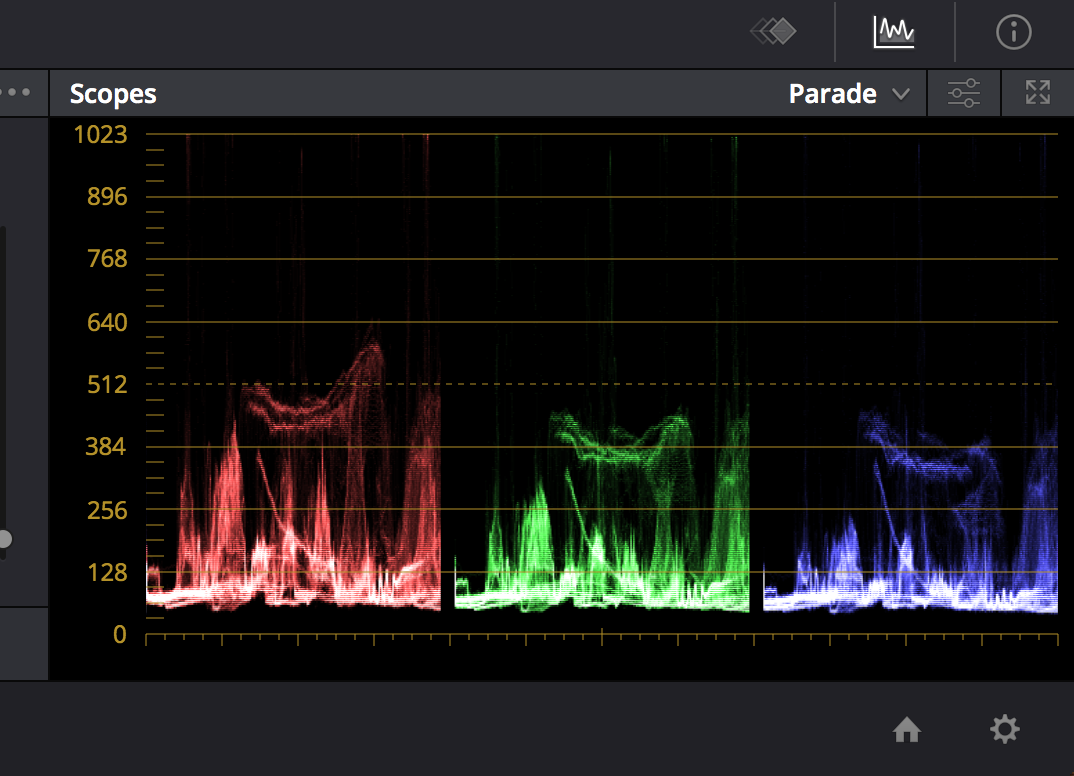
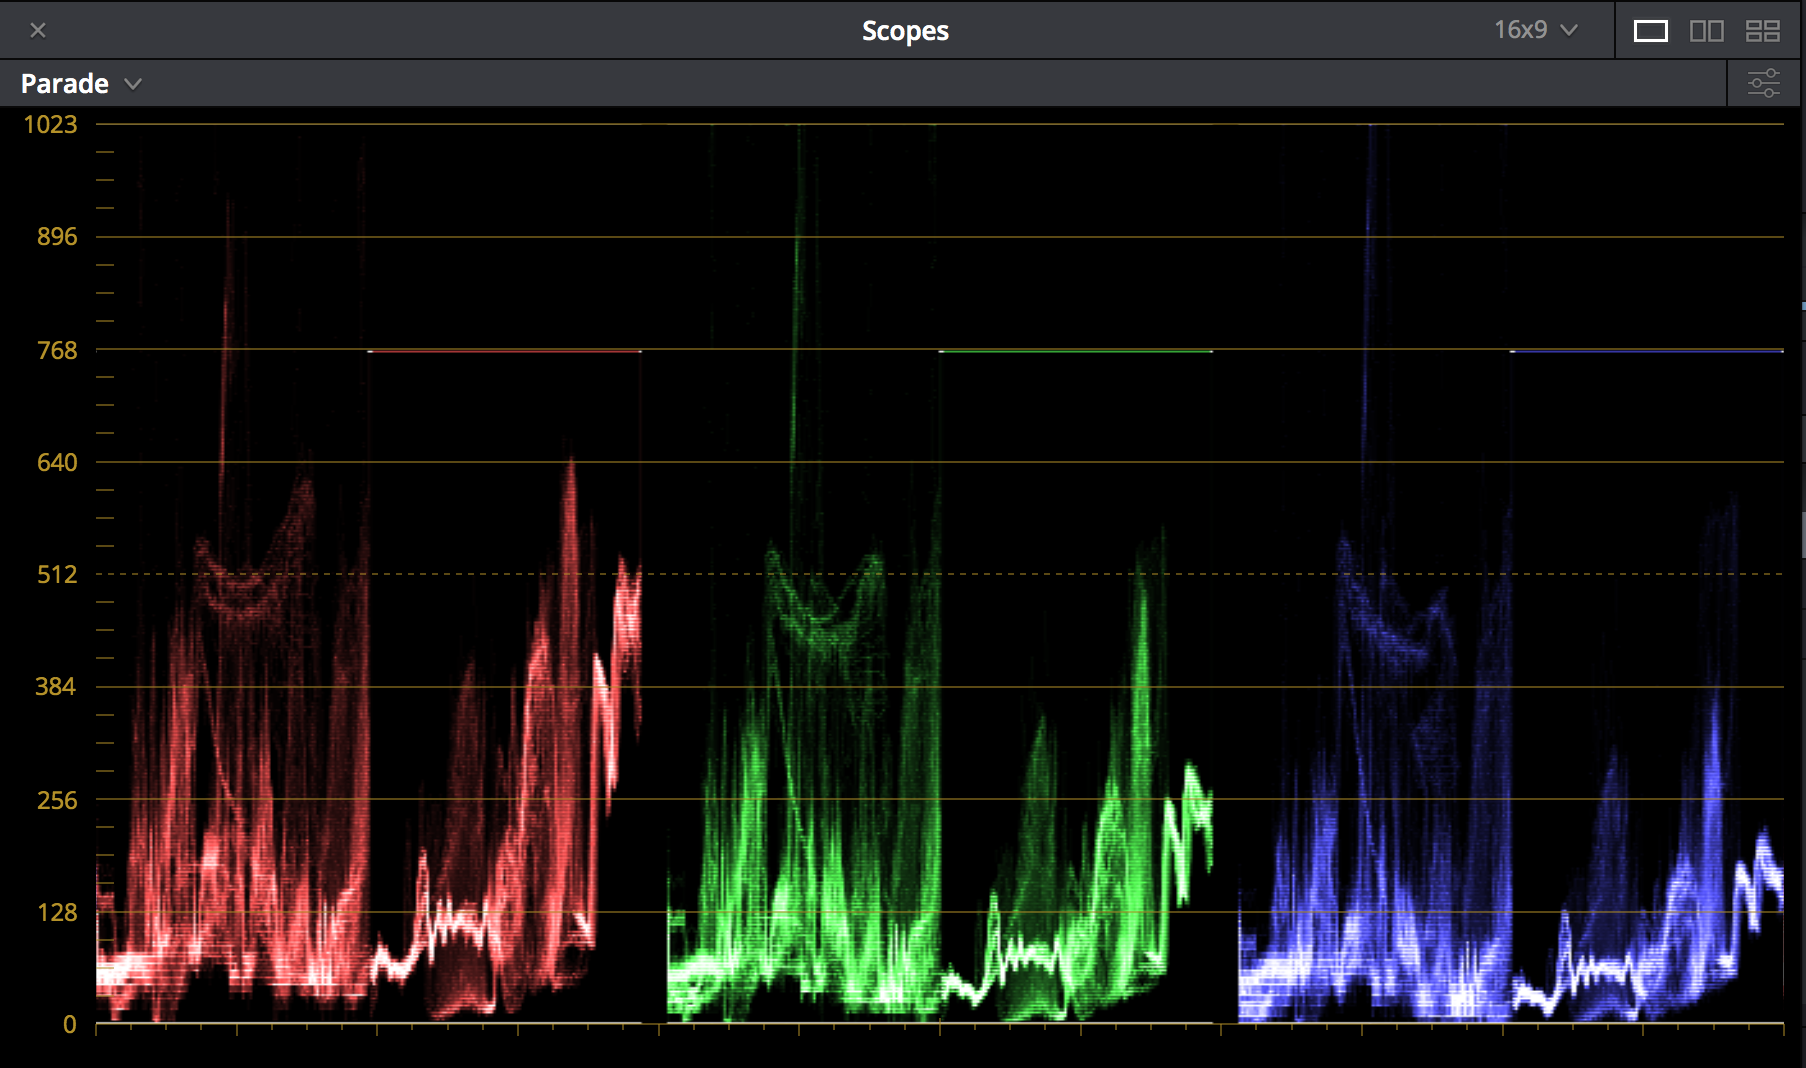
RGB parade
They represent the image from left to right. Button to top is luminous 0-1023 (100%) top line is white
Color Wheels
Making Adjustments
- 4 sets of control
- Lift - dark bits
- Gamma - mid tones
- Gain - Bright bits
- Offset - the whole image

- Always start with exposure first before changing colour settings
- Total image has a tone range - so black setting on the line.
- Shift - D :show before and after changes
- High of a RGB, mean that high colour in the parade means that colour is more predominate in the image.
- Question asked befoer starting colour balance. For items that should be white.
- To stylise, should white things be colour neutral or to have a tint of colour to them.
- Find colour correction
- Search something in image that is colour natural
- Search its repression in the Perade.
- Multipul Clips
- Viwing side by side
-
CMD command key and previous clip
- And select slept screen for side by side view
-
Grey box visual on parade for video output
-
Zero saturation colour nut-role for greyscale. No colour in image.
-
Using colour wheel
- Eyes taken away from image and can bus used confusing
- In the industry they don’t use the mouse
- They use a panel
- A Grading control interfaces
- They use a panel
- In the industry they don’t use the mouse
- Eyes taken away from image and can bus used confusing
-
Grading can be difficult to isolate colour tone is specific area of images
-
Option for linking grading to similar shots
- Making colour grading so much easier
- First option is copy and paste
- opther option is linking the changes to to all the other linked clips
- Using curves is same as previous.
- Y mean luminous / brightness
- Curves can add point to affect a narrow band (more detailed control)
- Isolate section with curves point to bring up flesh tones or other parts of an image.
Advanced Divici Resolve grading
- Different format and ability to colour grade
- Less bright area usual start to get noisy
- Compressing when shooting
- Less bright area usual start to get noisy
- Lower formate with compression
- Gain compression
- Shooting something in low light in pre-production
- When shooting with a highly compress format, and the increasing gain. There are artifact and noise in the image that cannot be removed.
- Easier to overexpose and then later to reduce in post production rather than underexpose and over expose in post-production
- With compressed formate can be graded well, when well lit during recording.
* Sampling with qualifier
- Can choose specific colours to change
- Adding a mask - subtle spot light on the face to bring out his facial features.
- When using people with backlight
- Using Window (adding masks)
- When using people with backlight
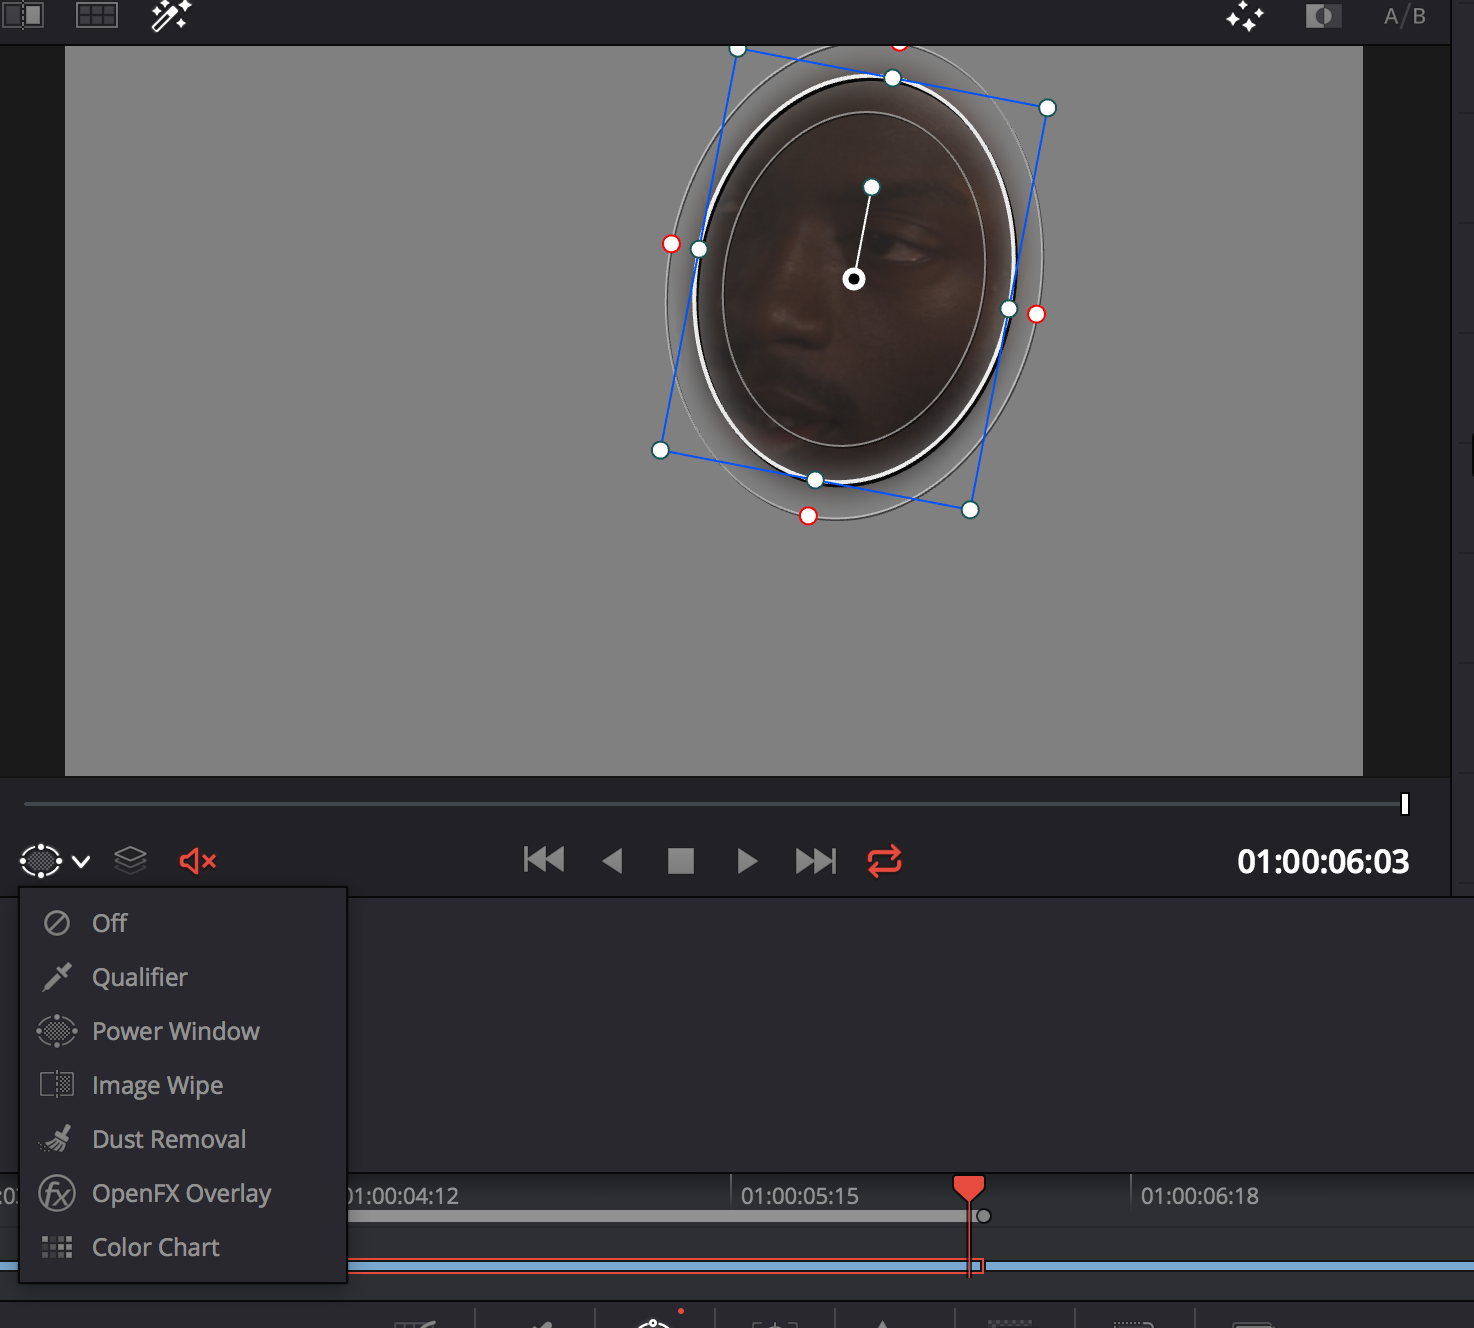
- Using feather to make smooth transition
- Adding a softness
- Masking the transition of the mask that is being applied
- Underexposing in postproduction is much easier and retain more detail.
- Overlight and all with filler and making enough a different in the key light and details.
- Adding a softness
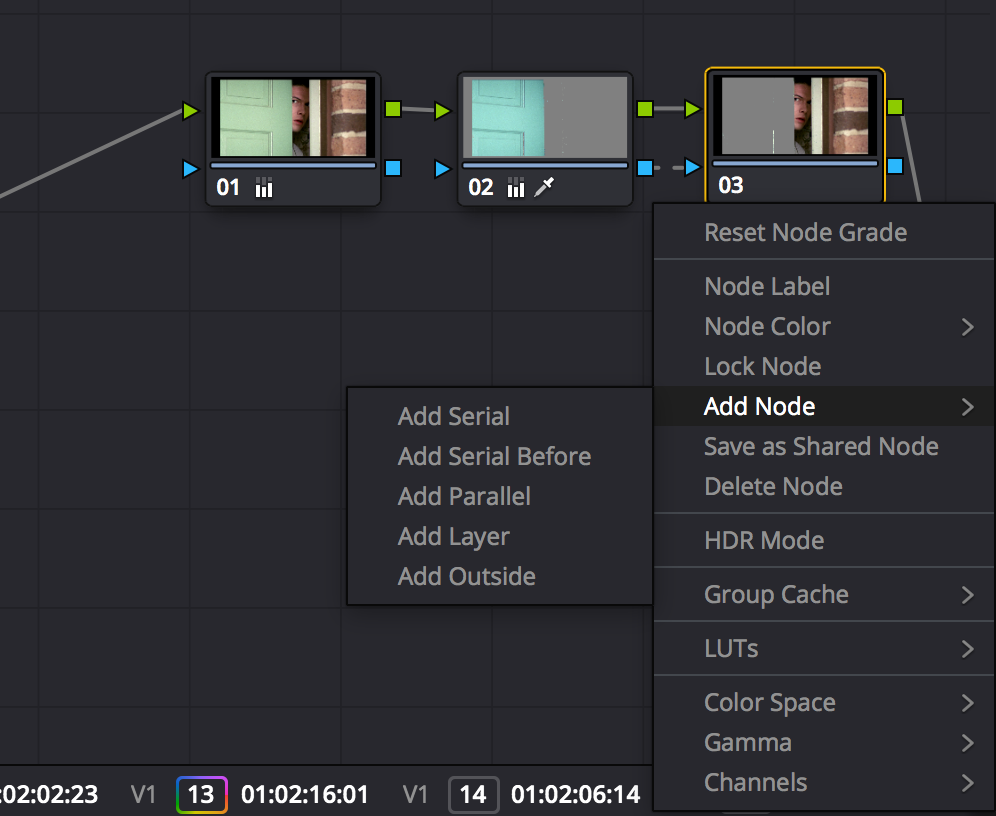
- Linking clips together to grade multiple clips together
- Links clip has chain symbol
- Creating multiple groups for each similar camera takes and angles.
- Group pre-clip is correction and not stylisation.

- Addition adjustment to individual change setting to clip
- Group post clip stylisation
- Pre clip to fix
- Post clip stylise
- Usuful shortcuts:
- Shift+D toggle on/off all colour correct
- CMD+D toggle on/off only select nodes
- Nodes are layers
- KEYFRAMING
- Exporting
- Deliver tab
Important Note: The scene Must include shot reverse shot.
Week 2 - Blocking & Seen Rehearsal Week 3 - Filming of the scene between Week 3 & 4 - Editing of video Week 4 - Film Crit with Pavel and other group.
We where given a script to read over. We where tasked to create a scene from the script.
Example ideas and treatment:
Treatment
- Idea of different aspect
- Image a whole visual word that transcends the scene.
The reason for the newspaper, its the son that buy the news new paper. His father passed away. And always his father bough a news paper everyday/ The son buys a news paper because he is holding onto its his father memory.
One example,
One character is dealing with loss.
Another Example:
Both Characters are dealing with loss.
Further examples:
Using Fight club as inspiration, One character talking to the other who is a figment of his own imagination. Trying to use camera end editing techniques to slowly show that the second character is not really there.
In This session we Discuss in detail different roles with-in a a production team and what it takes to make to put everything together to make meaning out of a scene.
What makes a scene
- The visual style and atmospher, so the emotion that comes through the story.
- All choices are made creativity. Mease-un-Scene.
- A single scene every good seem something is changes.
- So the story evolves scene by scene.
- Engaging
- There are certain strategies That help to hook people in and not let me be bored.
- Drama always interesting an engaging when something happens to the charactor.
- There are certain strategies That help to hook people in and not let me be bored.
- Dramatic tone
- Treatment
- Most traditional drama:
- Contains some sort of conflicts
- Most traditional drama:
- reaching an Equilibrium of conflict.
- Camera technique and style.
- Shot Rever shot - important
- The camera is the fourth wall with in a scene,
- But in film the camera can be anywhere.
- 180 degree rule
- Camera should not cross a line, it will look jarring and change the continuty of subjects with in a scene.
- 45 Degree rule
- Cutting between camera if the angle is too small will not look like a natural cut.
- Example: Two different cuts, the angle between two shots is less that 45 Degree, it is noticible by the viewer and my lead to uncomfortable viewing.
- Cutting between camera if the angle is too small will not look like a natural cut.
- Blocking
- rehearsing the scene to understand the position of equipment, camera, lighting, etc. so there are no issues of day of filming.
- Moving of actors, position of movement, there are no accident.
- Original ideas on discussed and/ or paper do not always work in practice.
Actor
- Listen
- Be in the moment
- If u cant remember the line, there is pressure.
- U can do a lot of take of the same scene.
Focus Length
- Zoom lens is gradual change of focus length From giving a wide shot covering a lot of things.
- Most neutral 50mm lens such as the eye.
- Depth of Flight
Scene Analysis
Blade runner
- The camera constantly moving in. With each shot cut .
- Start with close up,
- moving usuing a Crane
- Misty background
- It is used to establishing the flight between the interviewee and interviewer
- Tense, sound played a role
- an Establishing shot to know the room is in the building.
- Camera zooms into the face of characters to show there change of emotion.
- Dutch angel - perspective not aligned.
Roles for the Project
- Actor PD
- Camera
- Actor/ Producer
- Camera man
- Criteria
Professional Roles and Tasks
-
Roles in Video Productions
-
Industry standard in film & TV is Avid - therefor it is good to have a basis.
-
Shooting Sage Main Roles
- Director
- Anything Creative
- Set/acting/look/sound
- Does not direct all member of crew on set.
- Producer
- Finish the shoot,
- all logistics,
- all organising,
- Responsible for the delivery of the product in spec and in time.
- They can over ride director as in charge of finances
- Director
-
DOP (director of photographer) / or simply Camera Operator
-
Sound Recorder
-
Slate or Clapper board is a way to keep sound and video synchronised.
-
On set there is a role called DIT (digital image Technician)
- What is given to post production people is correct and not cause problems
- At end go day, make arrive (Exact Copy) Making rushes. Considered archives when it exist on two different devices, kept in different location for safety.
- Harddrive is only for archive - No other data include with the rushes.
- At end go day, make arrive (Exact Copy) Making rushes. Considered archives when it exist on two different devices, kept in different location for safety.
- What is given to post production people is correct and not cause problems
-
POST Productions Roles:
- Editor
- Small production they do all, but if larger there, they do the creative decisions. They my not log the material. Such as Assistant Editor.
- Logging
- Sound mix
- DIT Role
- Grading
- Small production they do all, but if larger there, they do the creative decisions. They my not log the material. Such as Assistant Editor.
- Editor
-
Creative Decisions - Producer has final say, but can be director cut. WHen there is a difference.
-
DIT Role of archiving,
- how to properly copy and archive data video files.
- By copying everything in the root location go the memory card and dragging all contents into new folder in each different location.
- Location depend on industry - Can be used on a server
- For CMP to use server to rushes archive - need 2 week advance to Ed - Course intern.
- Benefit of server cant loose data and usual in a fire proof room. For high importance, this is more safer option.
- For CMP to use server to rushes archive - need 2 week advance to Ed - Course intern.
- Location depend on industry - Can be used on a server
- By copying everything in the root location go the memory card and dragging all contents into new folder in each different location.
- how to properly copy and archive data video files.
Adobe Software - Premiere
- Adobe only links to files location -
- So when moving it losses the links. So important for location area.
- Originally not for broadcast, mainly multimedia.
- Doesn’t do actual management of files
- Media encoder might open. So not the best fort workflow management,
- Adobe Application Prelude is used to to ingest video material with more Options and easier way.
- In Prelude easier to log and create subclass such as FCPX
- Doesn’t do actual management of files
Final Cut Pro X
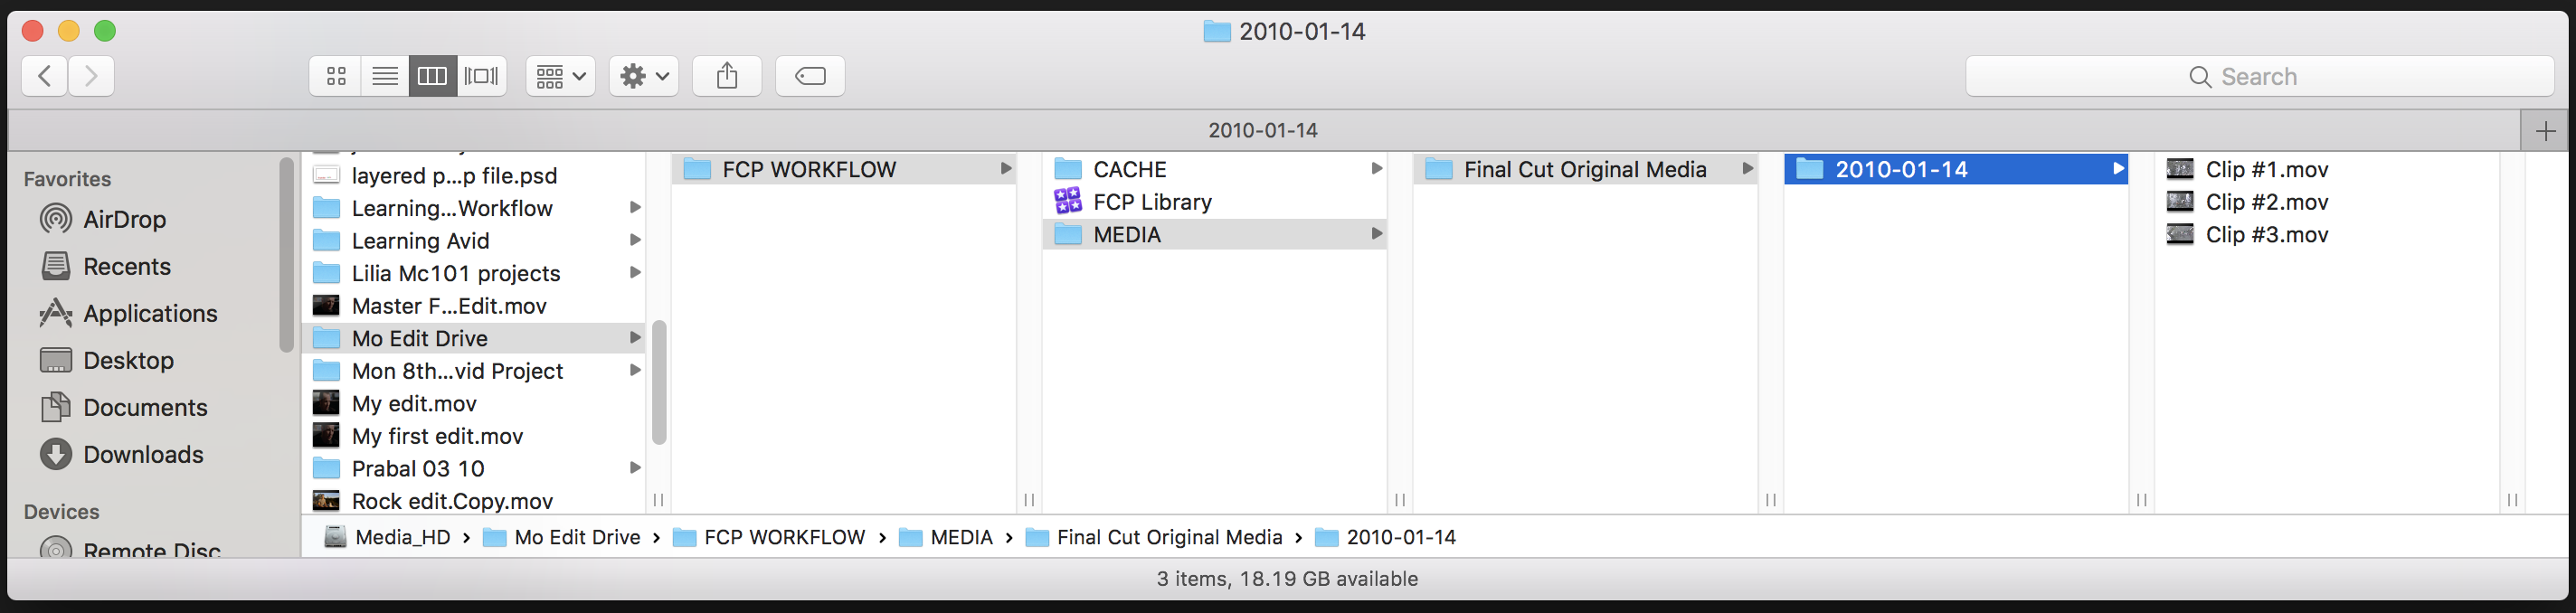
Preferred Method for creating a new project project. so there are not issues or loss of work and no loss of time during post-production. Create a correct folder as below on a Media Harddrive, the project should not be on the same Harddrive as the computer. The Harddrive should be fast enough for the media to play back in real time for smoother editing.
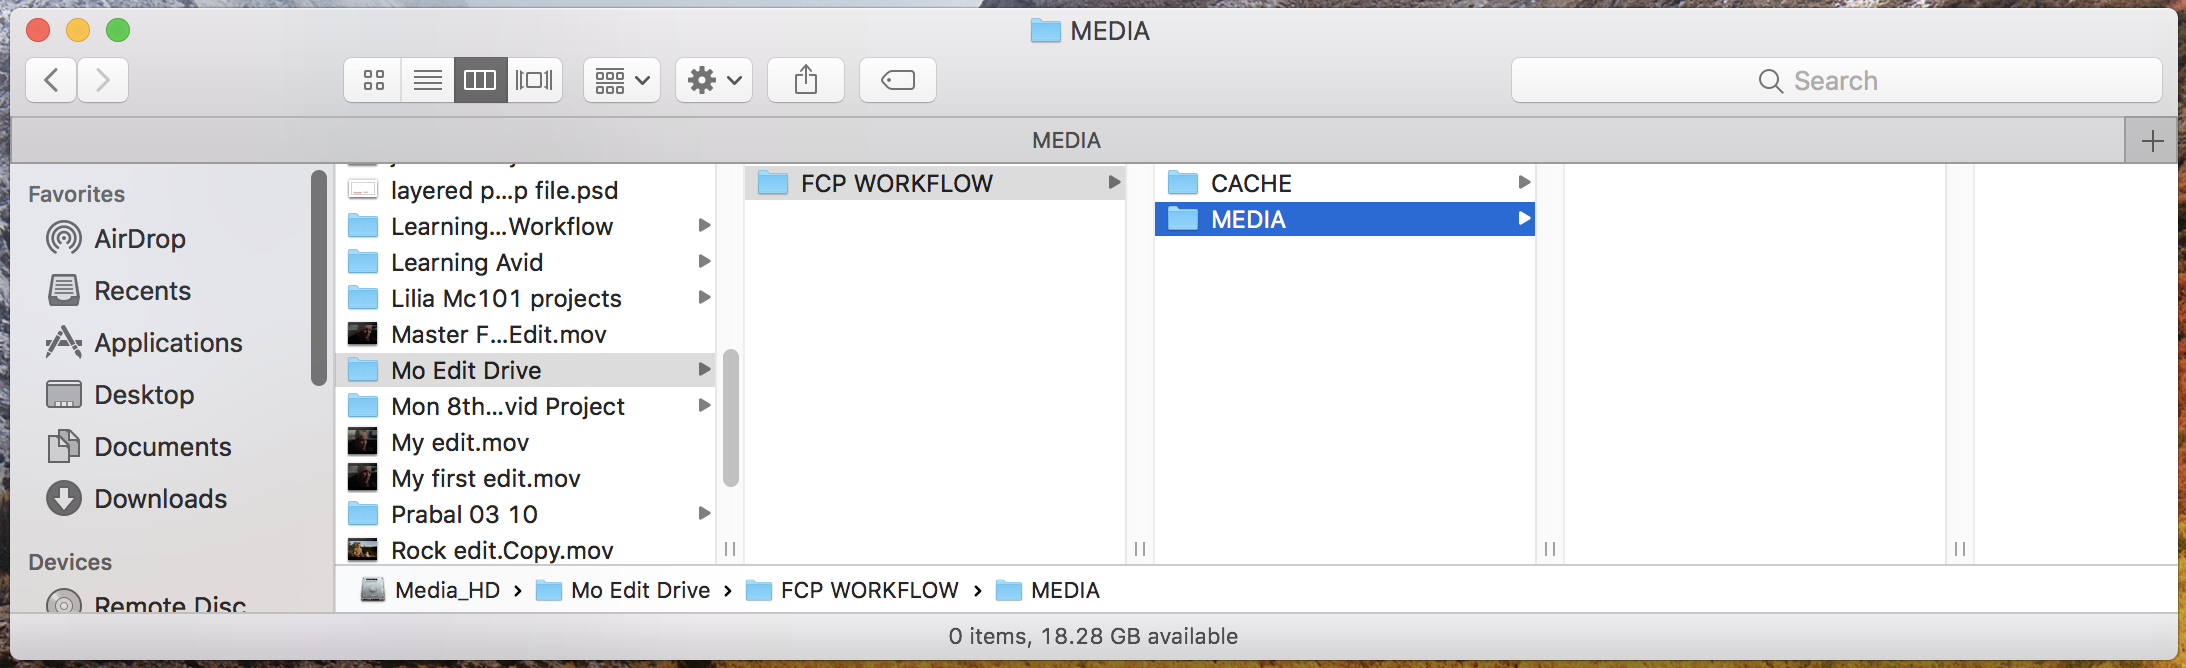
Create a new Project and save into the preferred location.
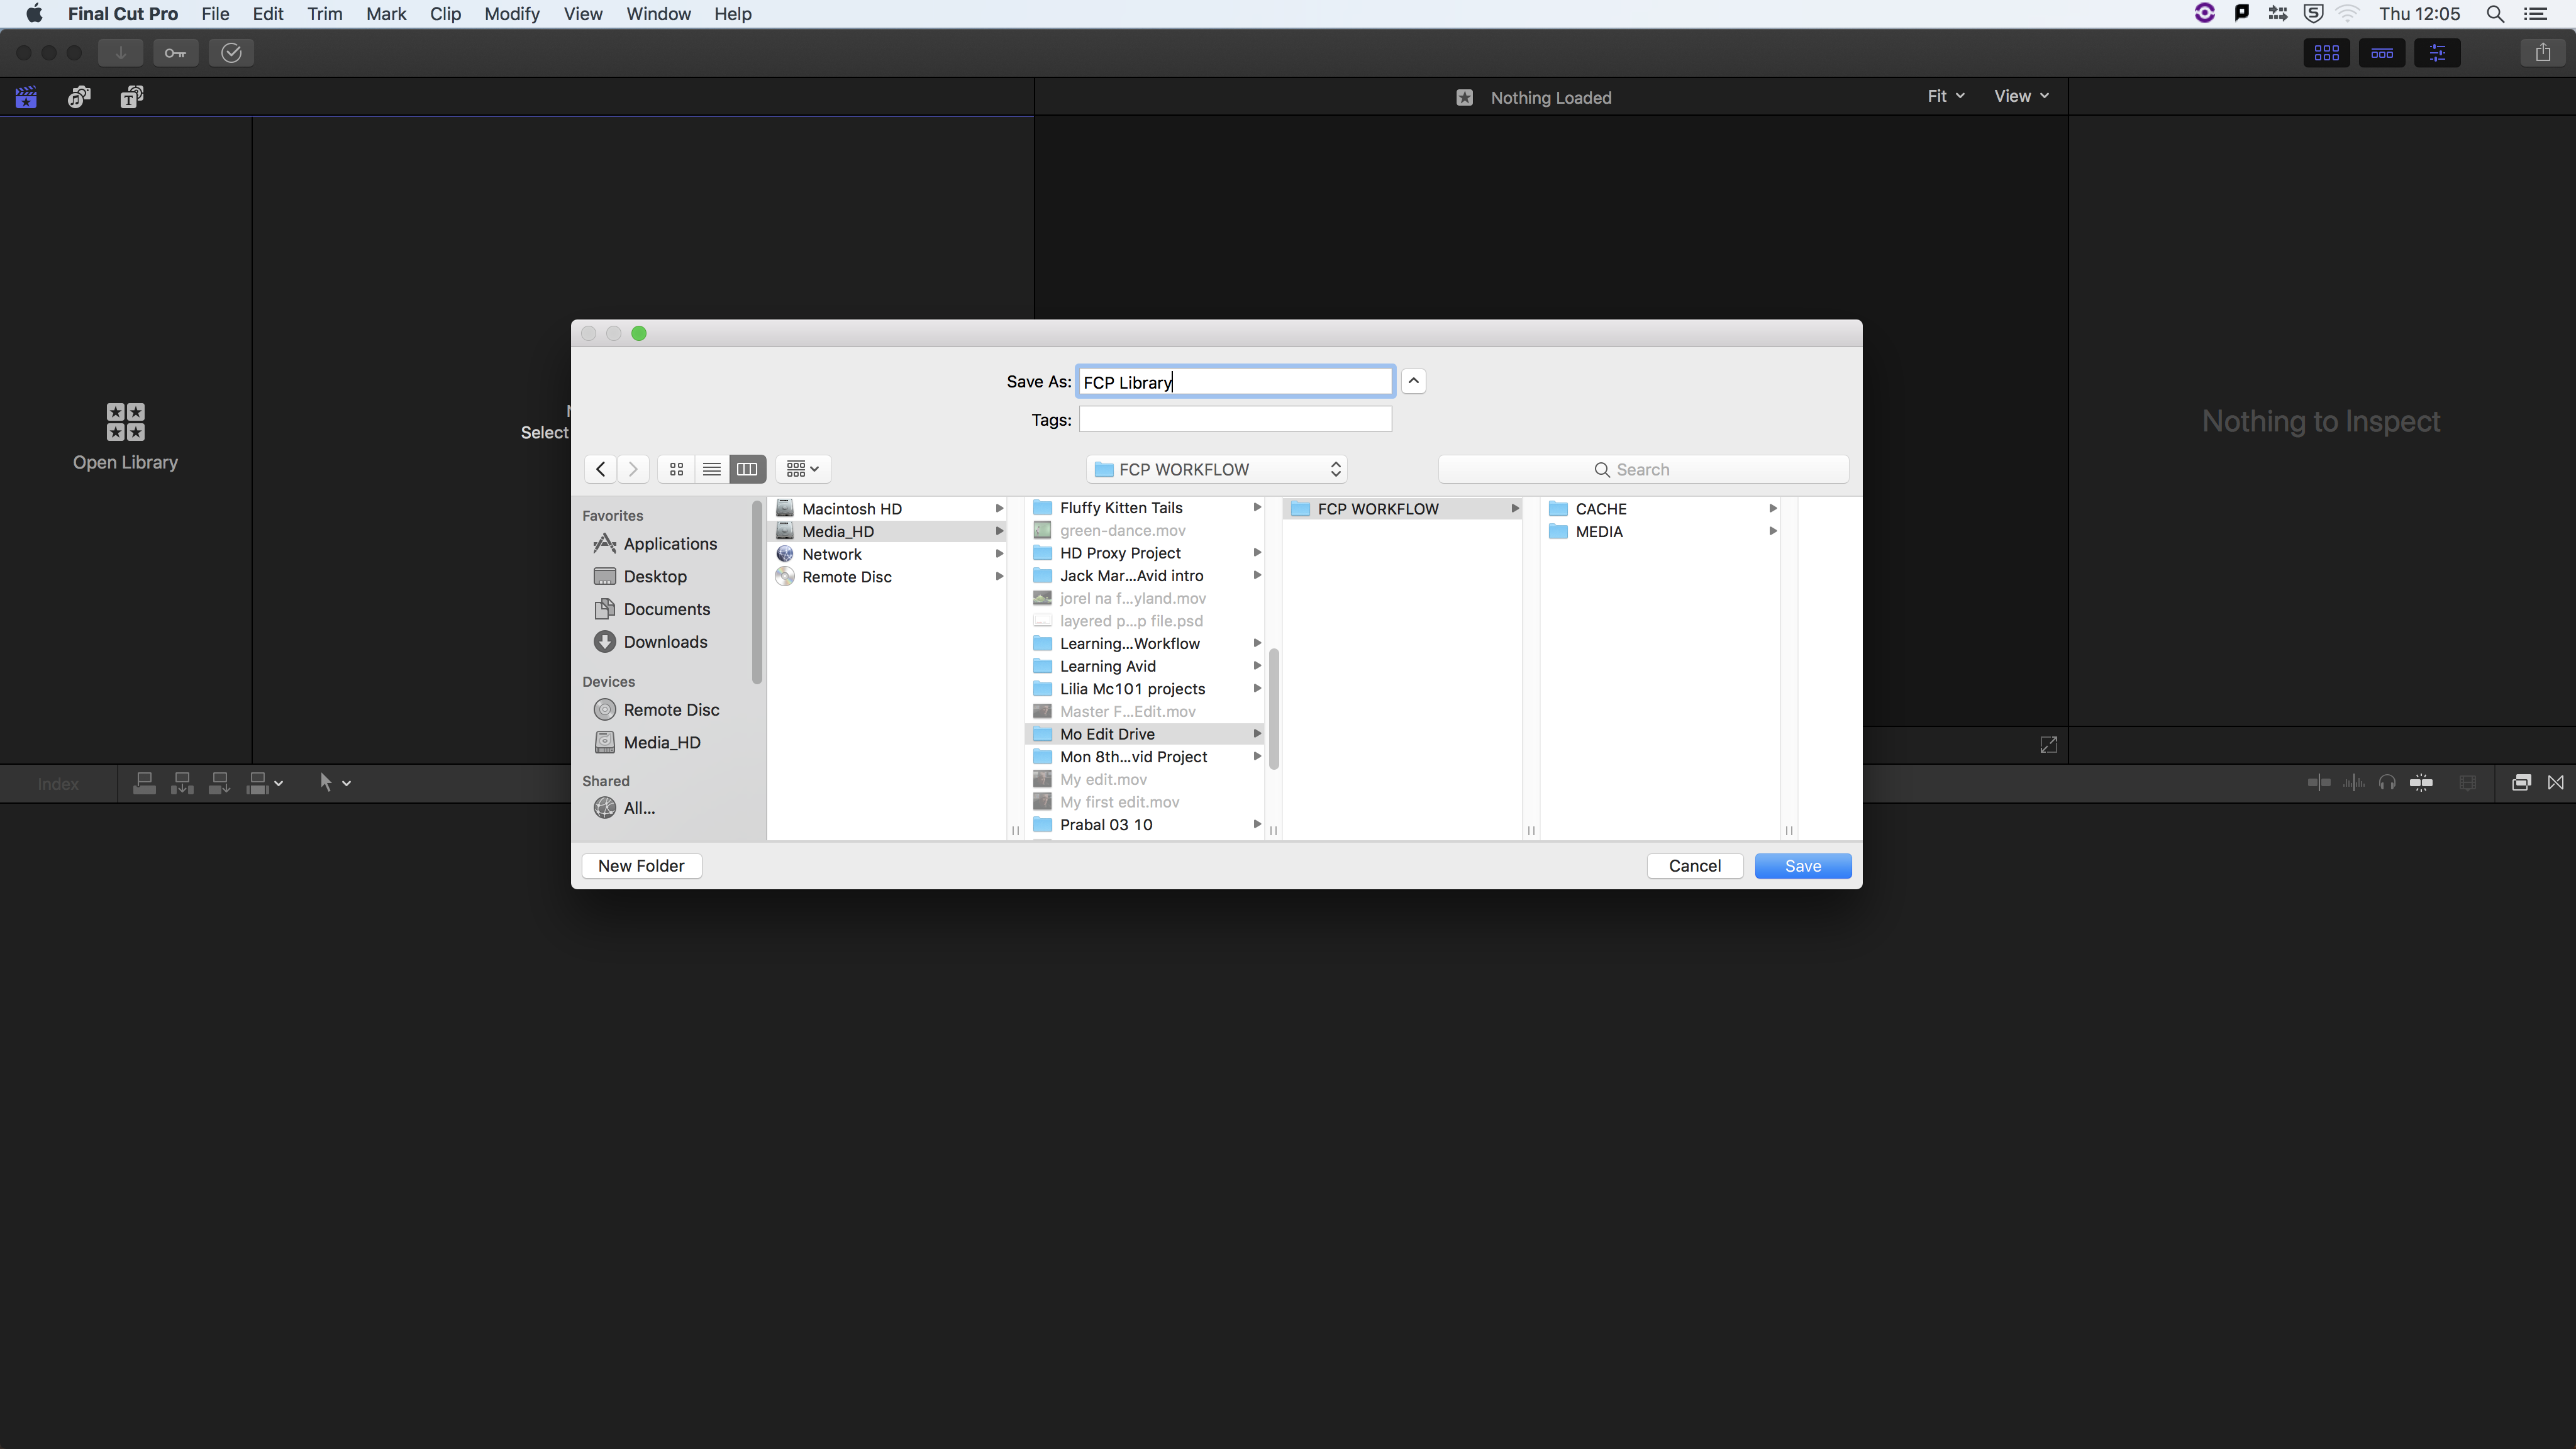
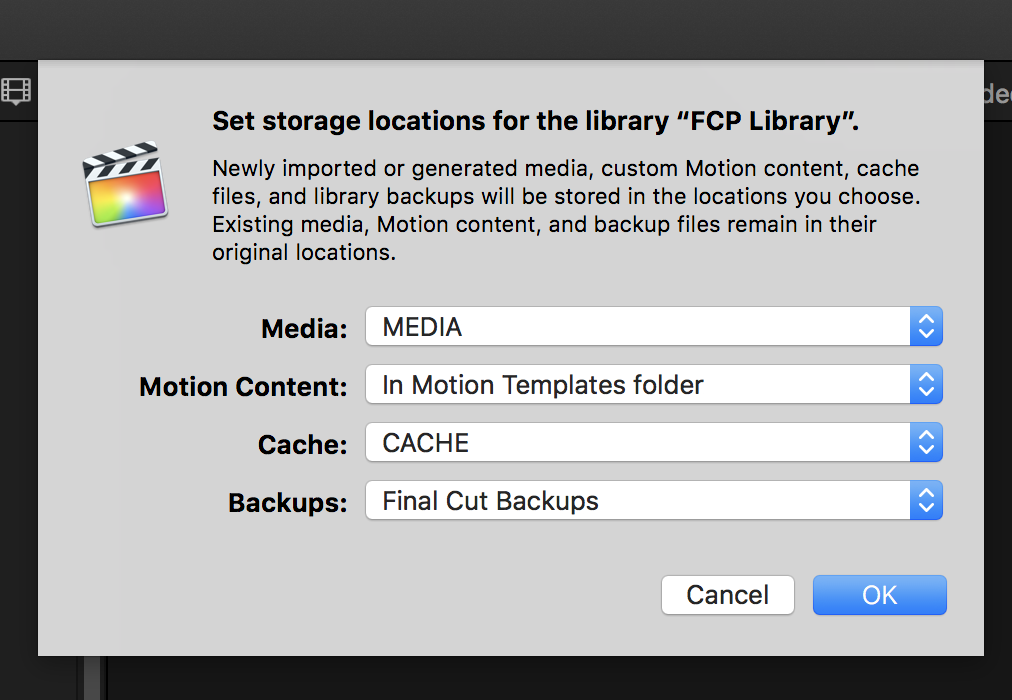
Change media and cache folder location from the Library properties window to the new folders set up.
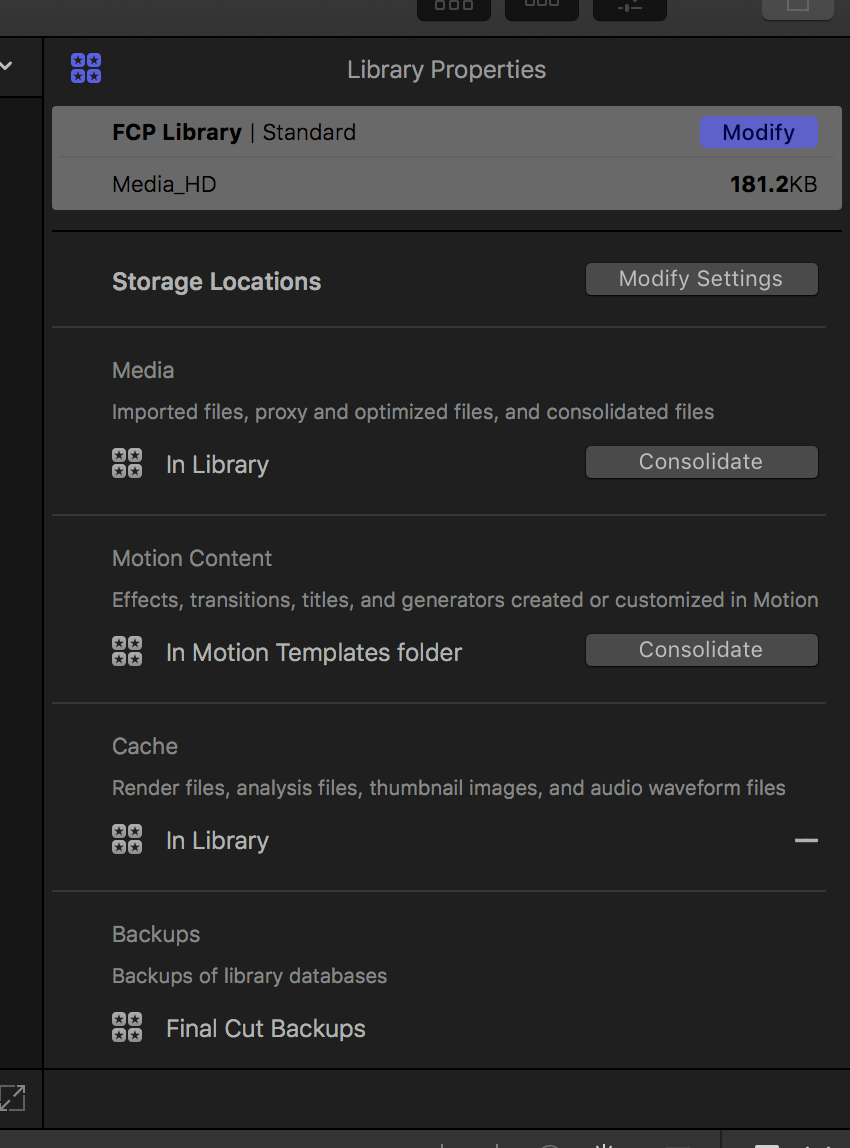
This will help to reduce the size of the FCPX project folder. Keeping media and other files and data organised.
After evething is setup with the Project. It is time to ingest. When inserting a Camera card it is optimal to create a back up. Usuing FCPX there is an option to create a camera archive. This will create a 1 to 1 clone of the camera card that can be accessed anytime.
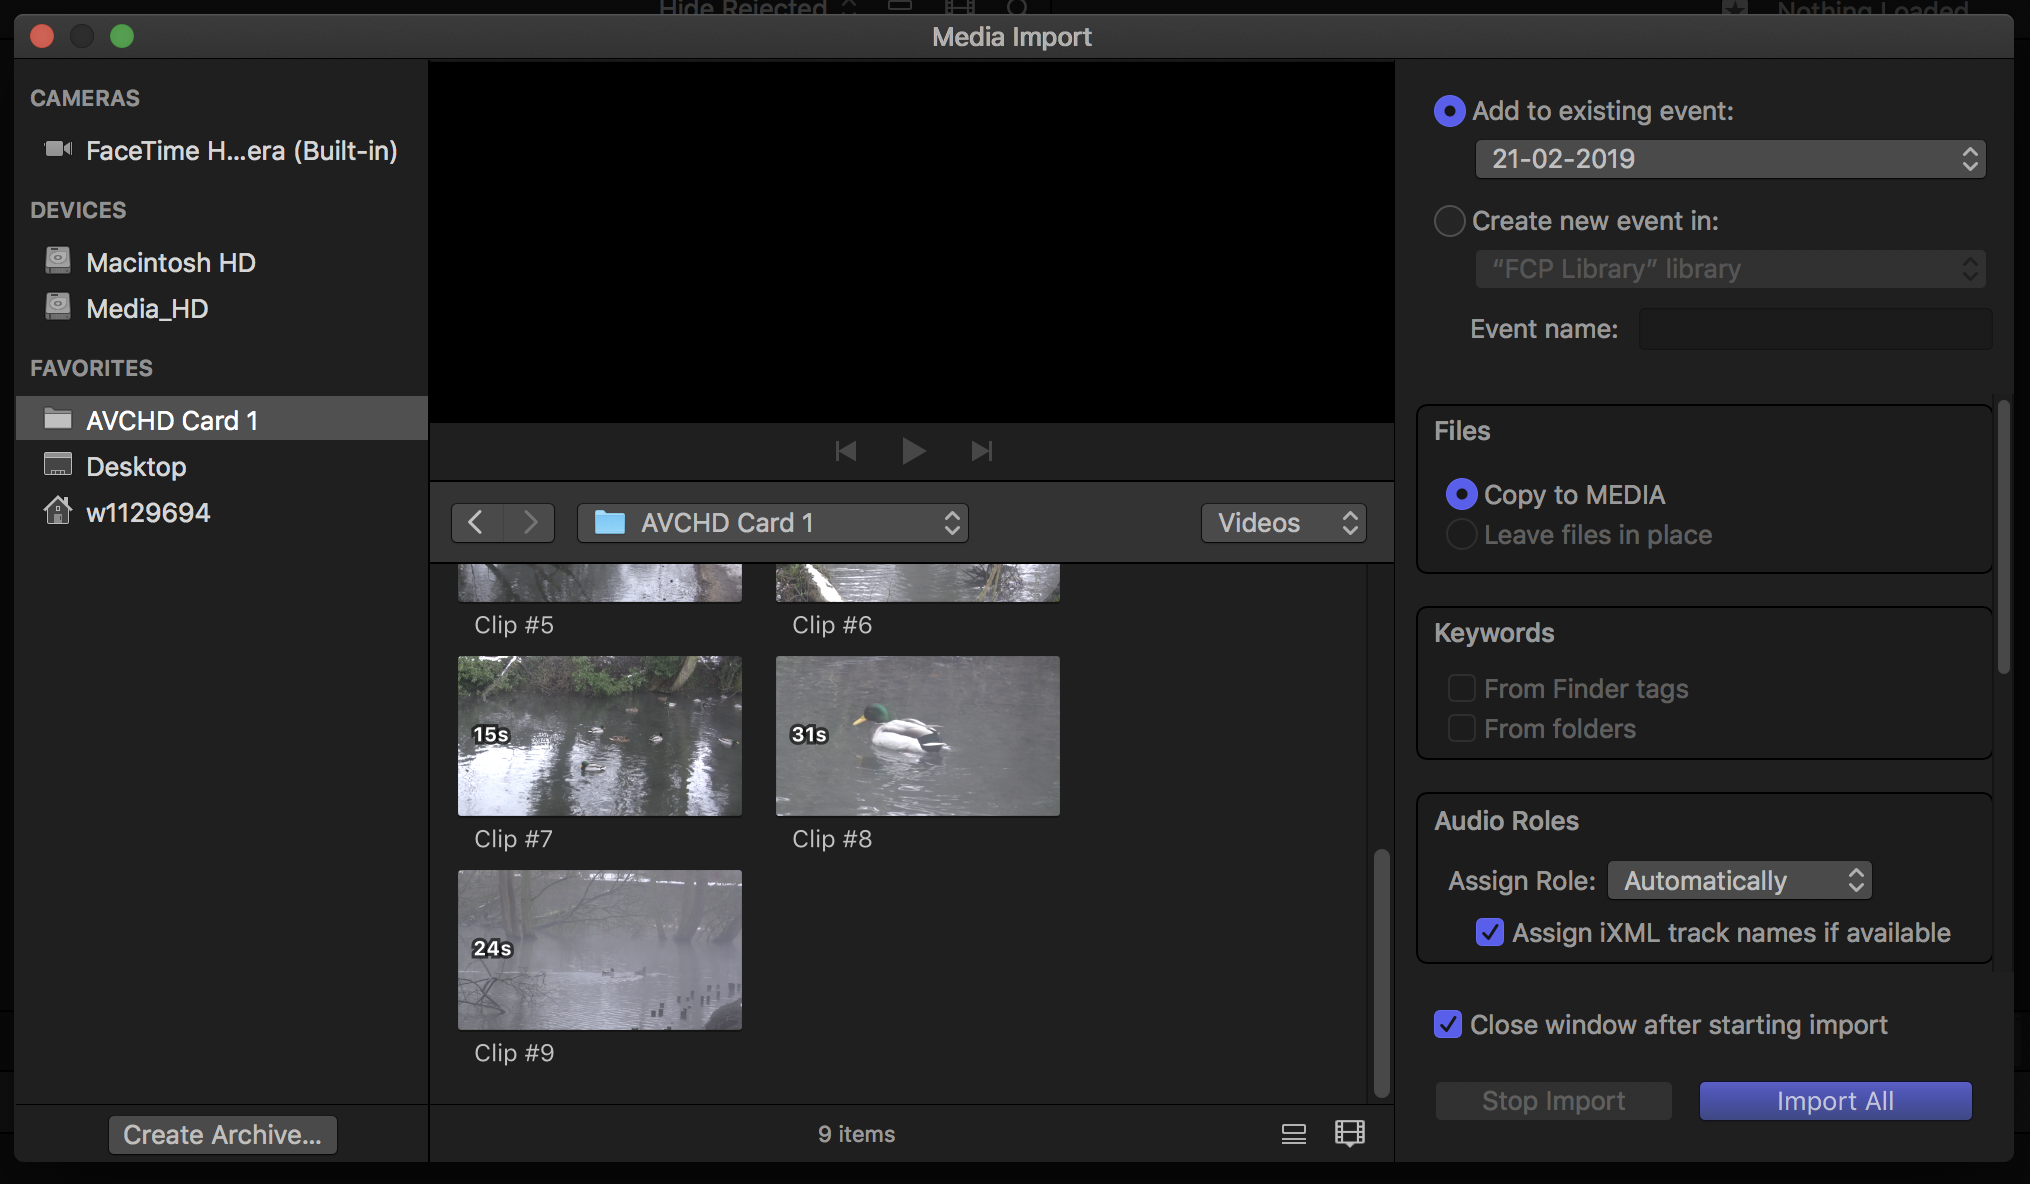
When the project is set up correctly FCPX organises the files automatically but there are easy to follow and understand where they are being placed.
Editing can start knowing that all the perfered procidures have been followed.
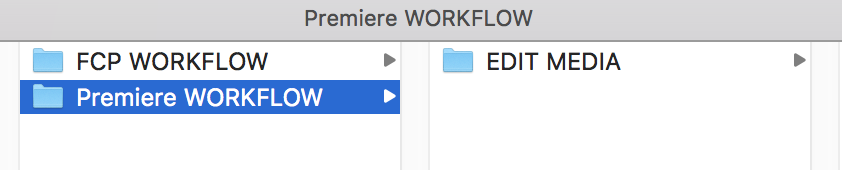
Adobe Premiere Pro
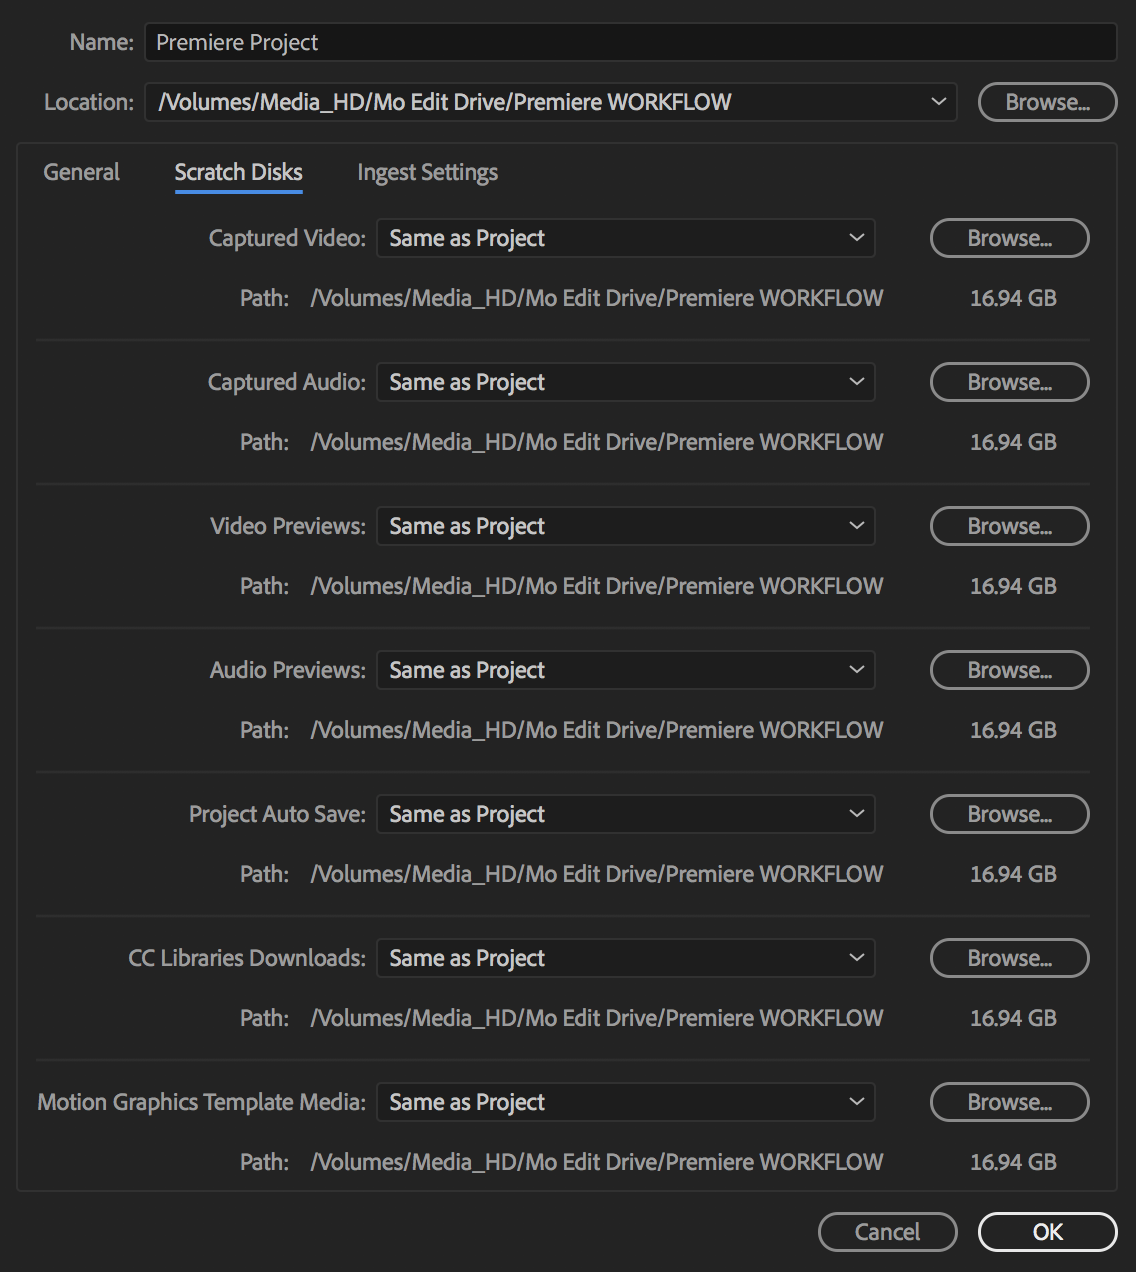
Perferred methos for setting up a project. Start by creating project and media folders on a fast harddrive.
Adobe has more setting for saving different types of media. If larger projects or slower hard drive media can be places in different Harddrives to speed up the programme.
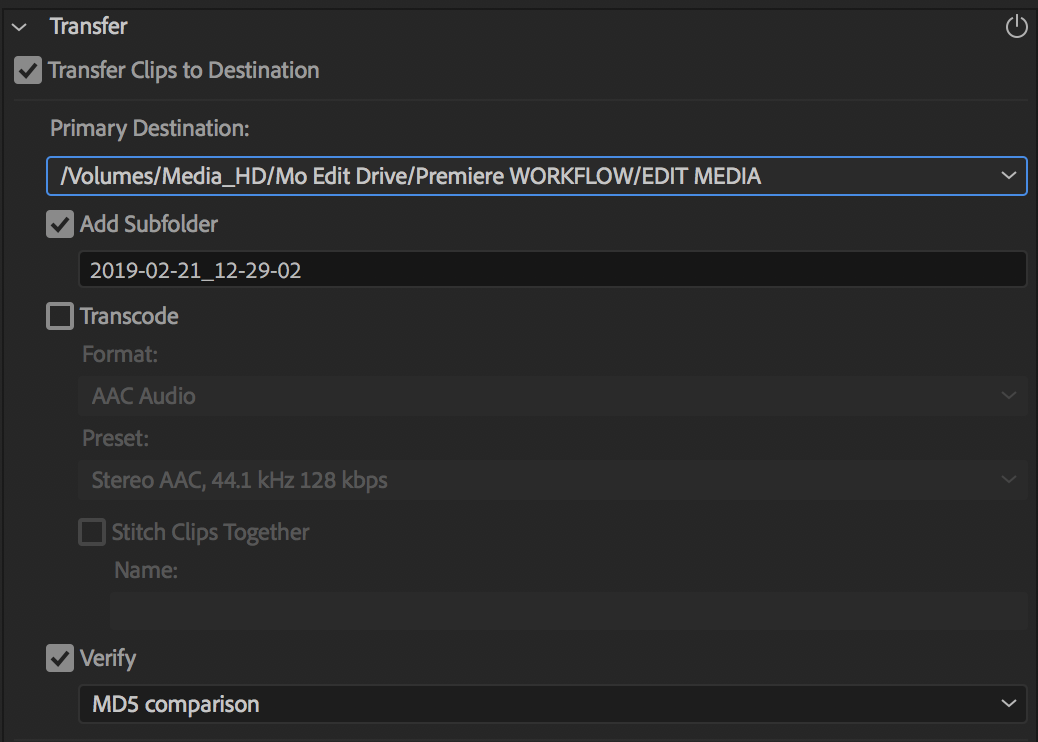
Unlike FCPX premiere has a stand alone programe that is used to ingesting material in the correct manner. Importing directly to premiere mat cause issues later in the edit. Usuing Prelude to ingest material is the Perffered method.
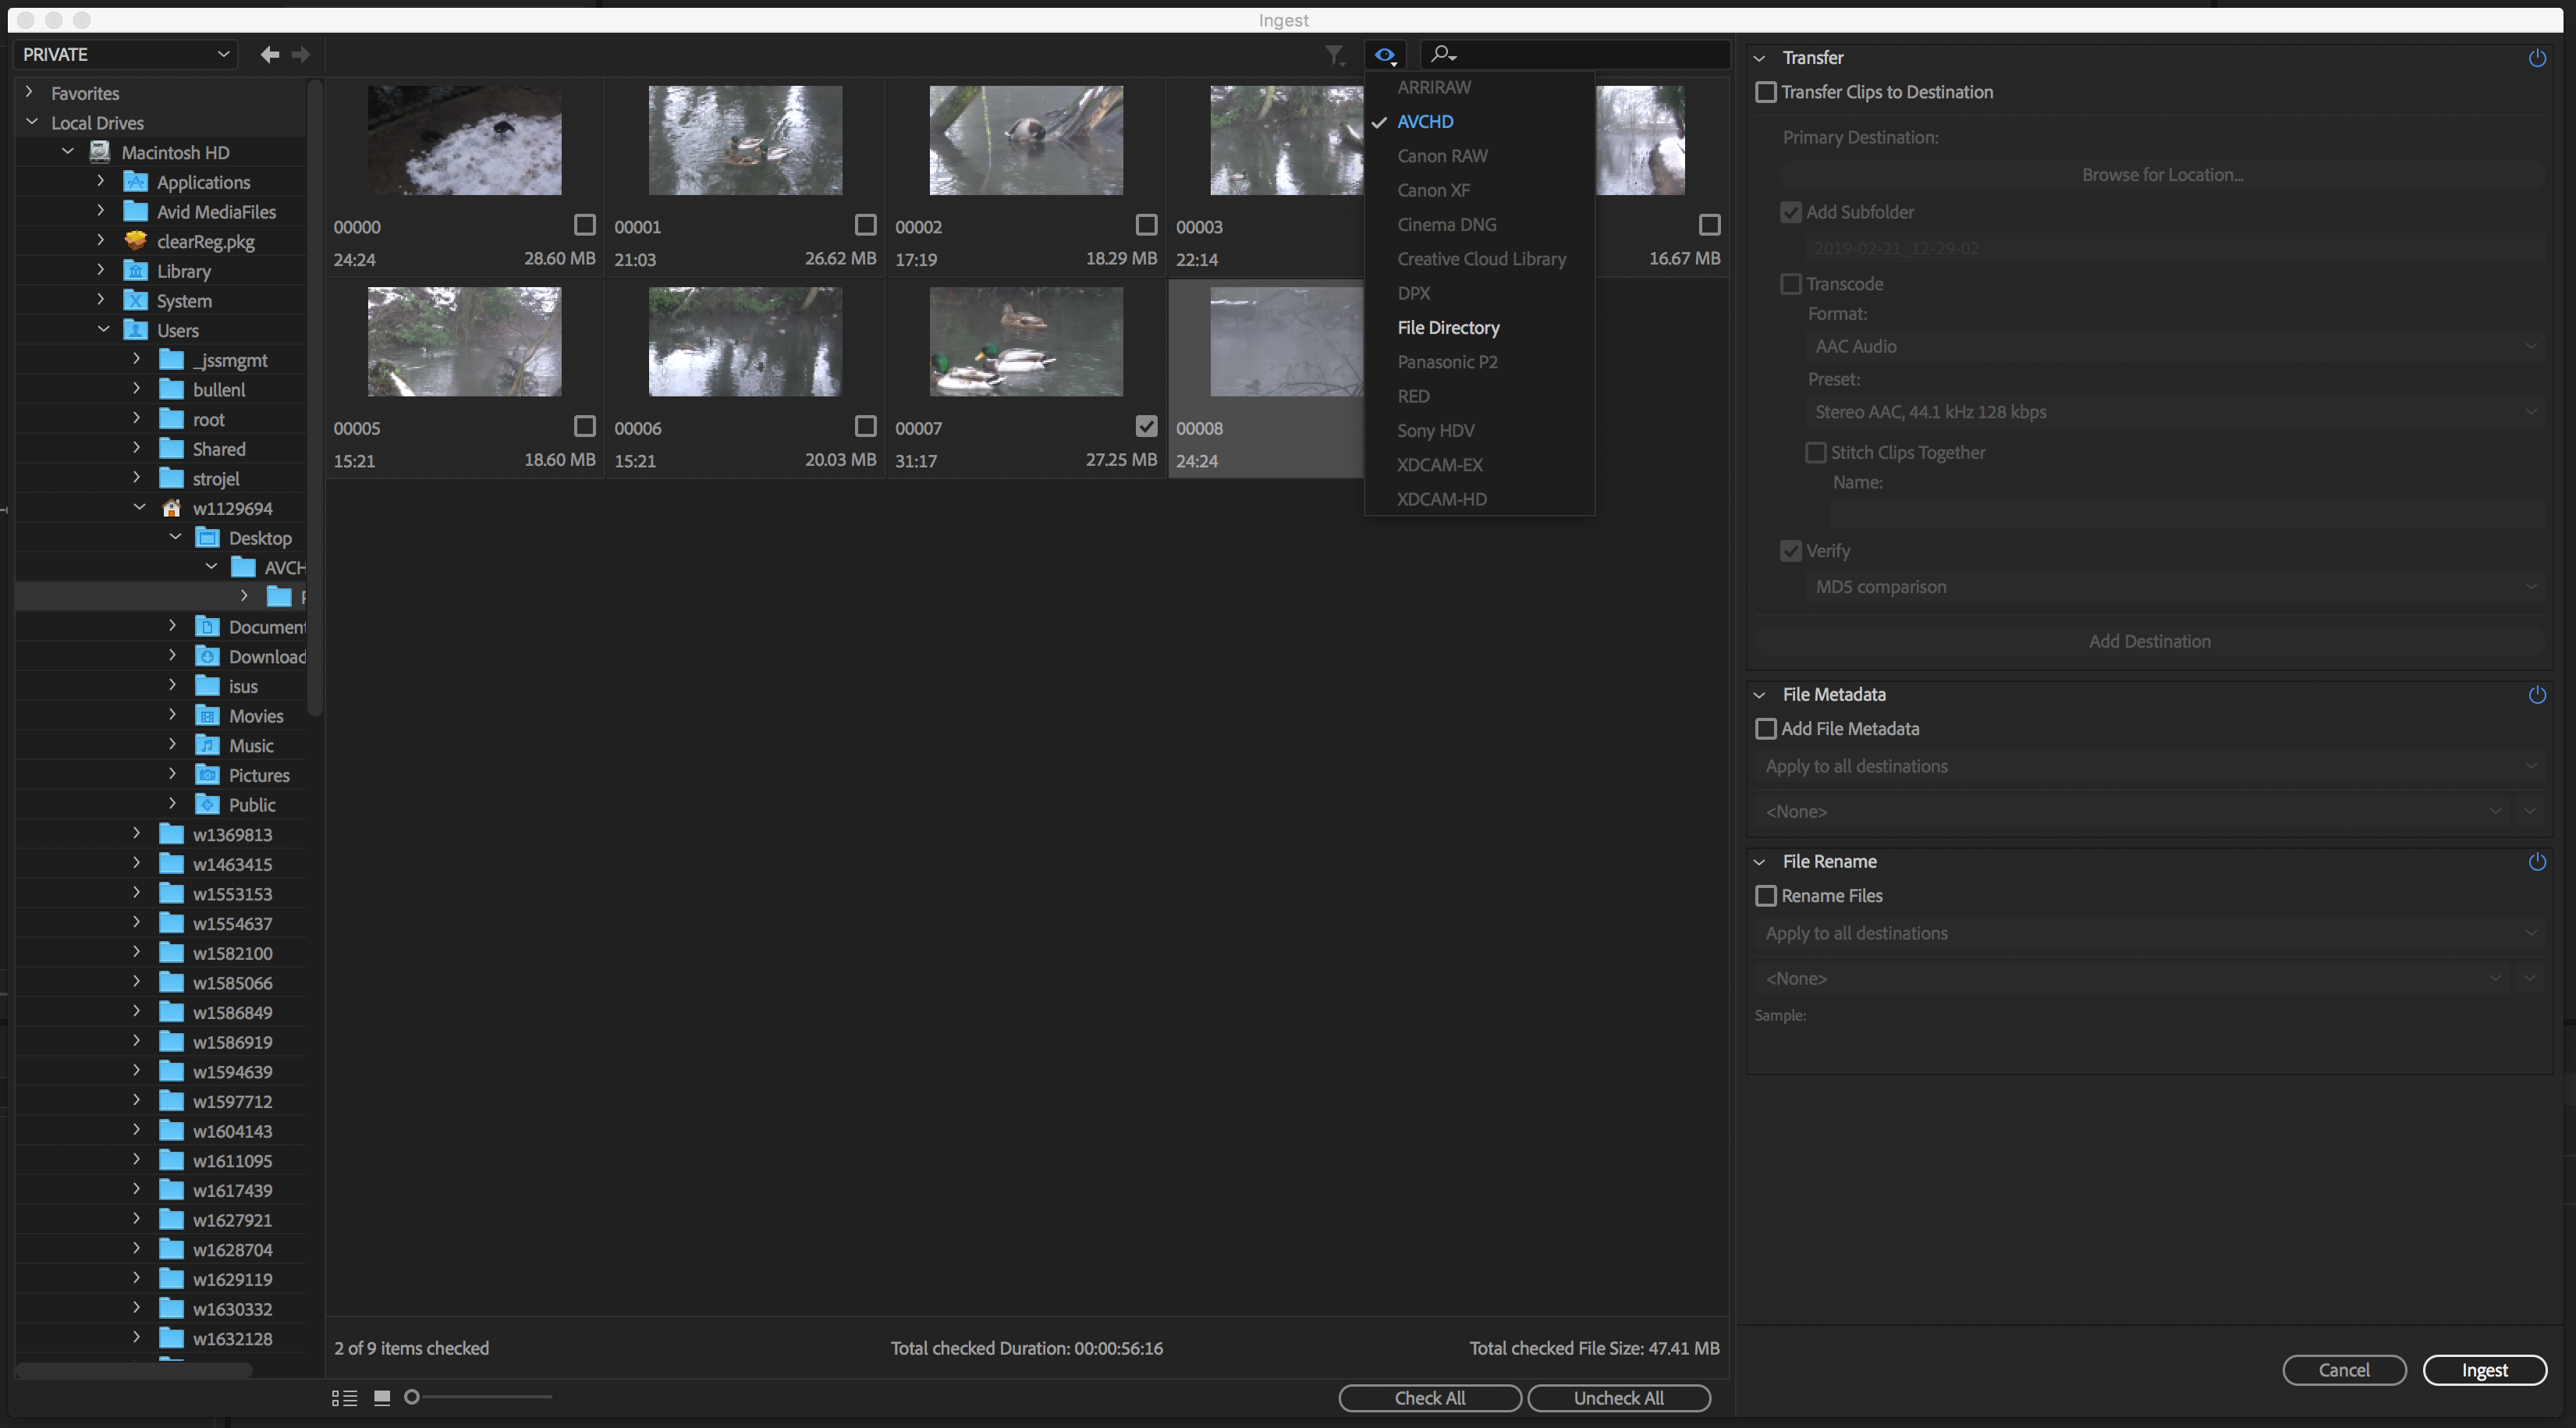
From within prelude it can autmaticlly transcode of nesccary and place the media into the choose Premiere project folder.
With in prelude, such as FCPX import window you may start marking and choosing the media.
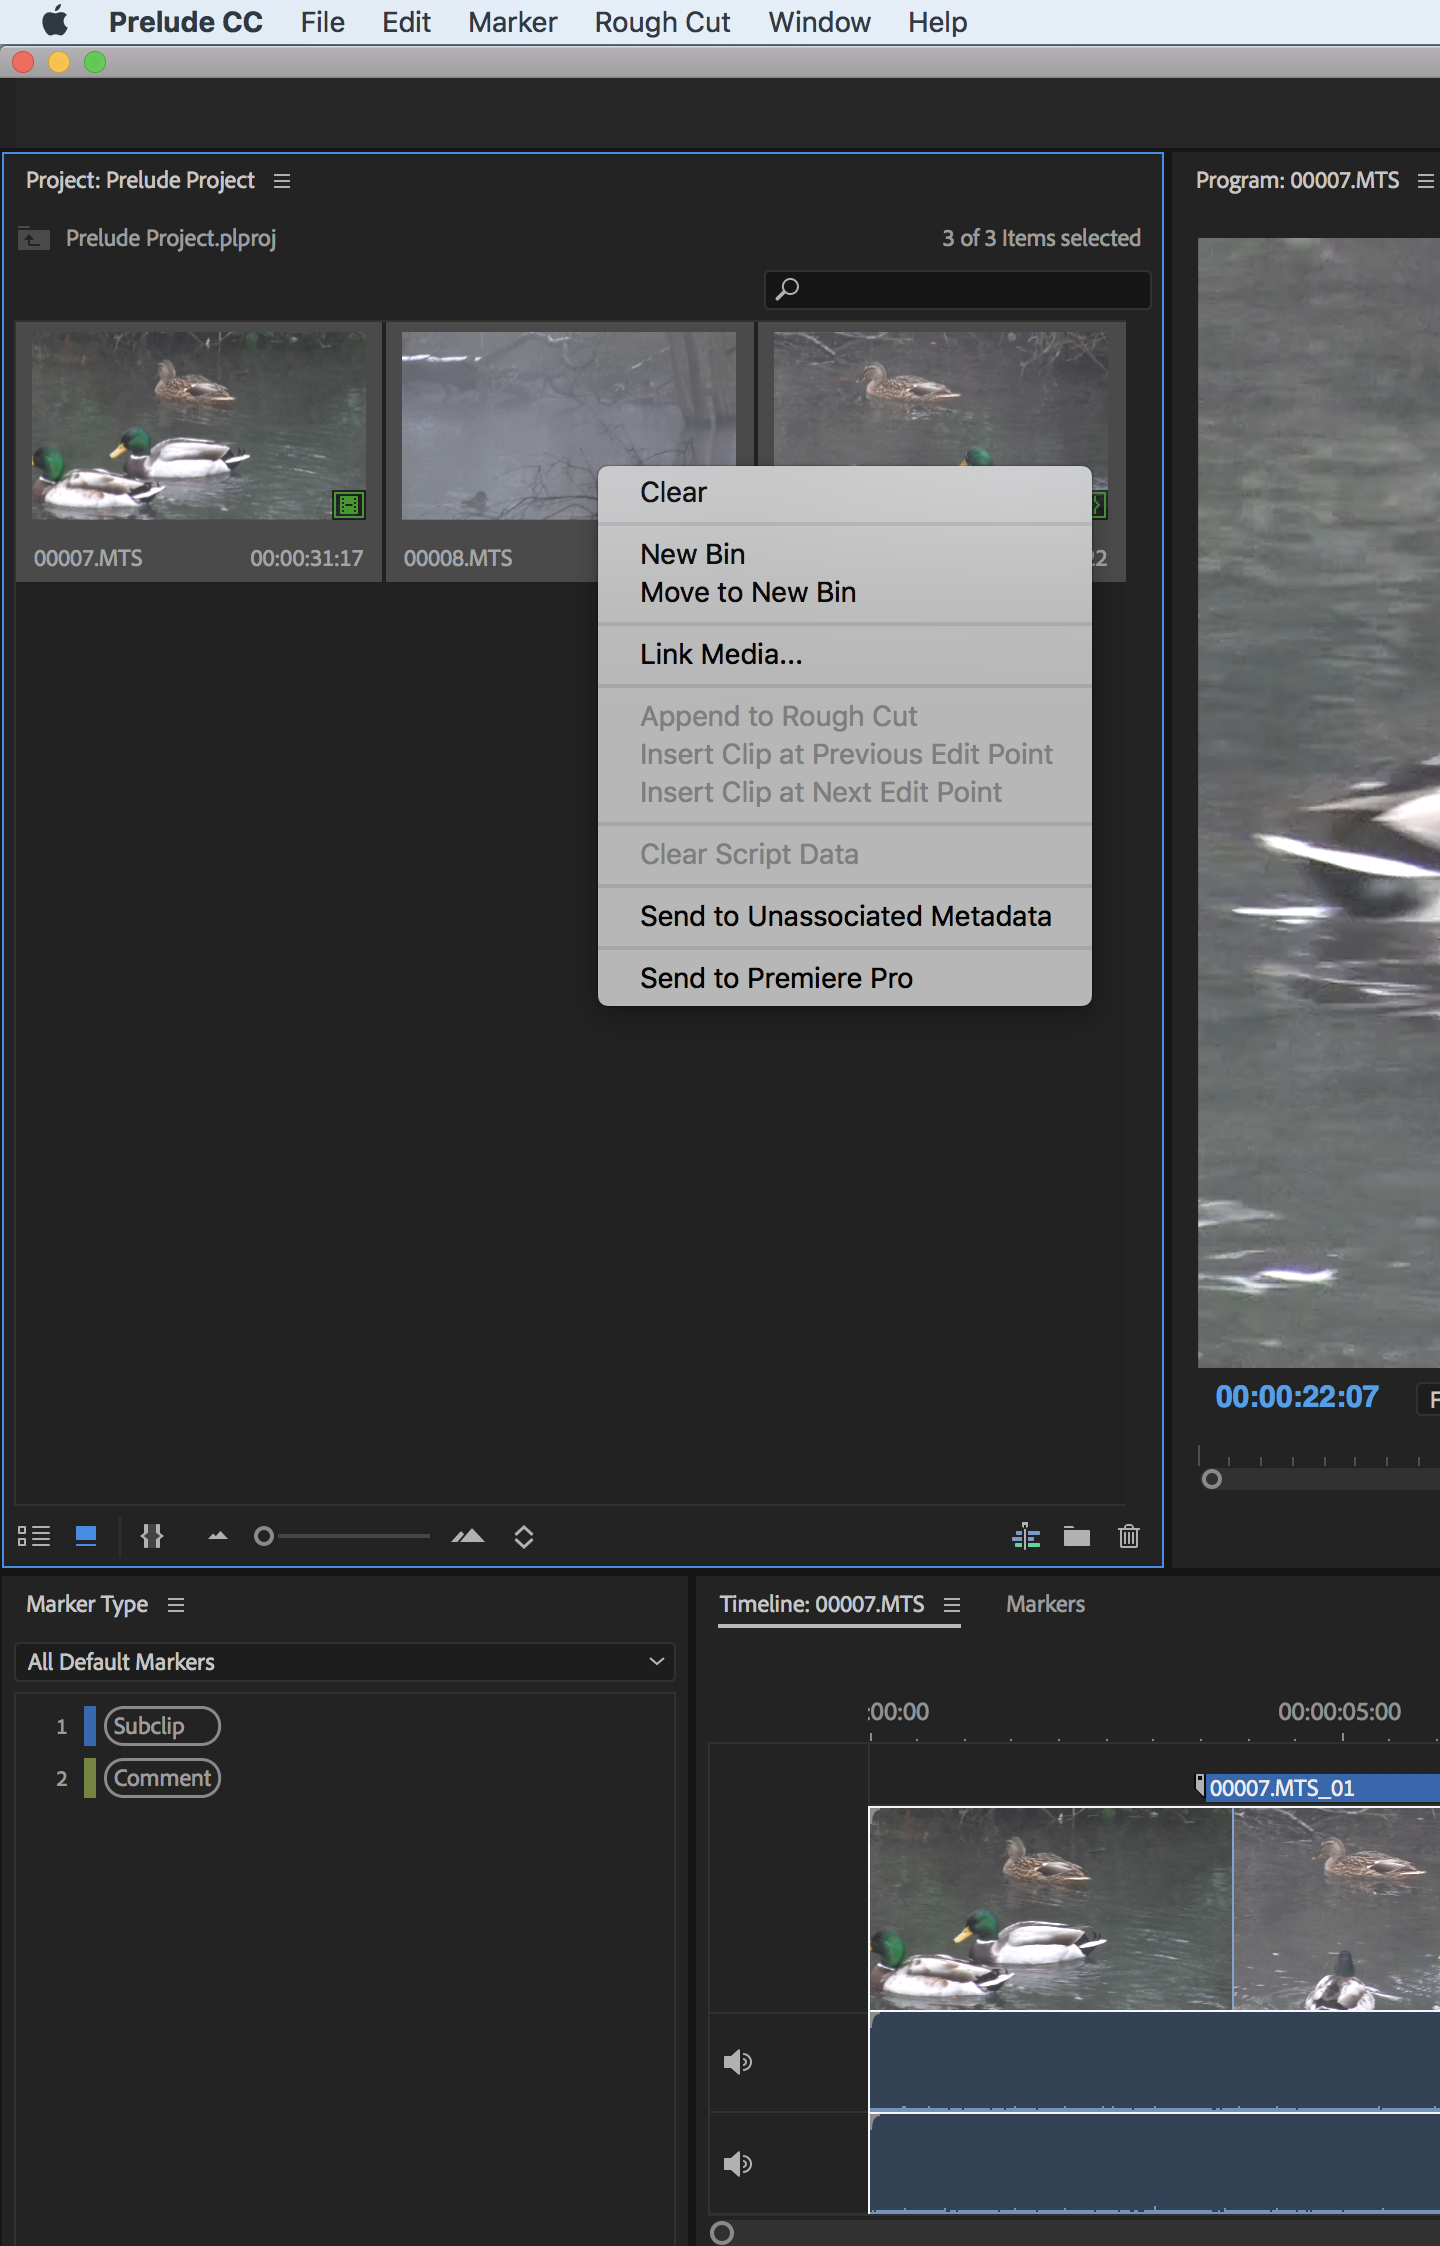
Image Experimentation within FCPX
Here is an example of placing 4 videos, and manipulating the size and orintation.
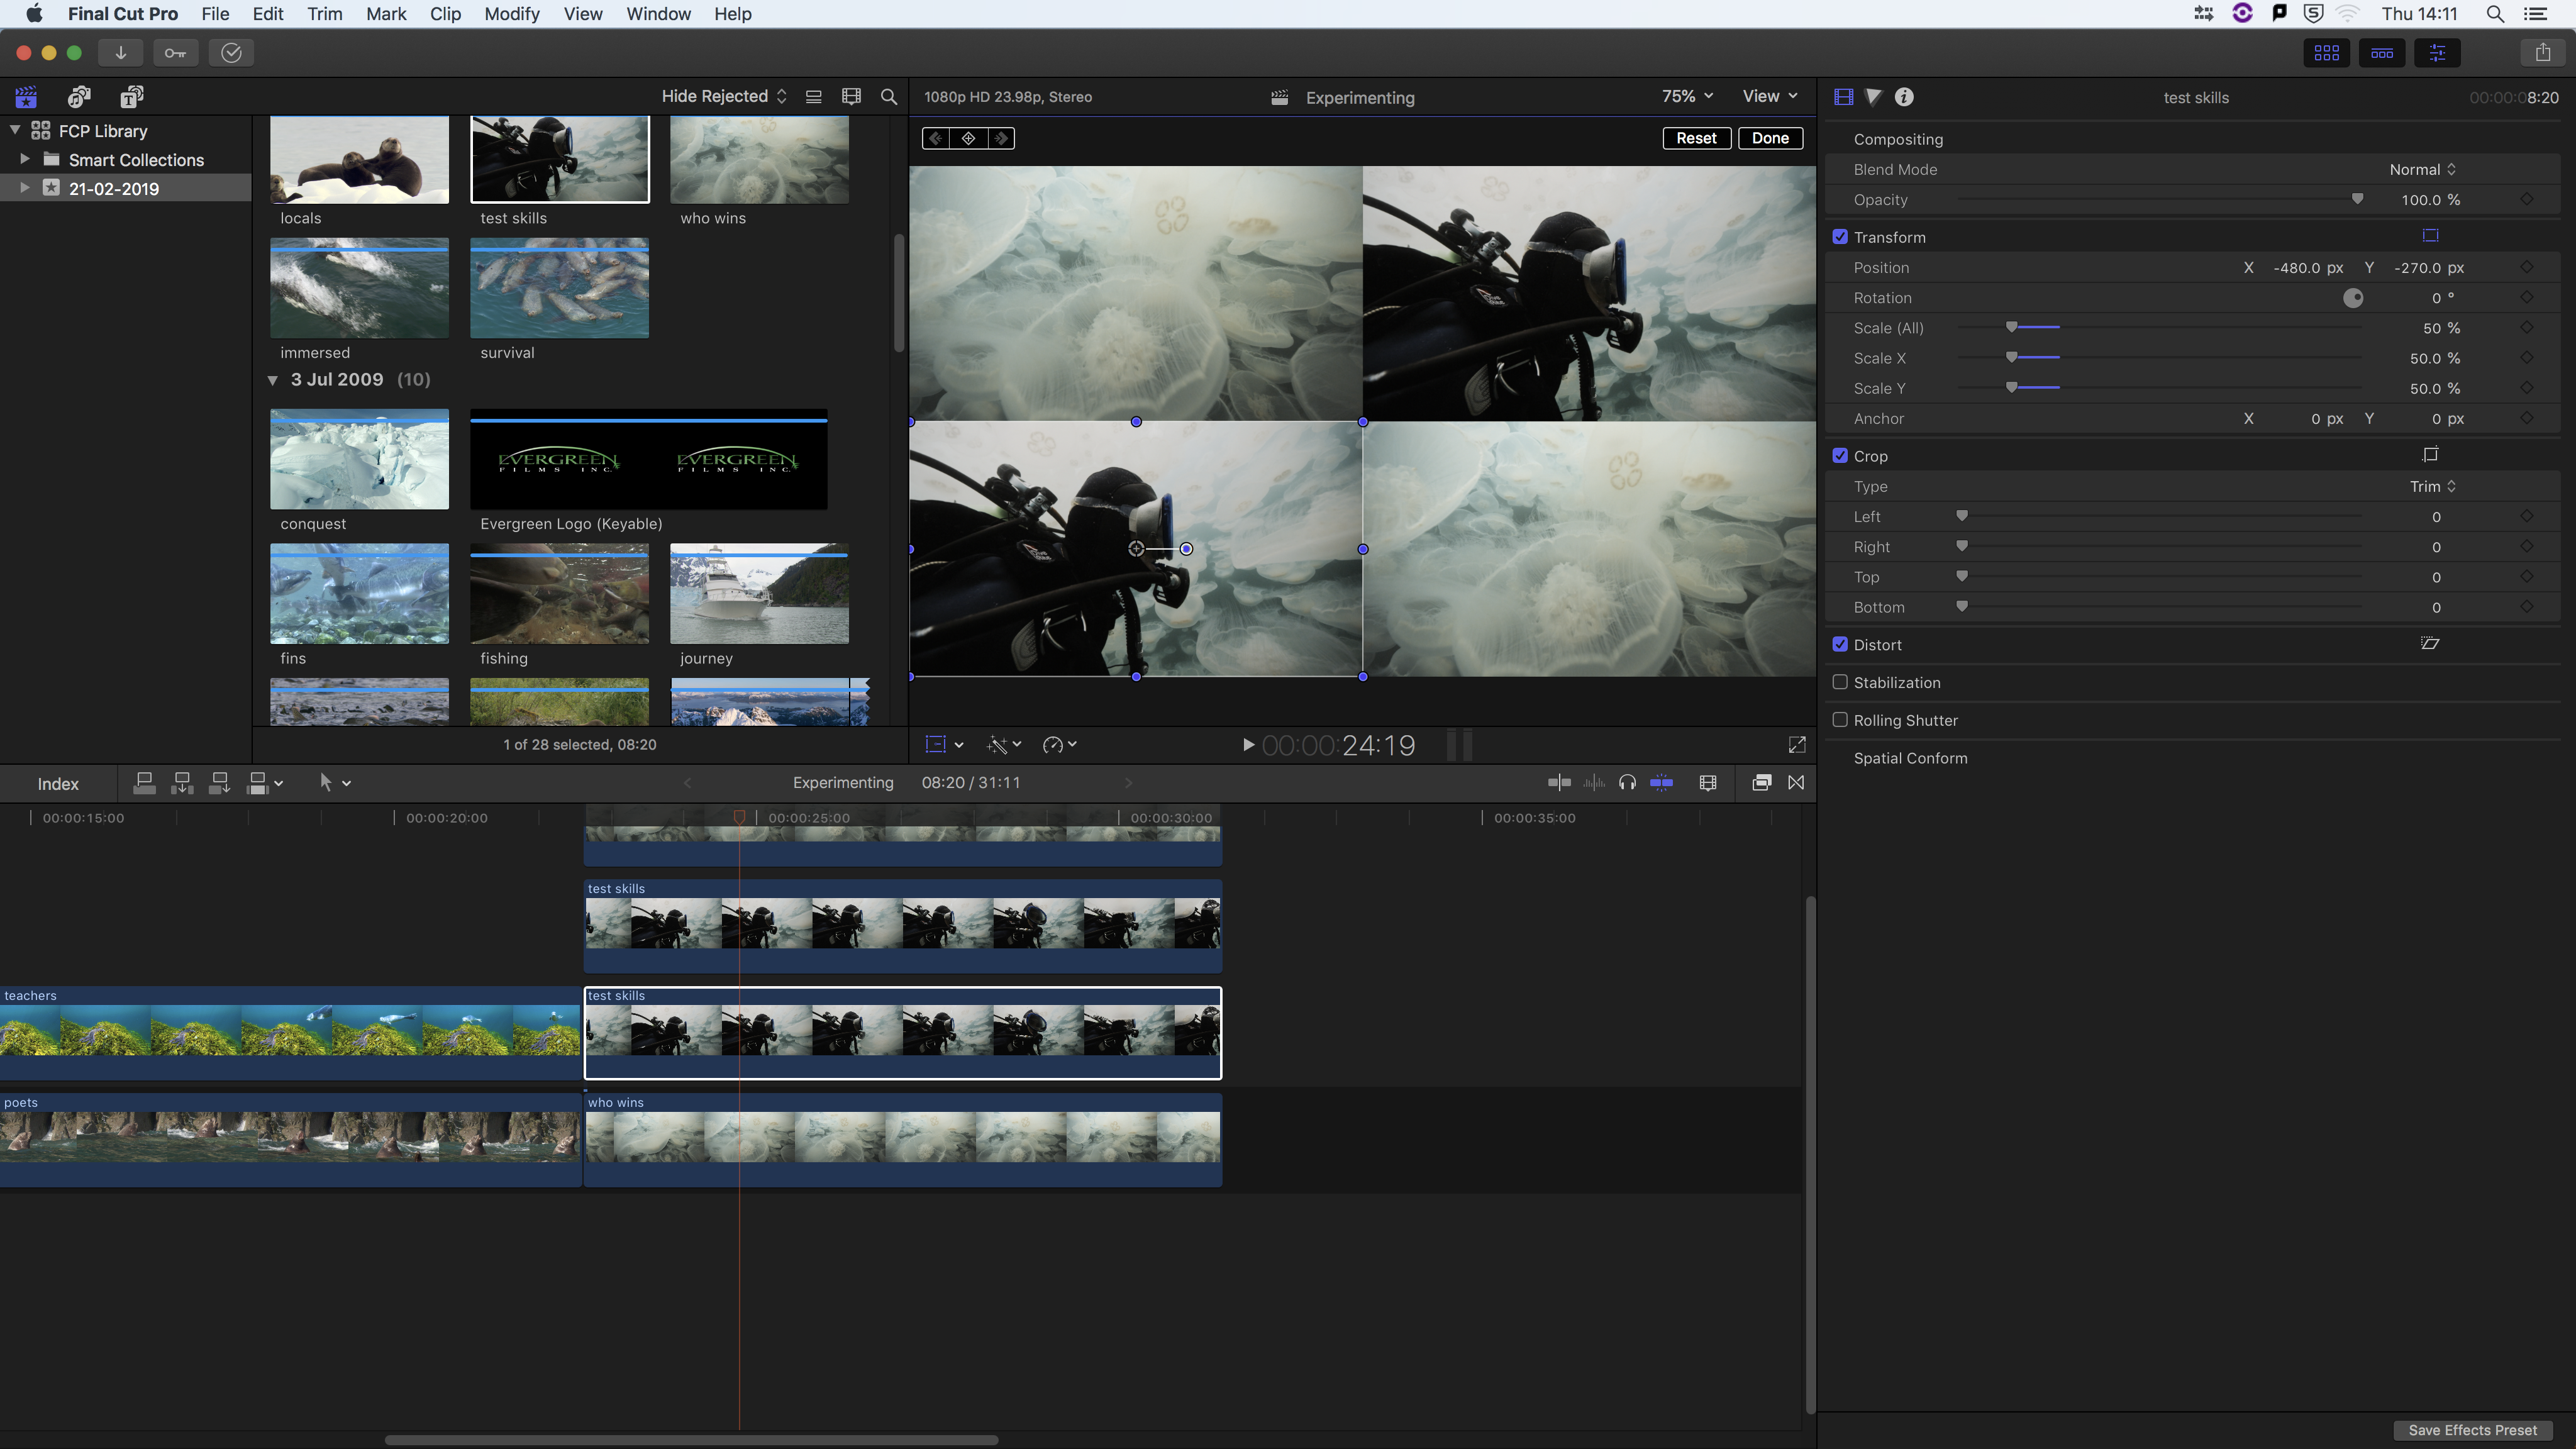
Properties can be changes from the inspector window,
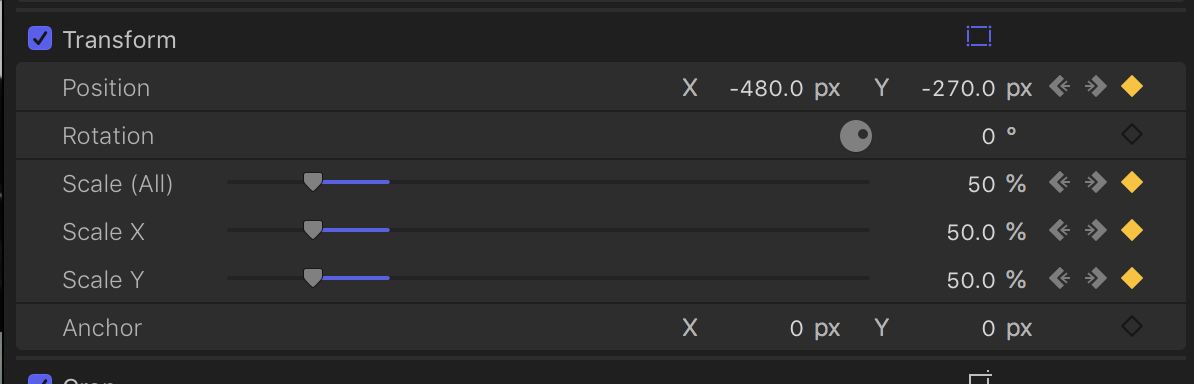
Keyframes can be added to manipulate paramiters over times animating the video.
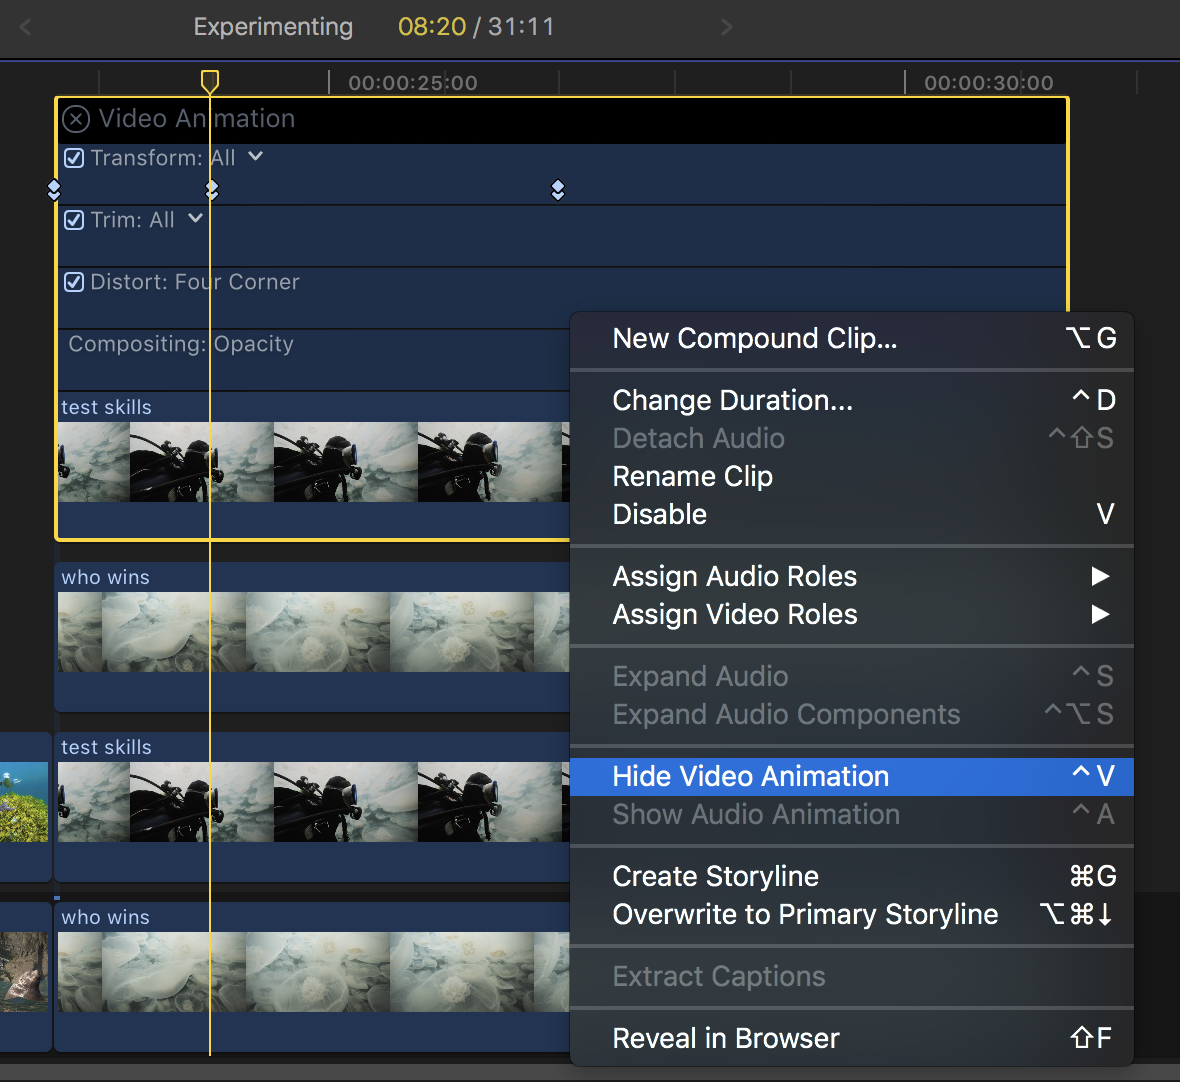
Changing a effect animation to be more smoother can be accessed from right-clicking the keyframe:

Changing the speed of a clip, FCPX give esear manipulation usually in real time blackback.